
First, apologies to Eminem for hijacking your lyrics. But I’m so excited, and I just can’t hide it. I got my machine back from the spa yesterday. We had some bonding time. Thank you for respecting our privacy.

First, apologies to Eminem for hijacking your lyrics. But I’m so excited, and I just can’t hide it. I got my machine back from the spa yesterday. We had some bonding time. Thank you for respecting our privacy.
I am sick and tired of organizing. Oh, I’m not done yet, just tired of it. And my machine is still at the spa. I couldn’t stand it any longer. I cut out some fabric.
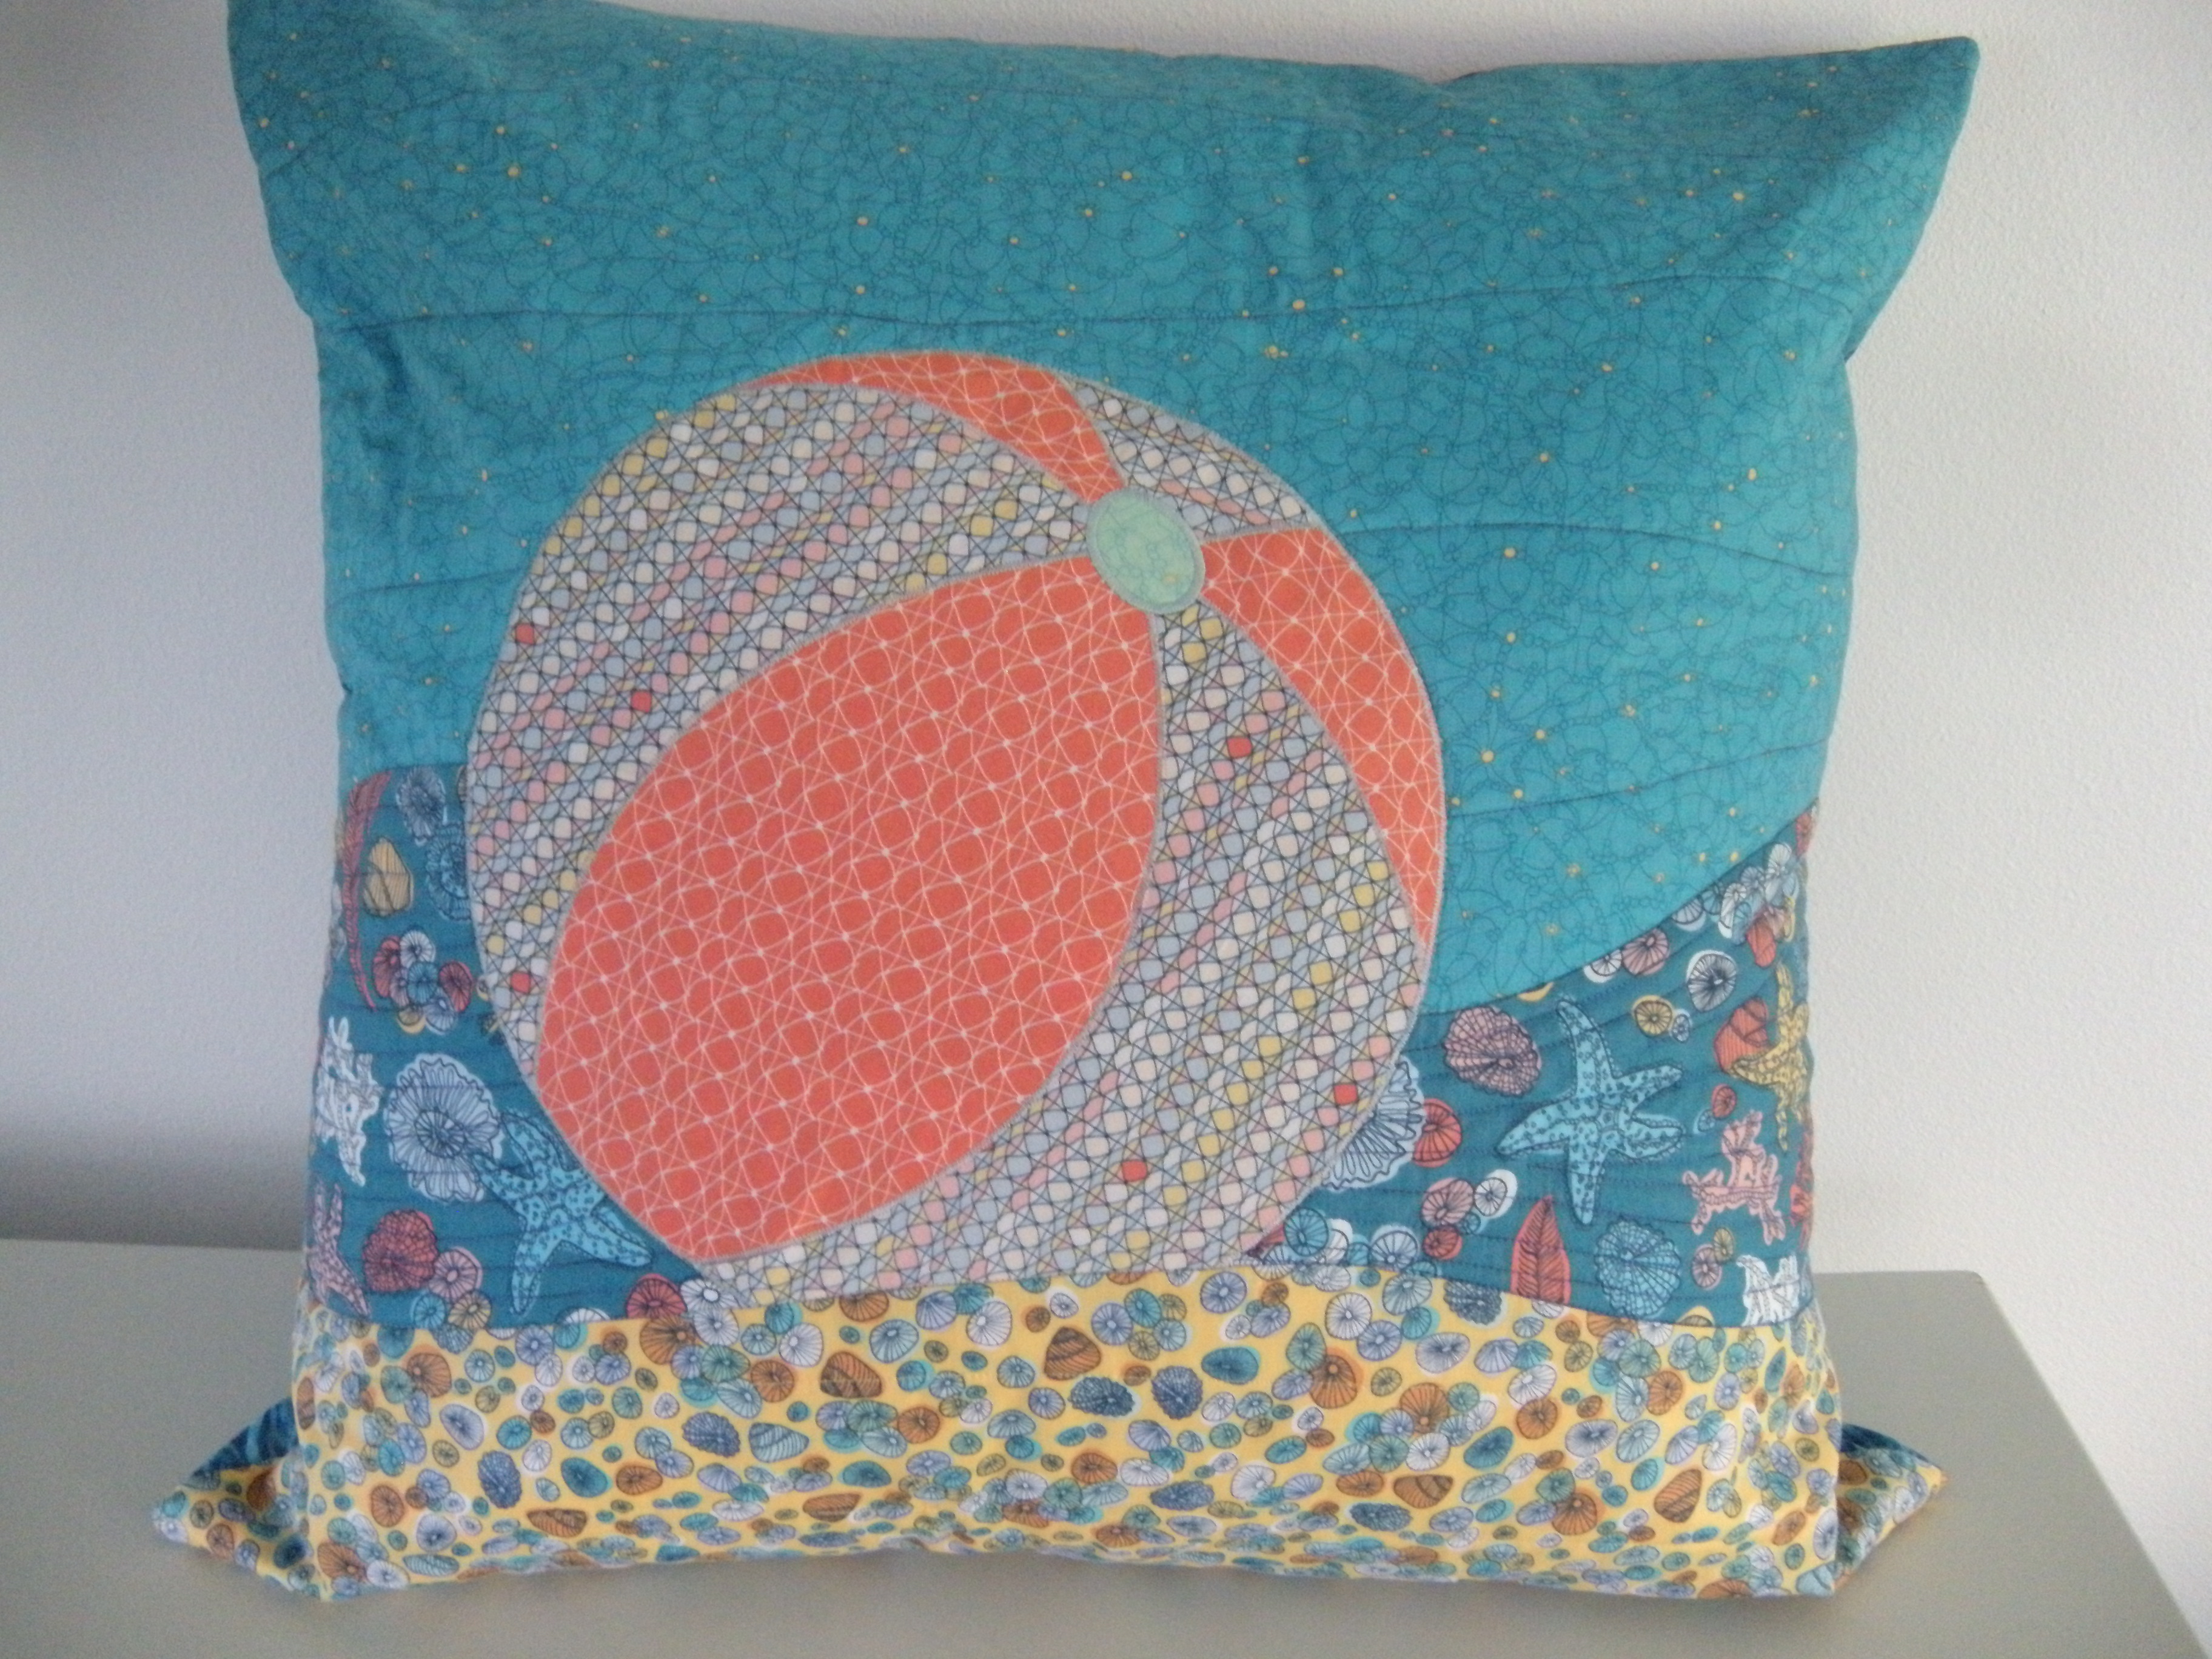
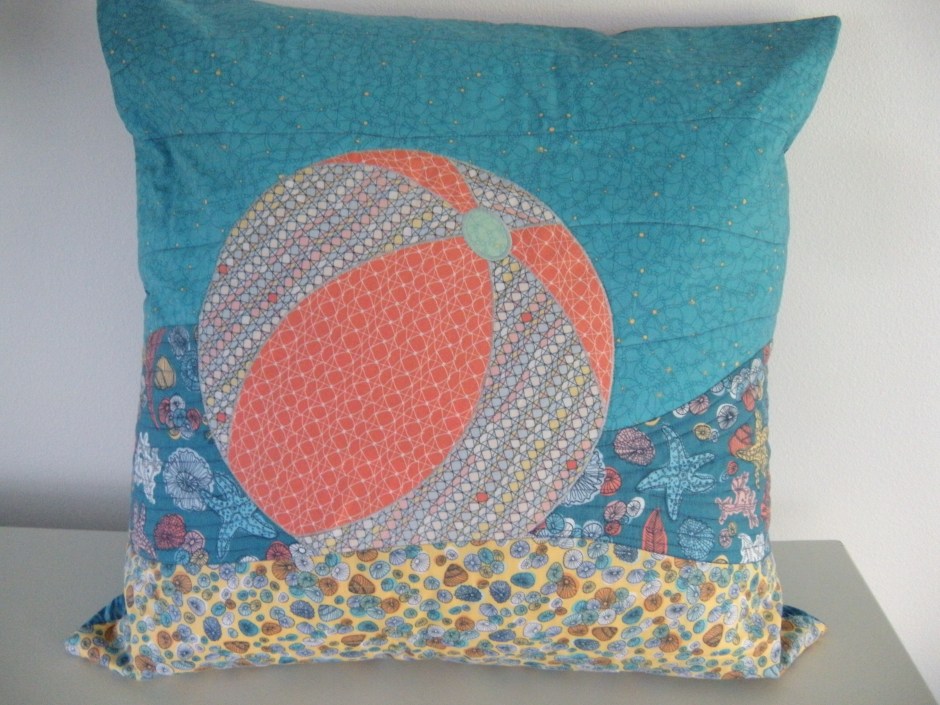
I decided to make a smallish project. I wasn’t sure how my Project Runway backup sewing machine would do, and I didn’t want to bite off more than it could chew. I just happened to have a 24″ pillow form sitting around, and some fabric from the new Tidal Lace collection by Windham Fabrics.
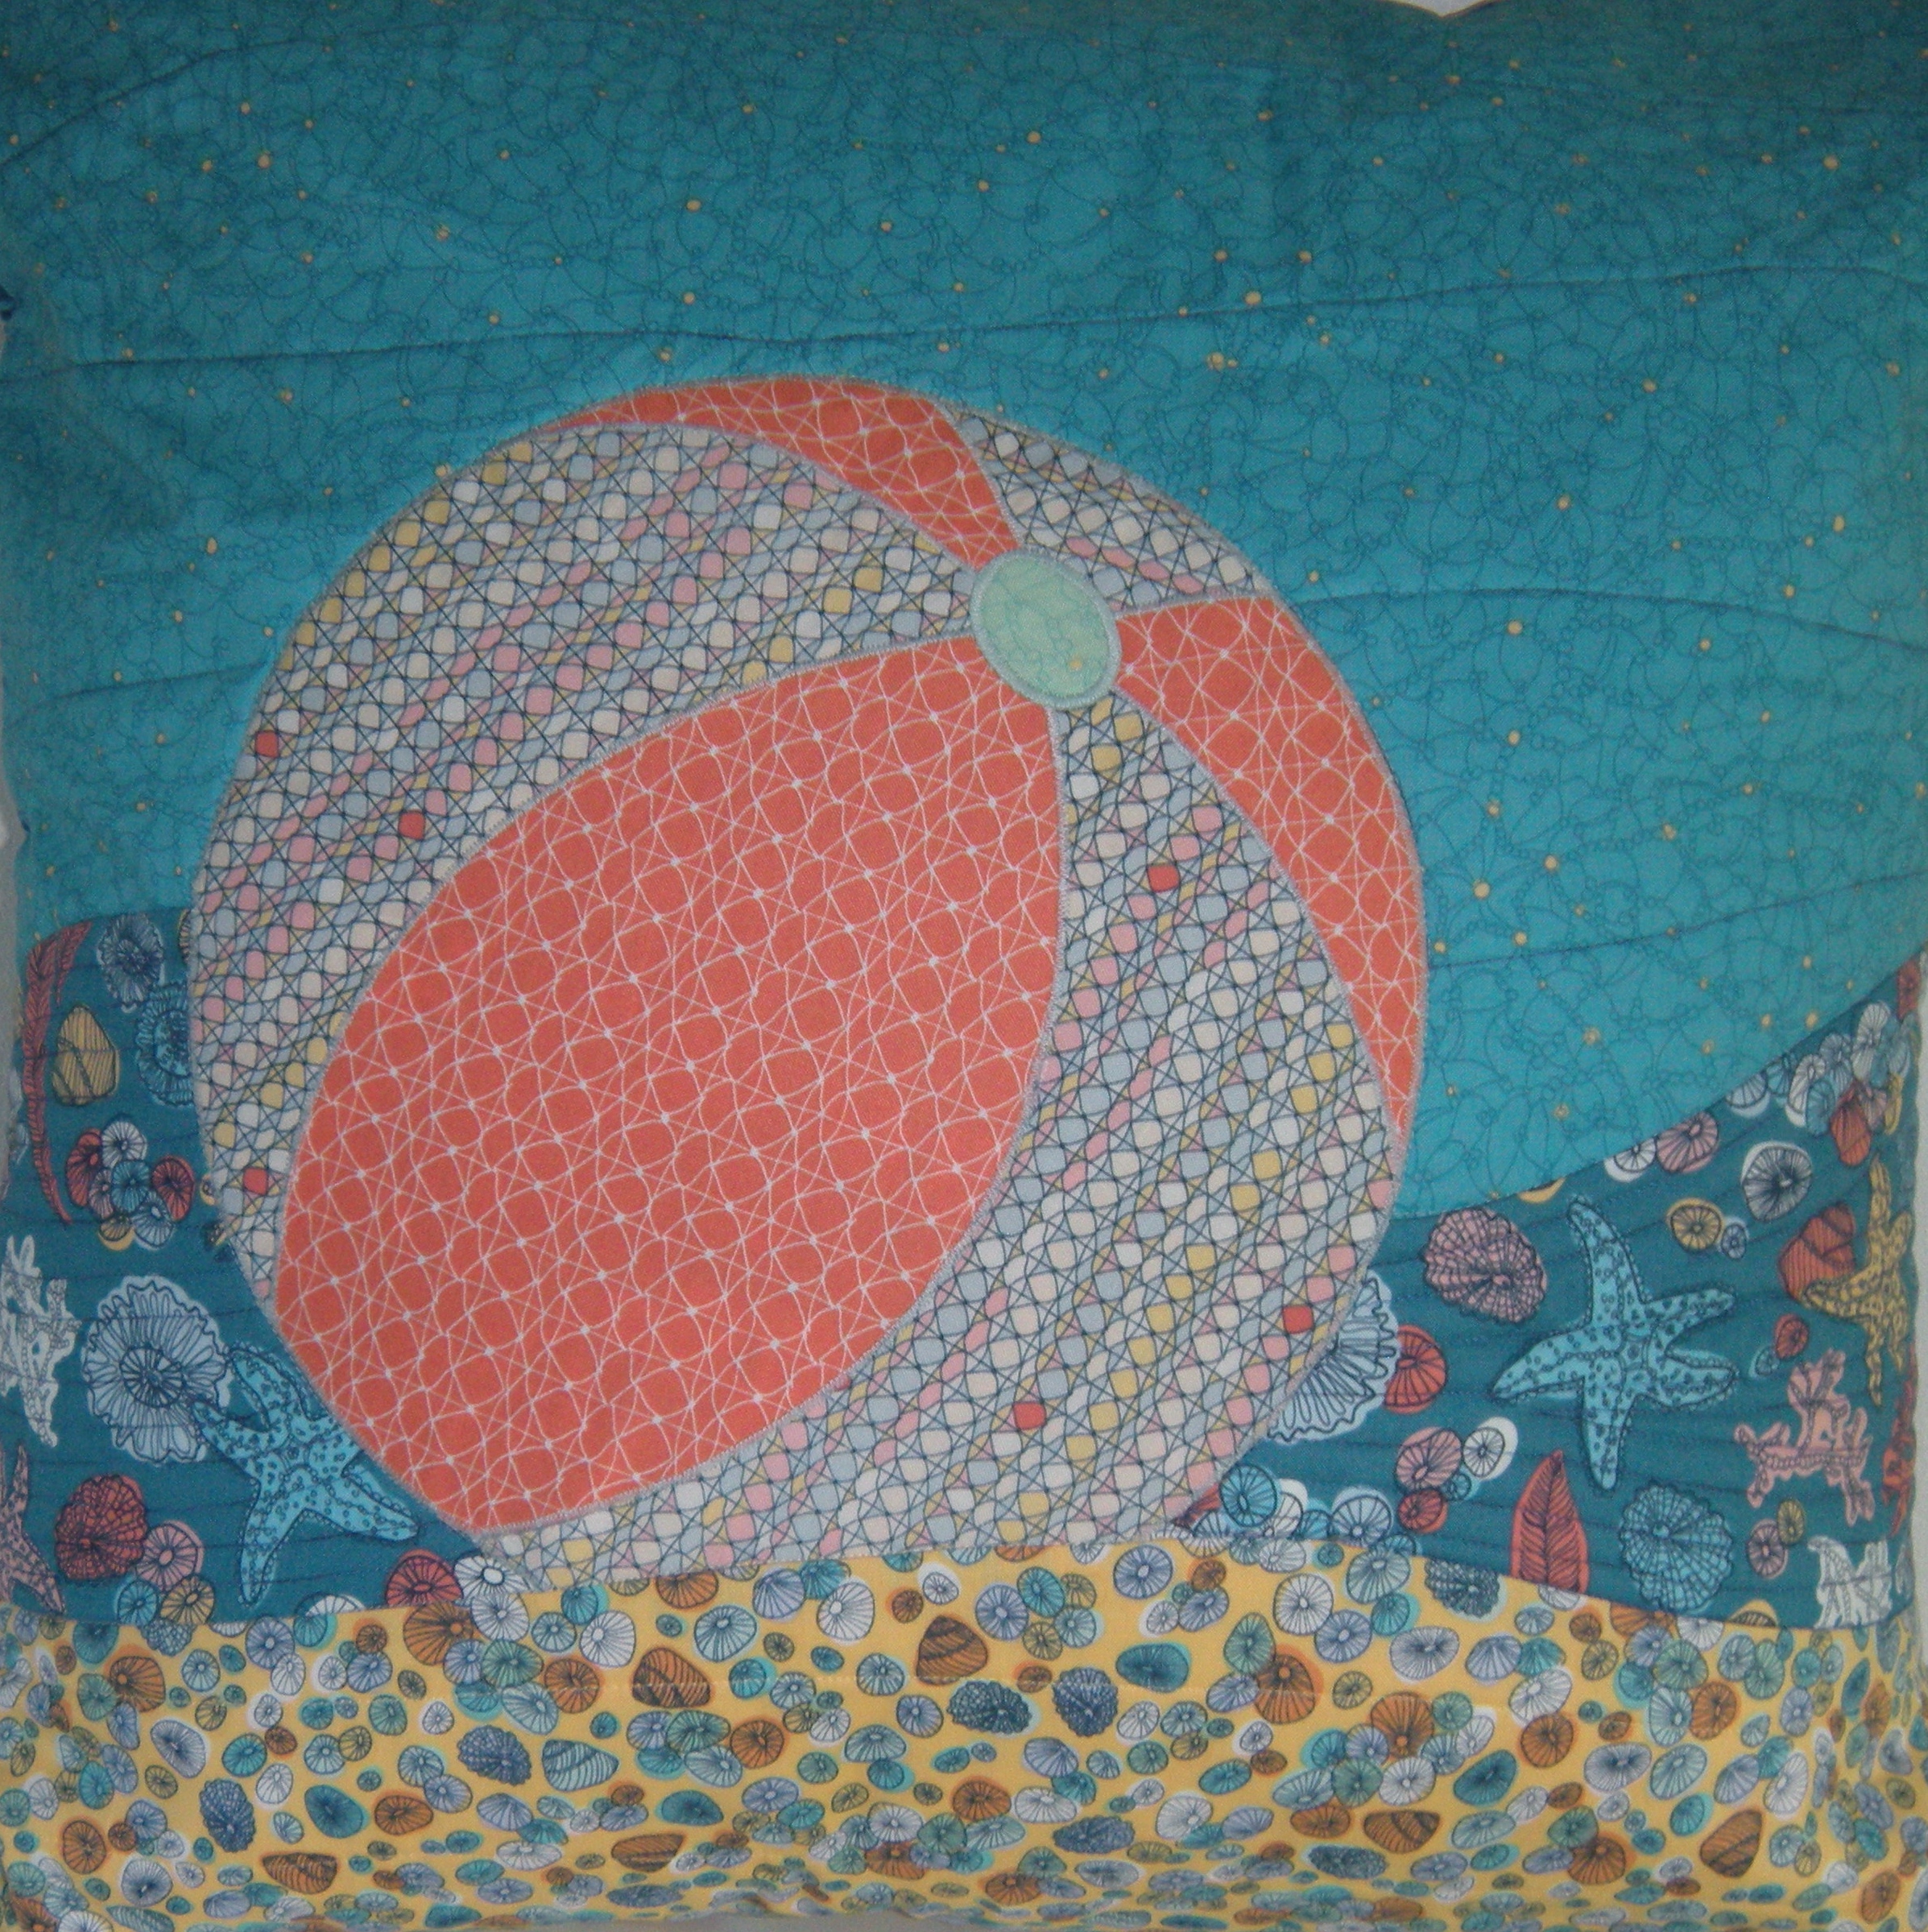
I was inspired by an adorable quilt pattern called Making Waves, on the See How We Sew blog. You can see the pattern here https://seehowwesew.wordpress.com/patterns/

I used the templates for one of the beach balls. The curves in the waves and sand were made by stacking the fabric and cutting freehand curves.
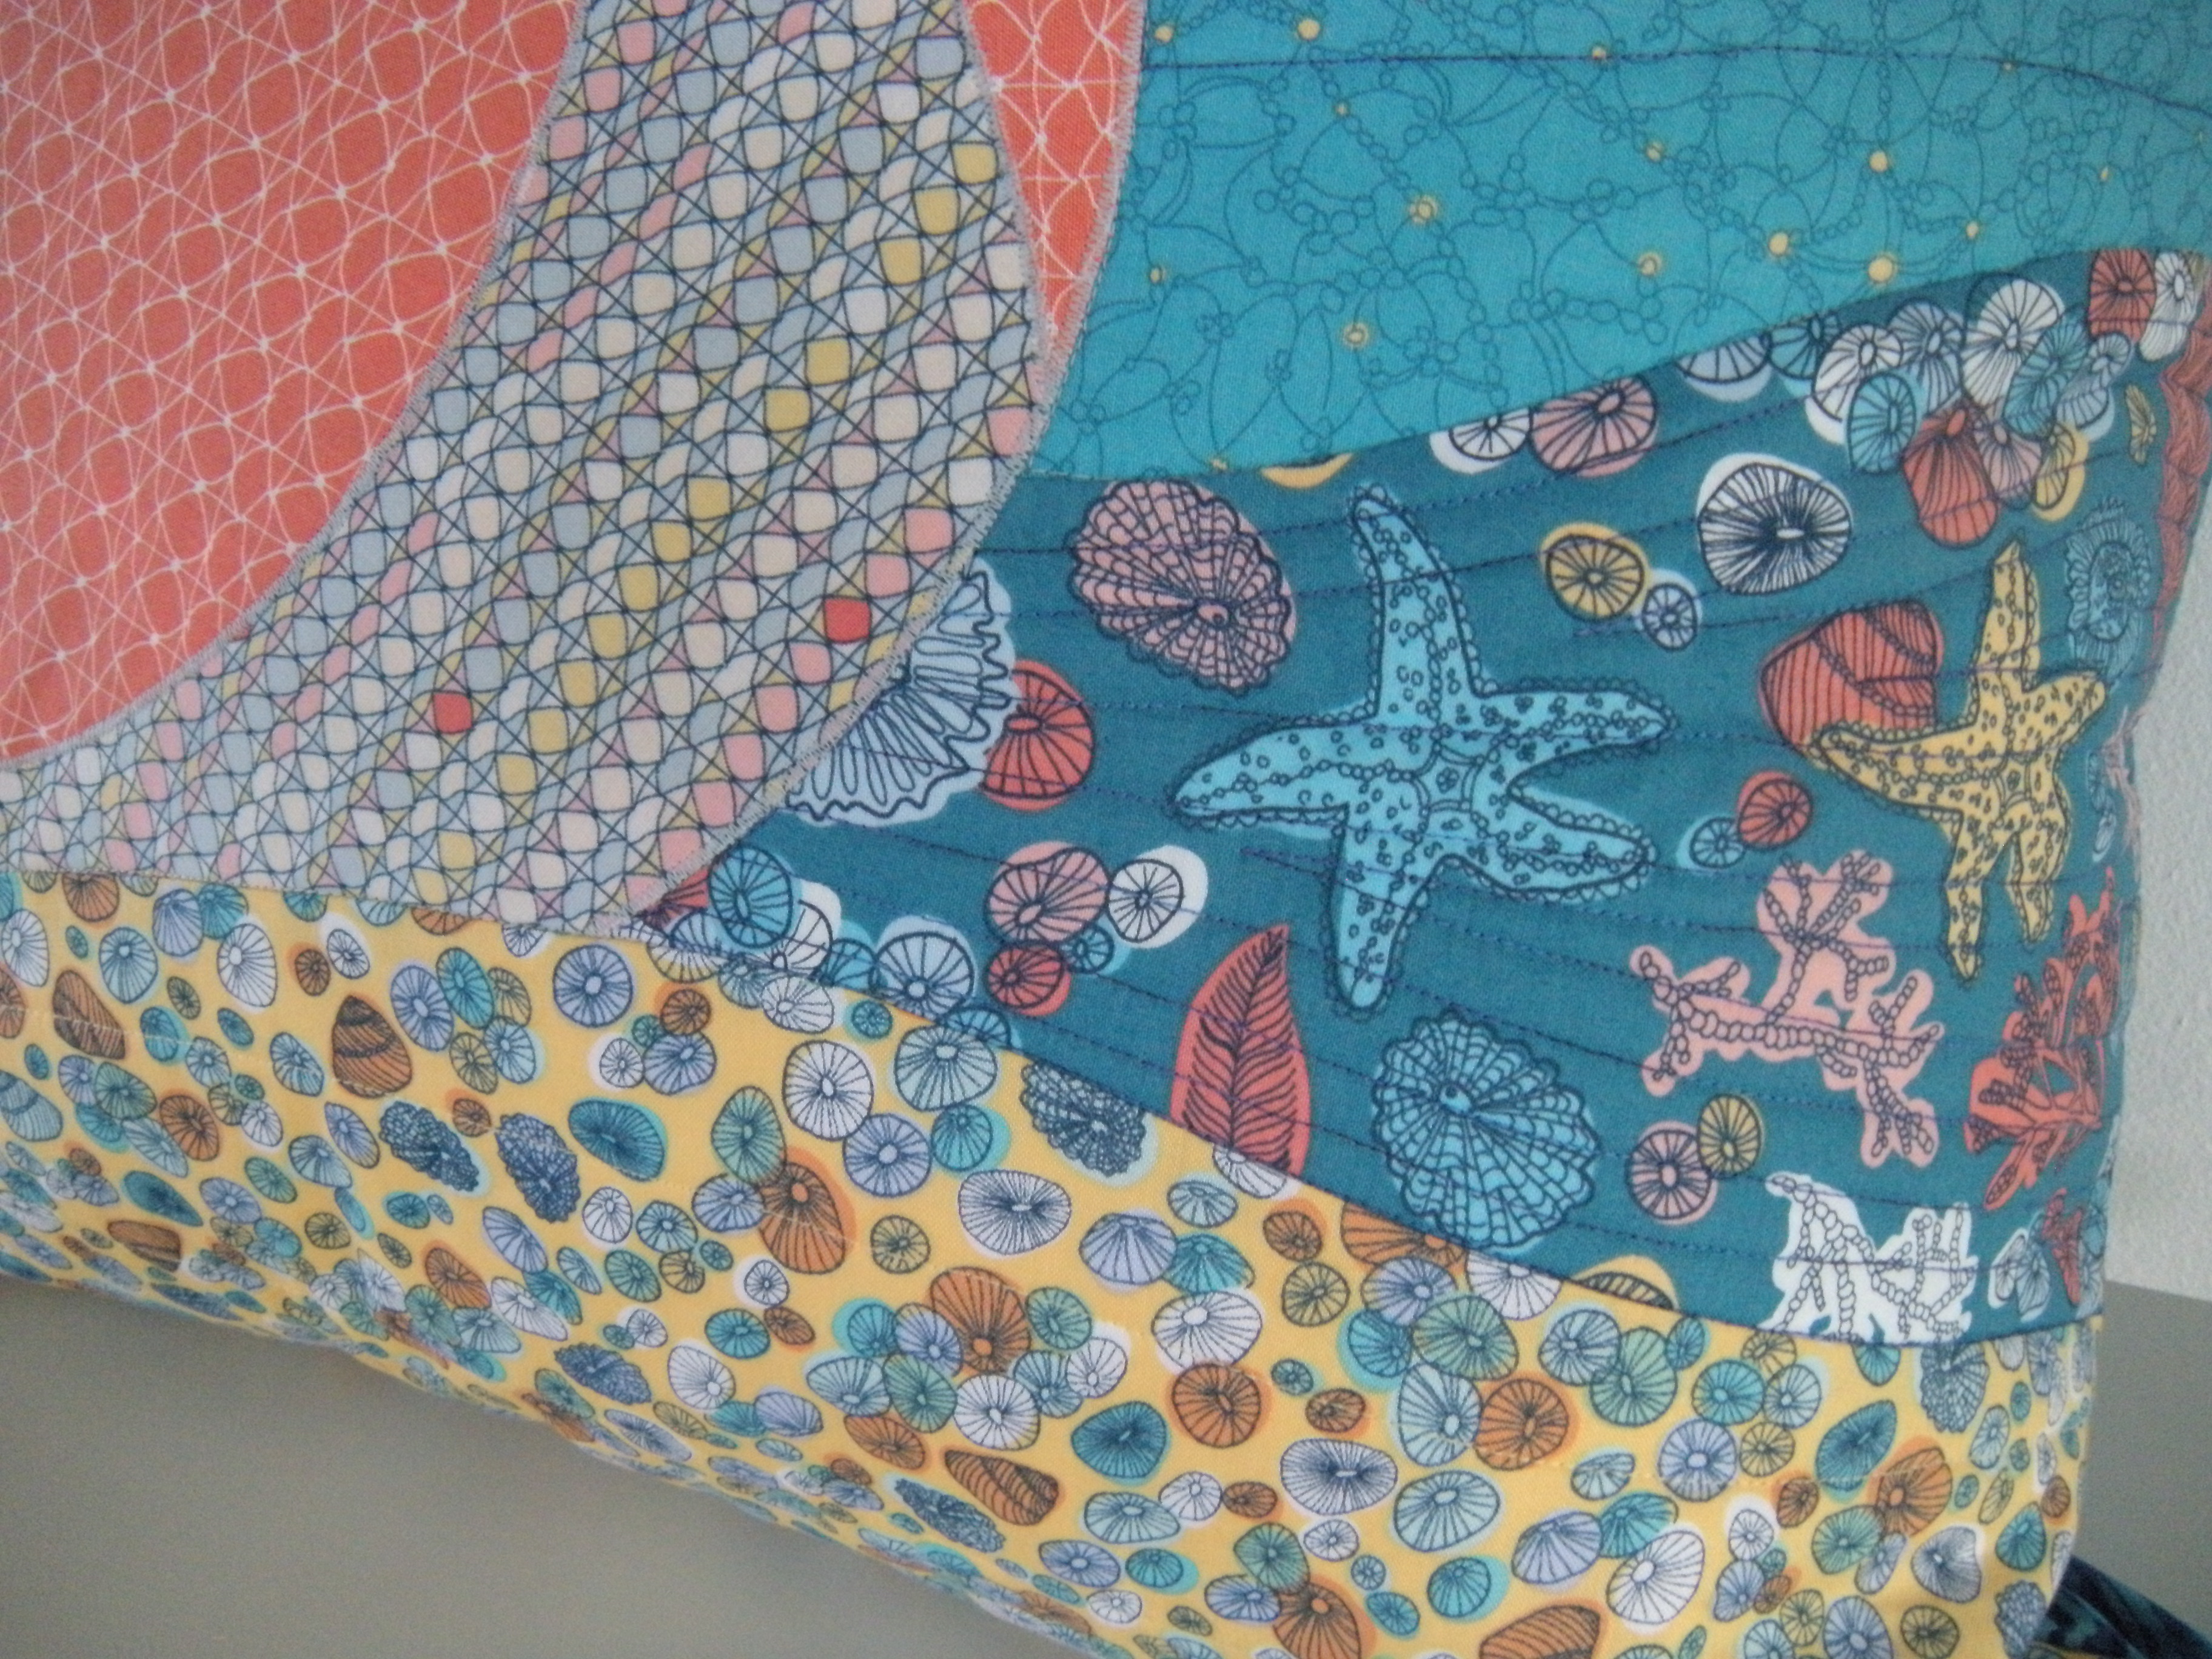
The back has a lapped zipper. Somebody’s bound to slobber on it at some point. Gotta be able to wash it.

It sure helped out my symptoms of withdrawal. And I gained a newly refreshed admiration for my Destiny. I have fallen in love with my dreamy machine. But I need it back, or I might not be held accountable for what happens next.
Stay crafty, my friends.

WARNING! Fabric porn! 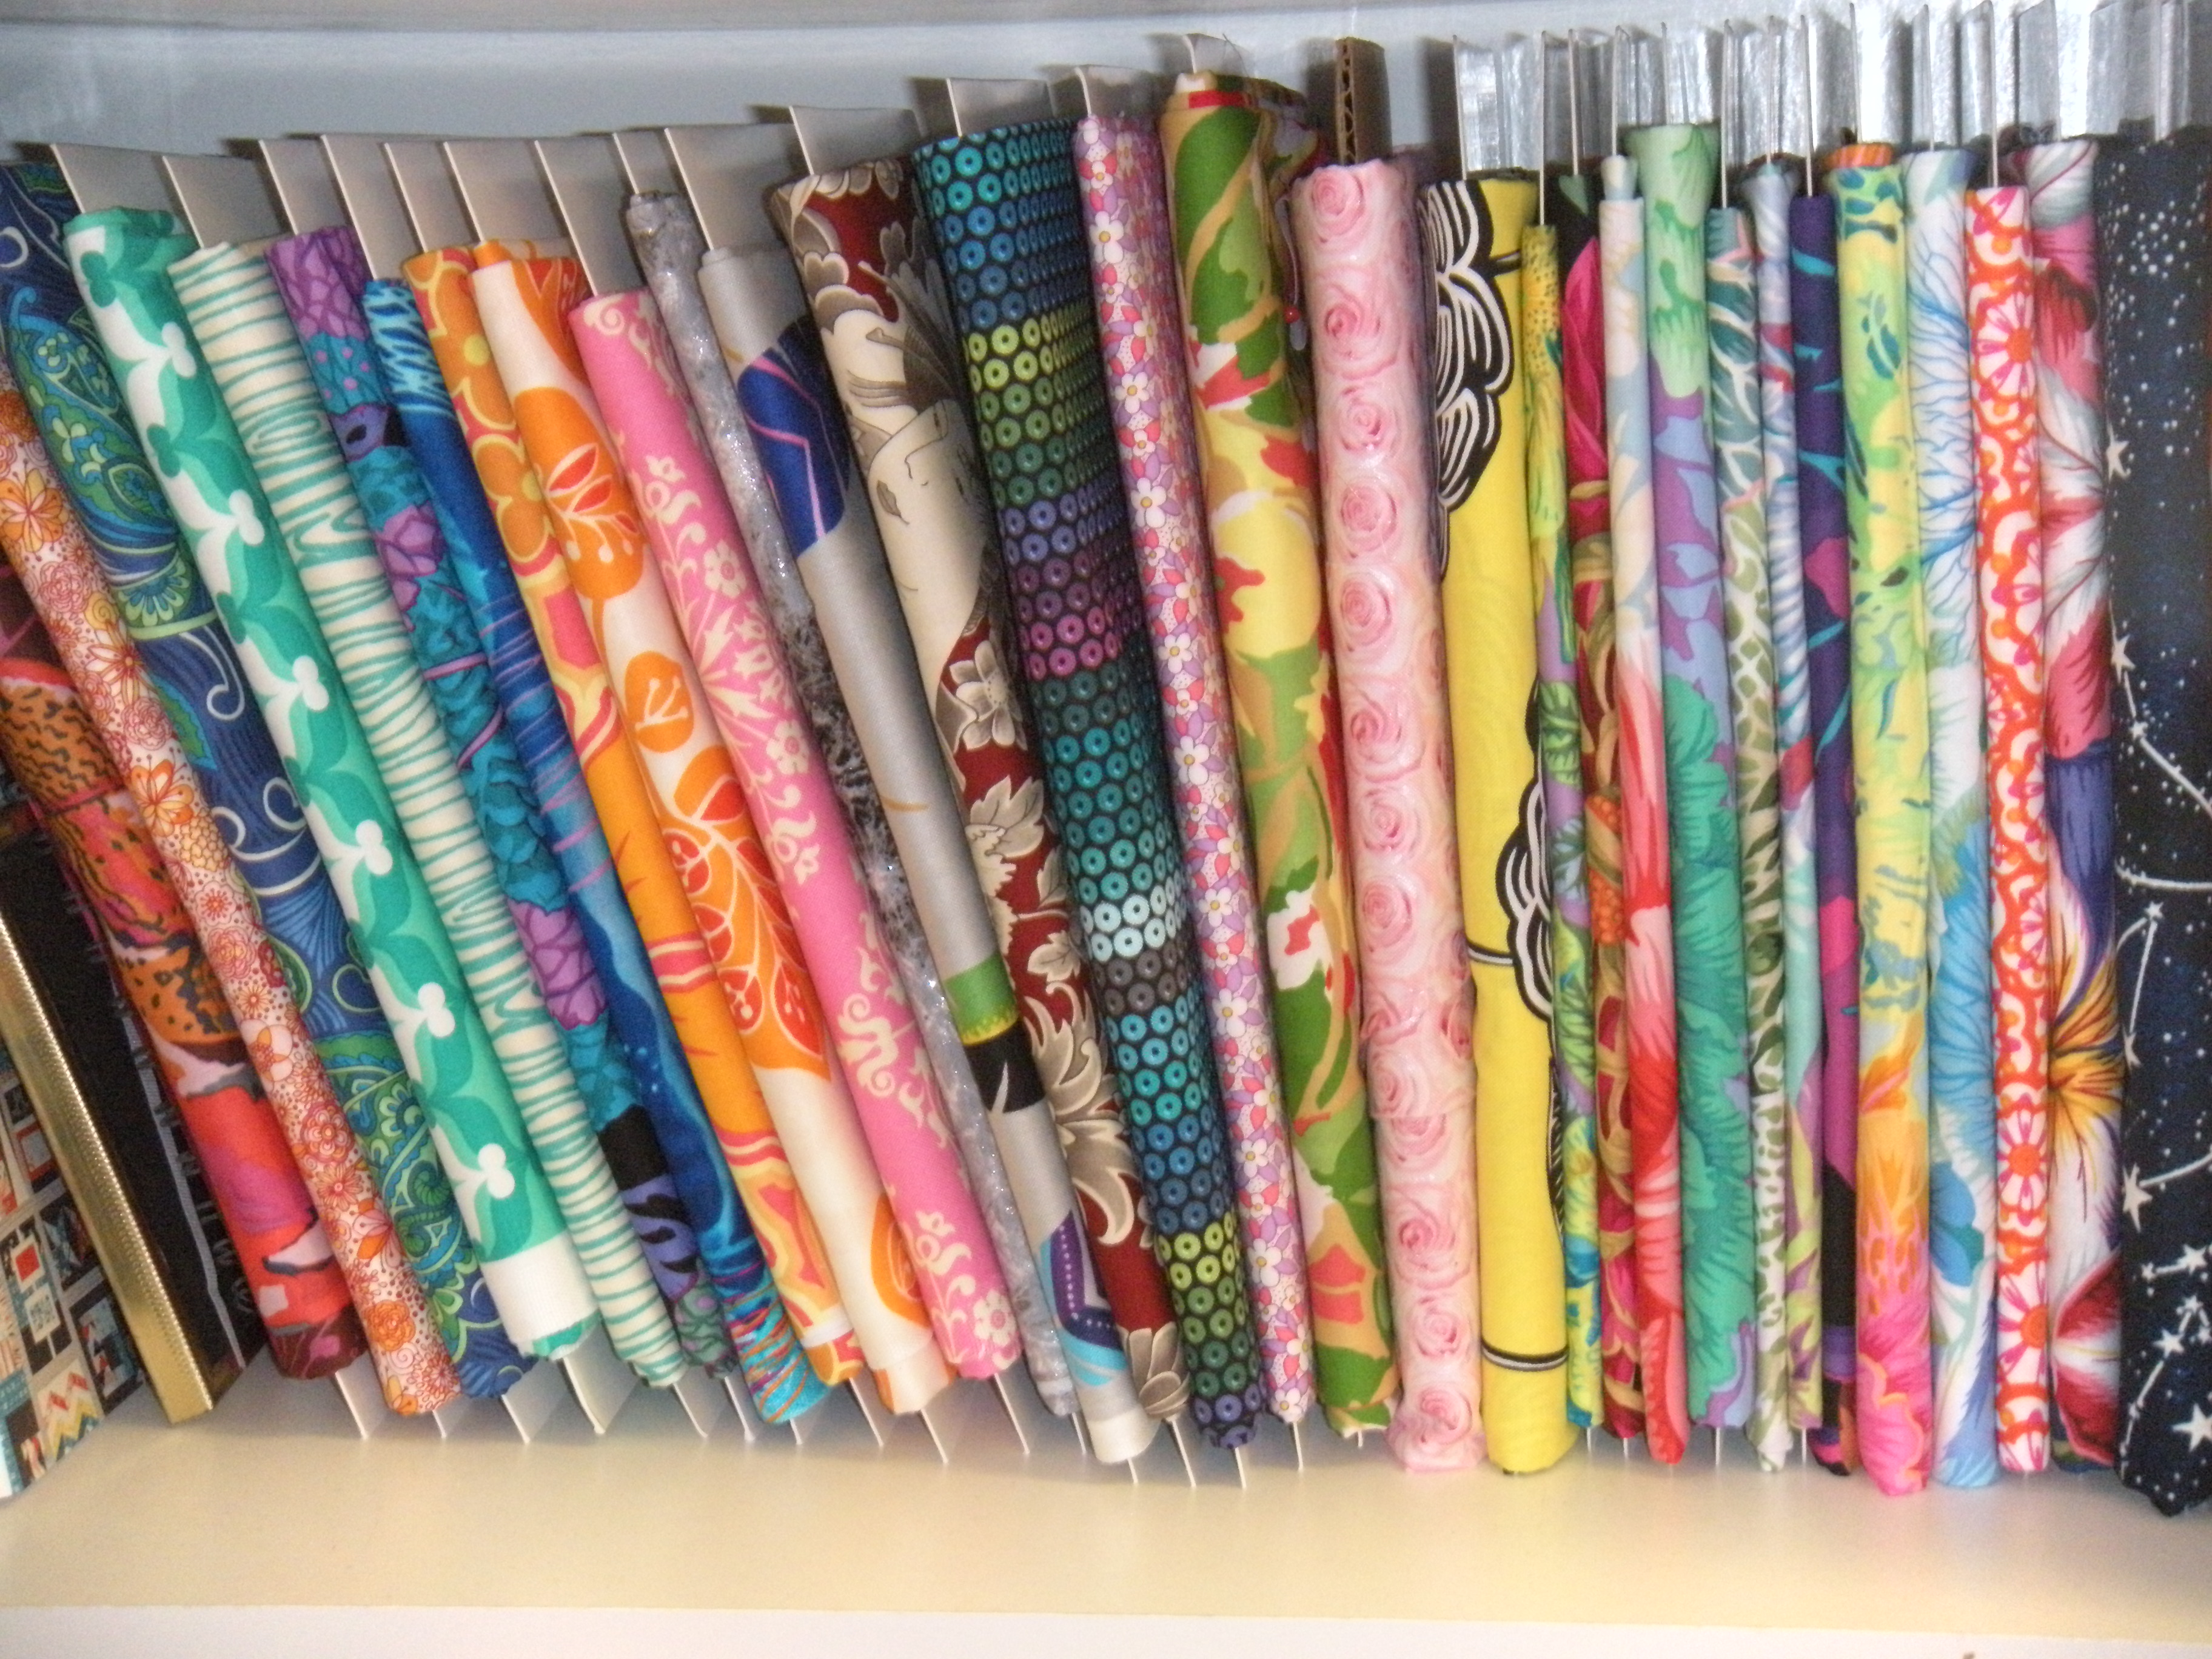
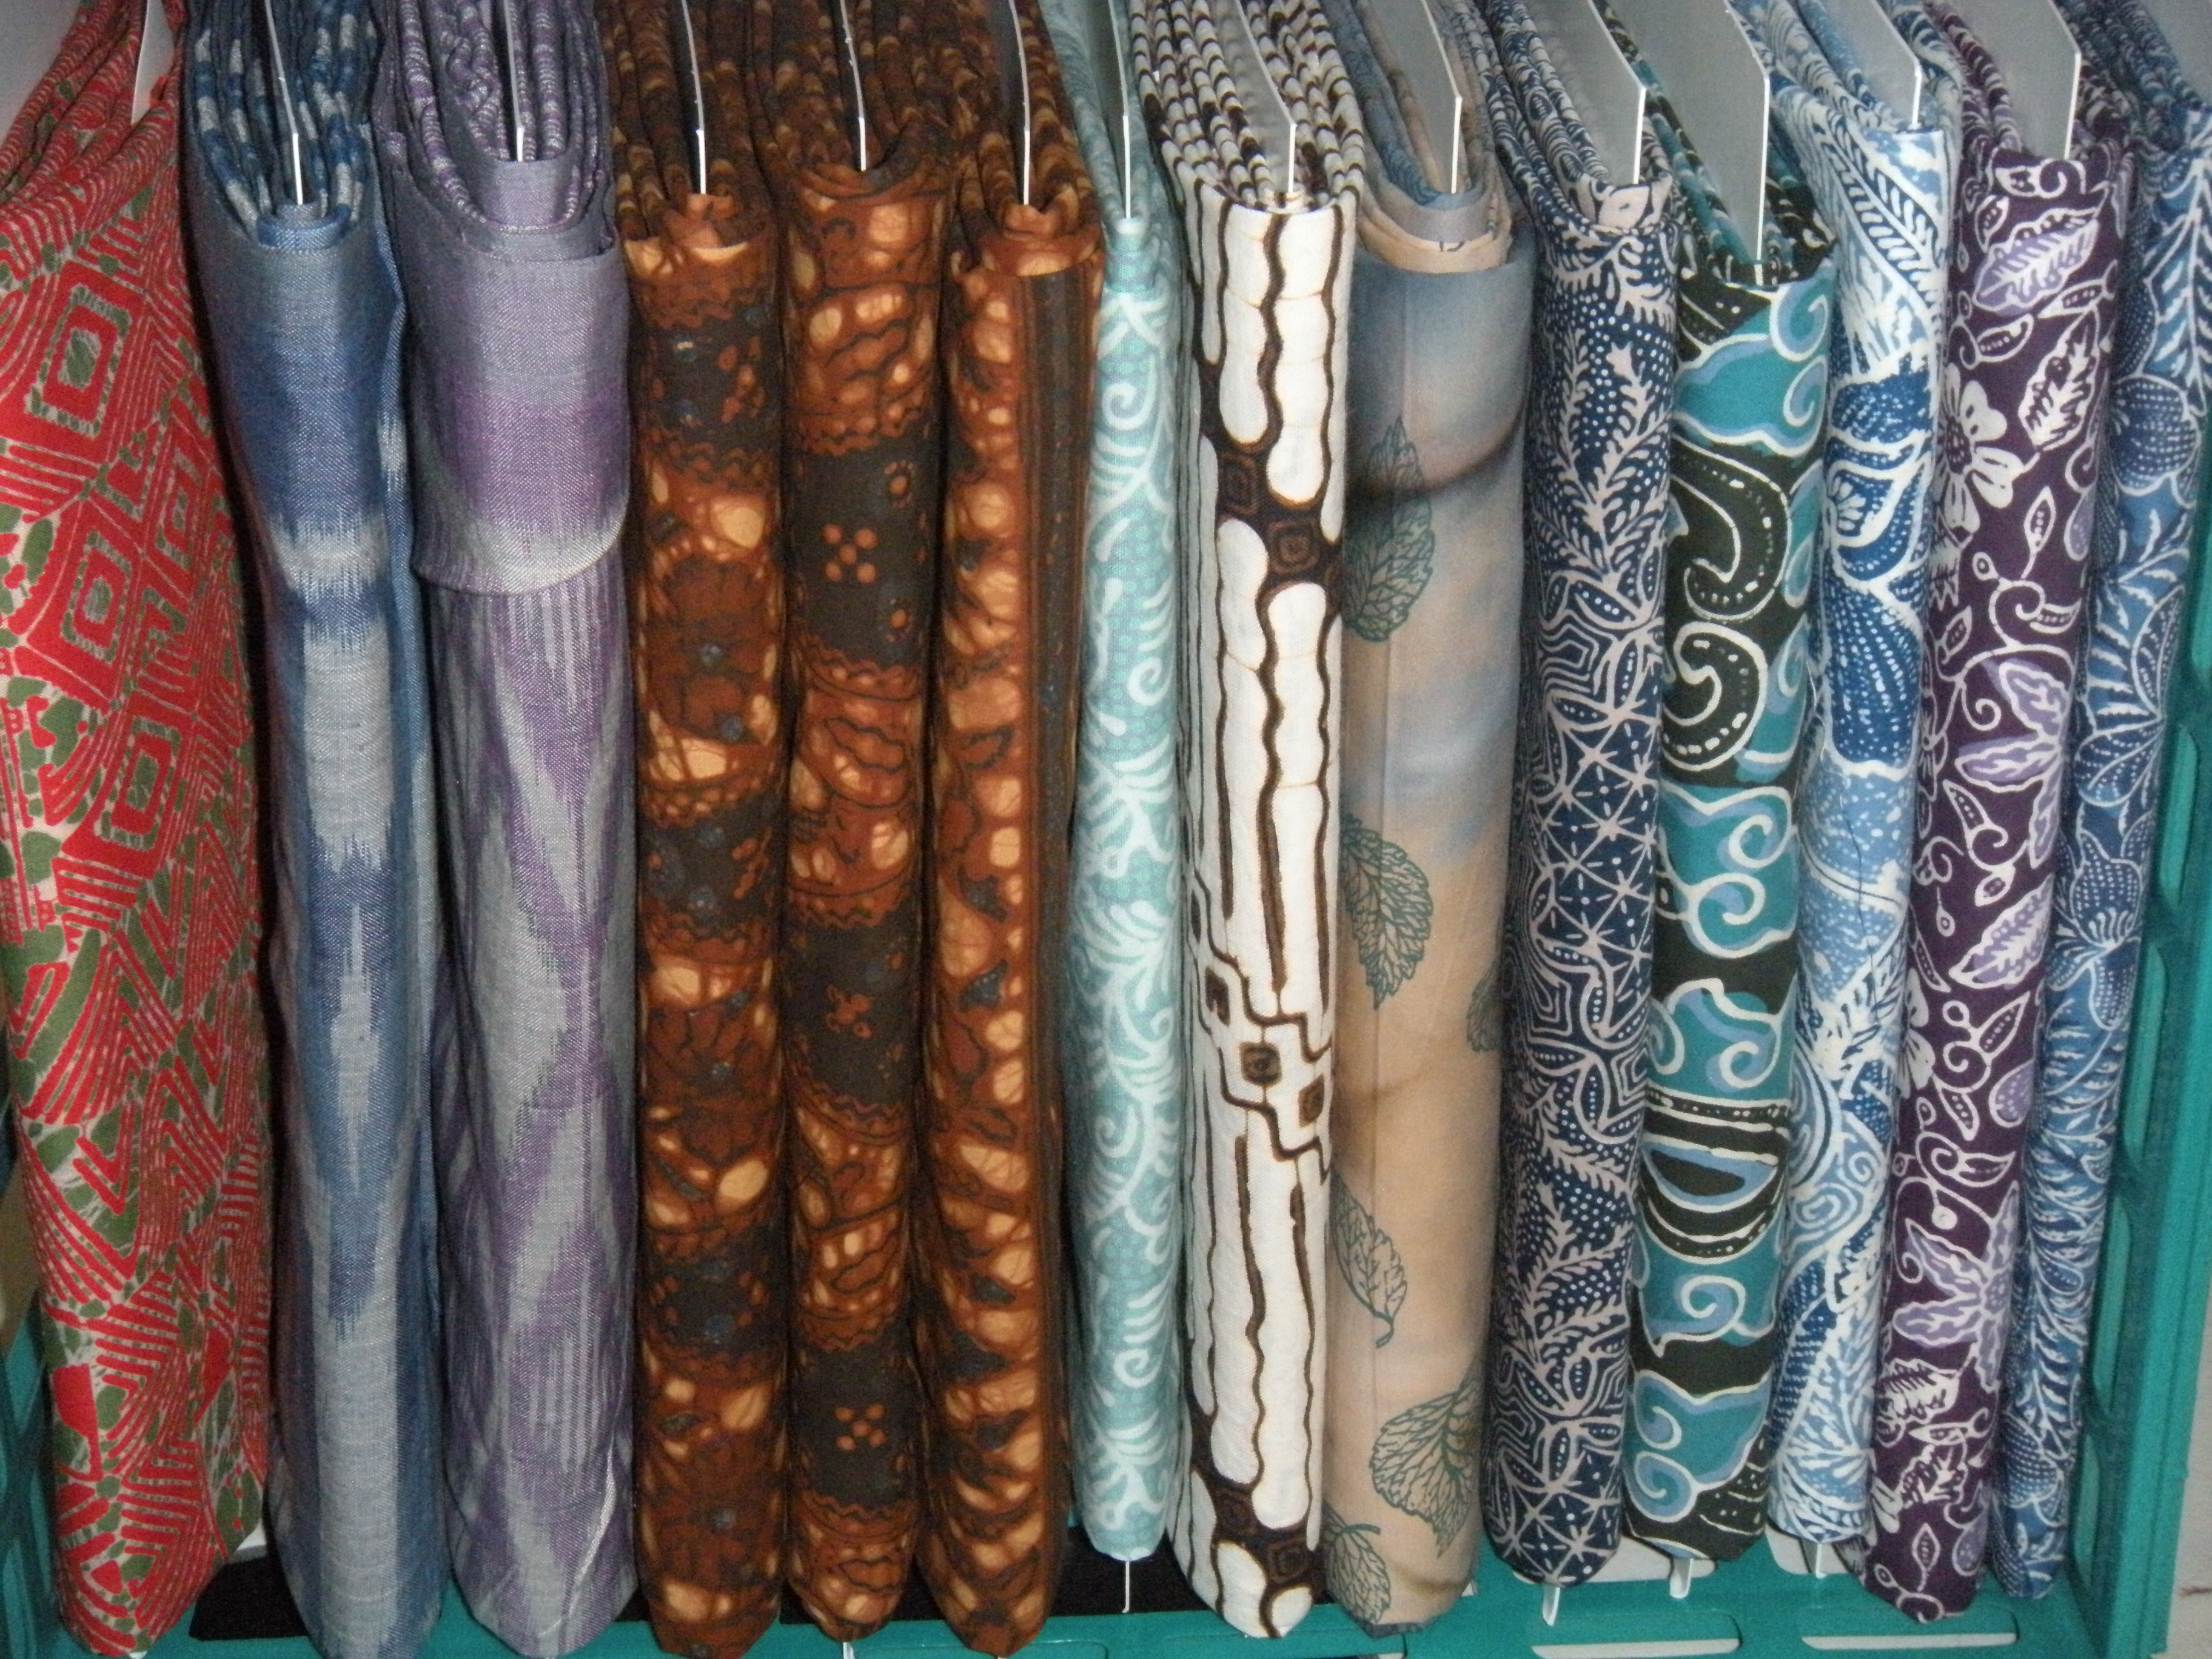
If these pictures don’t just set your heart a singing, I don’t know what will! By the way, this second photo is part of my collection of vintage batiks from Indonesia. Aside from silly hatbands, I have spent my sewing-machine-less time well. I am putting my fabric collection on little mini bolts. 
I am using these magazine boards that I bought from Amazon. Don’t you just love Amazon? When you live on a small island, it’s the only way to get your hands on certain things. 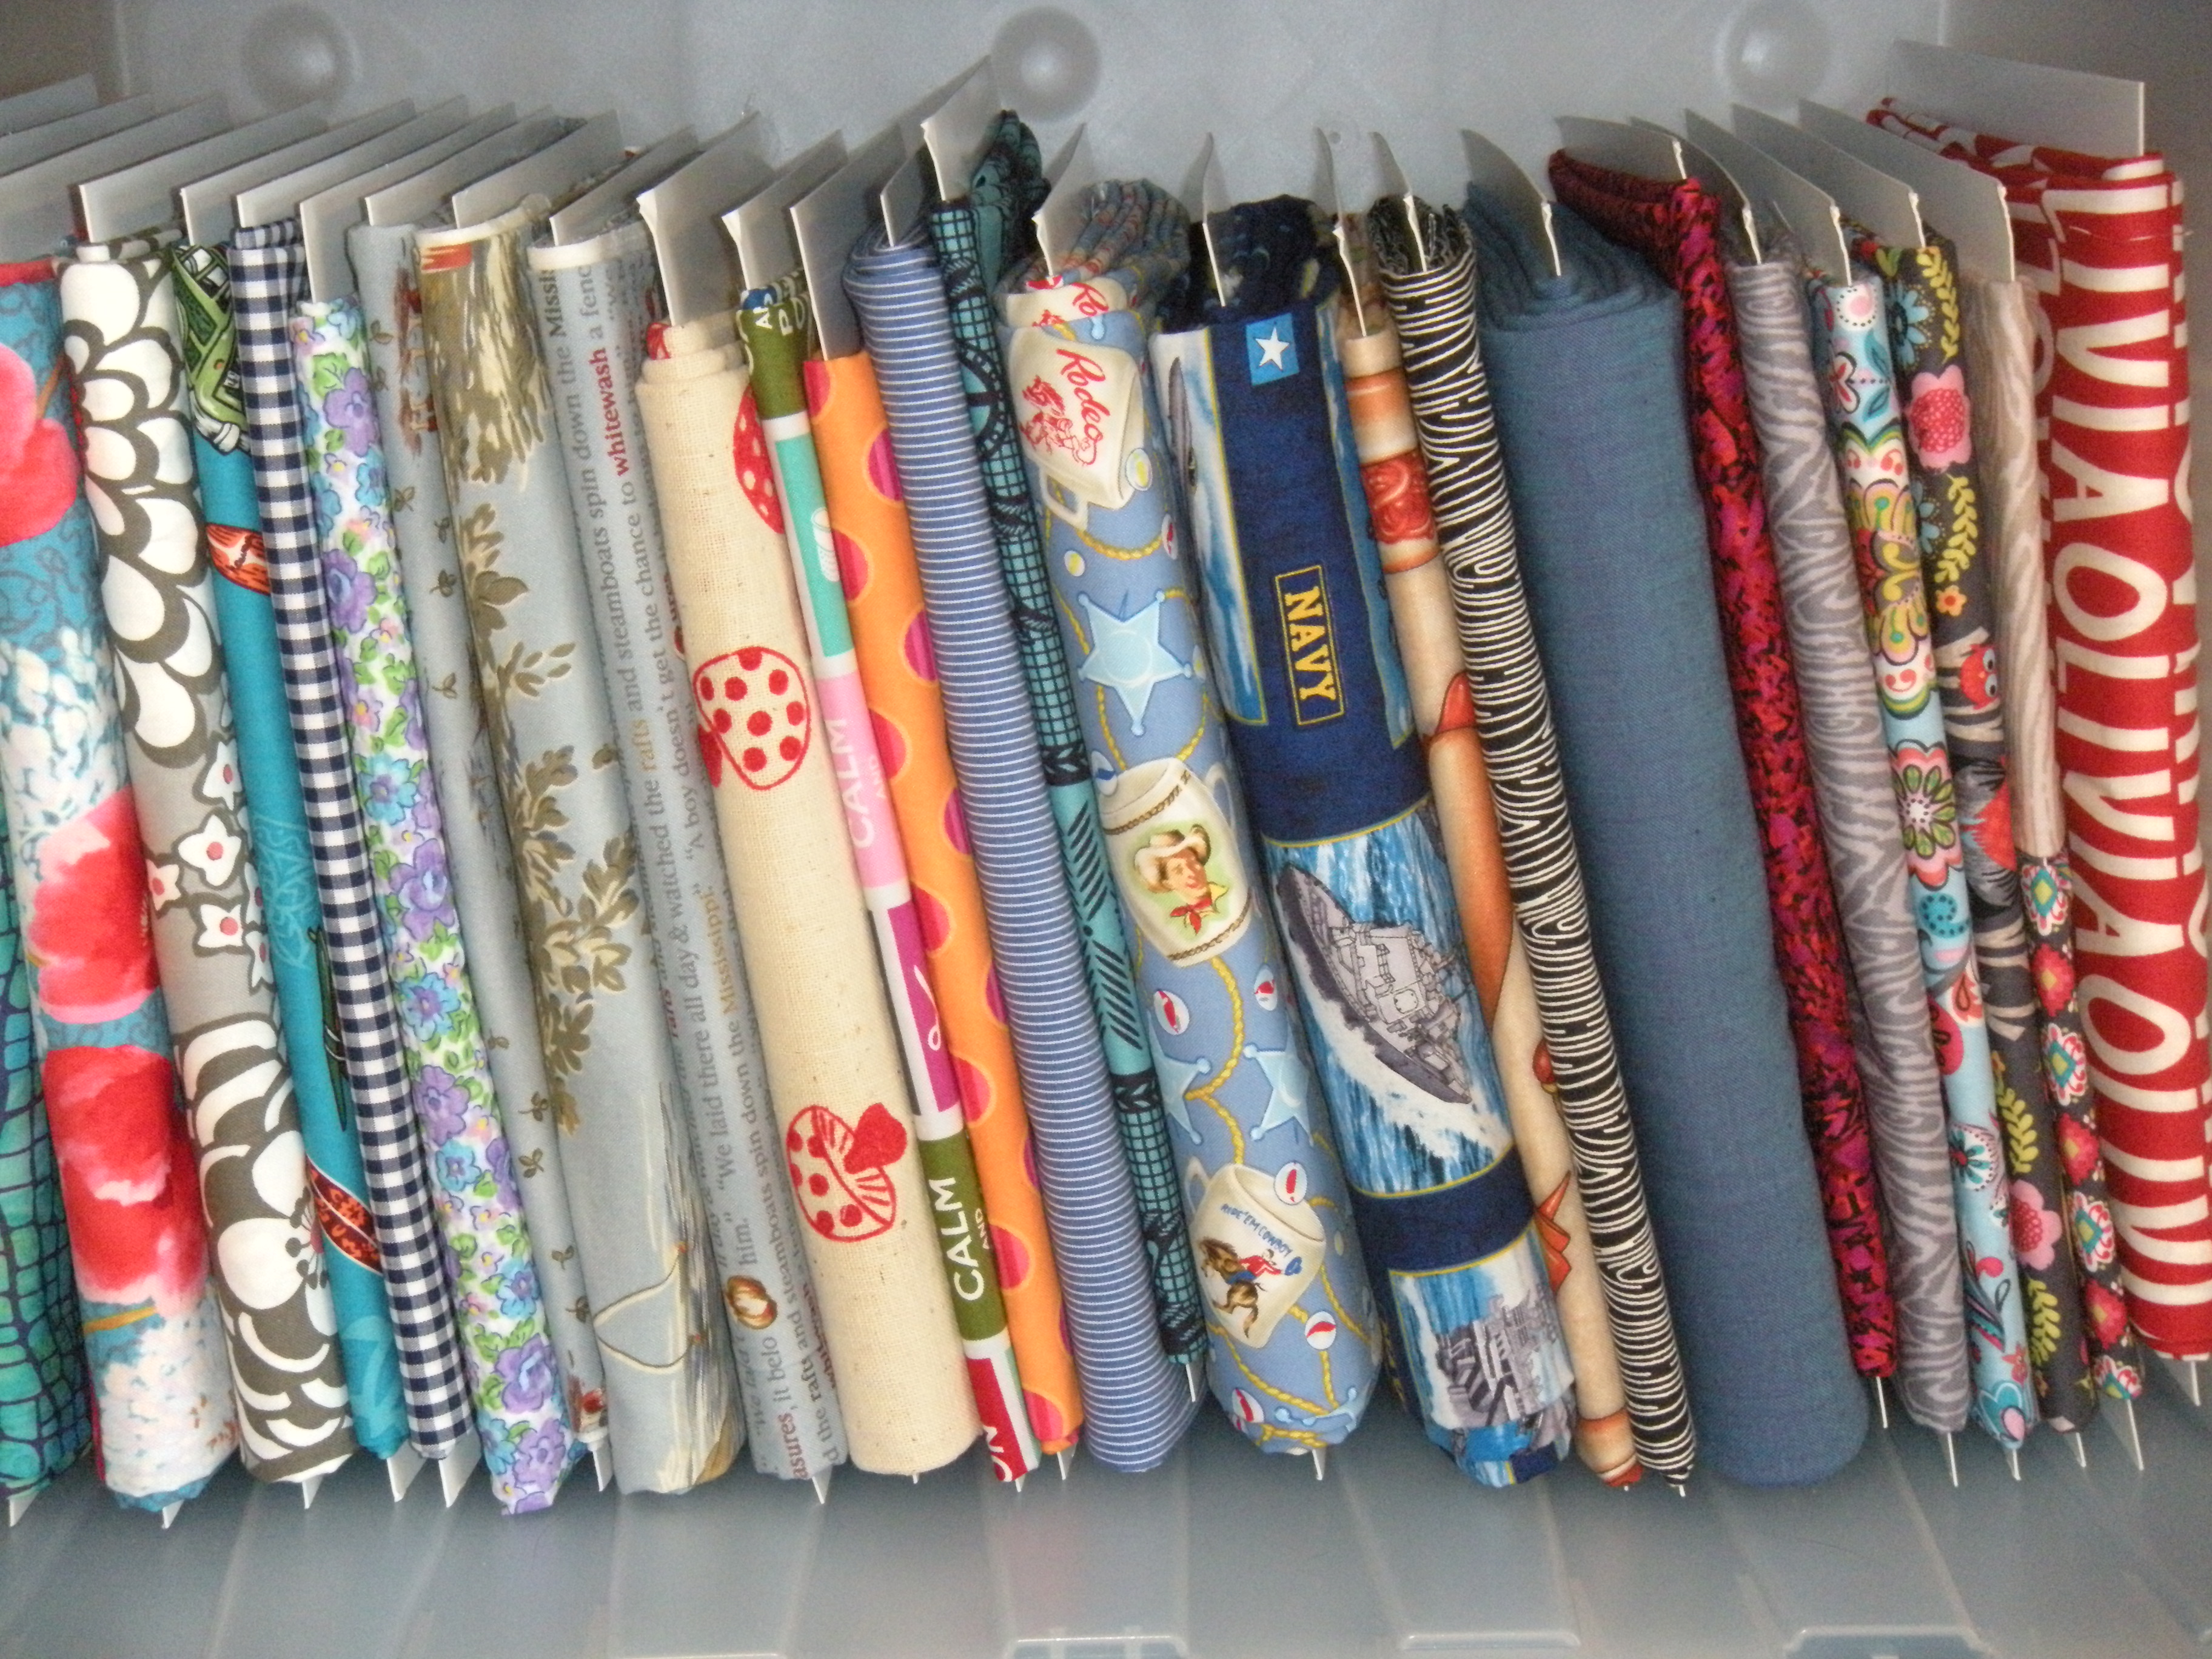
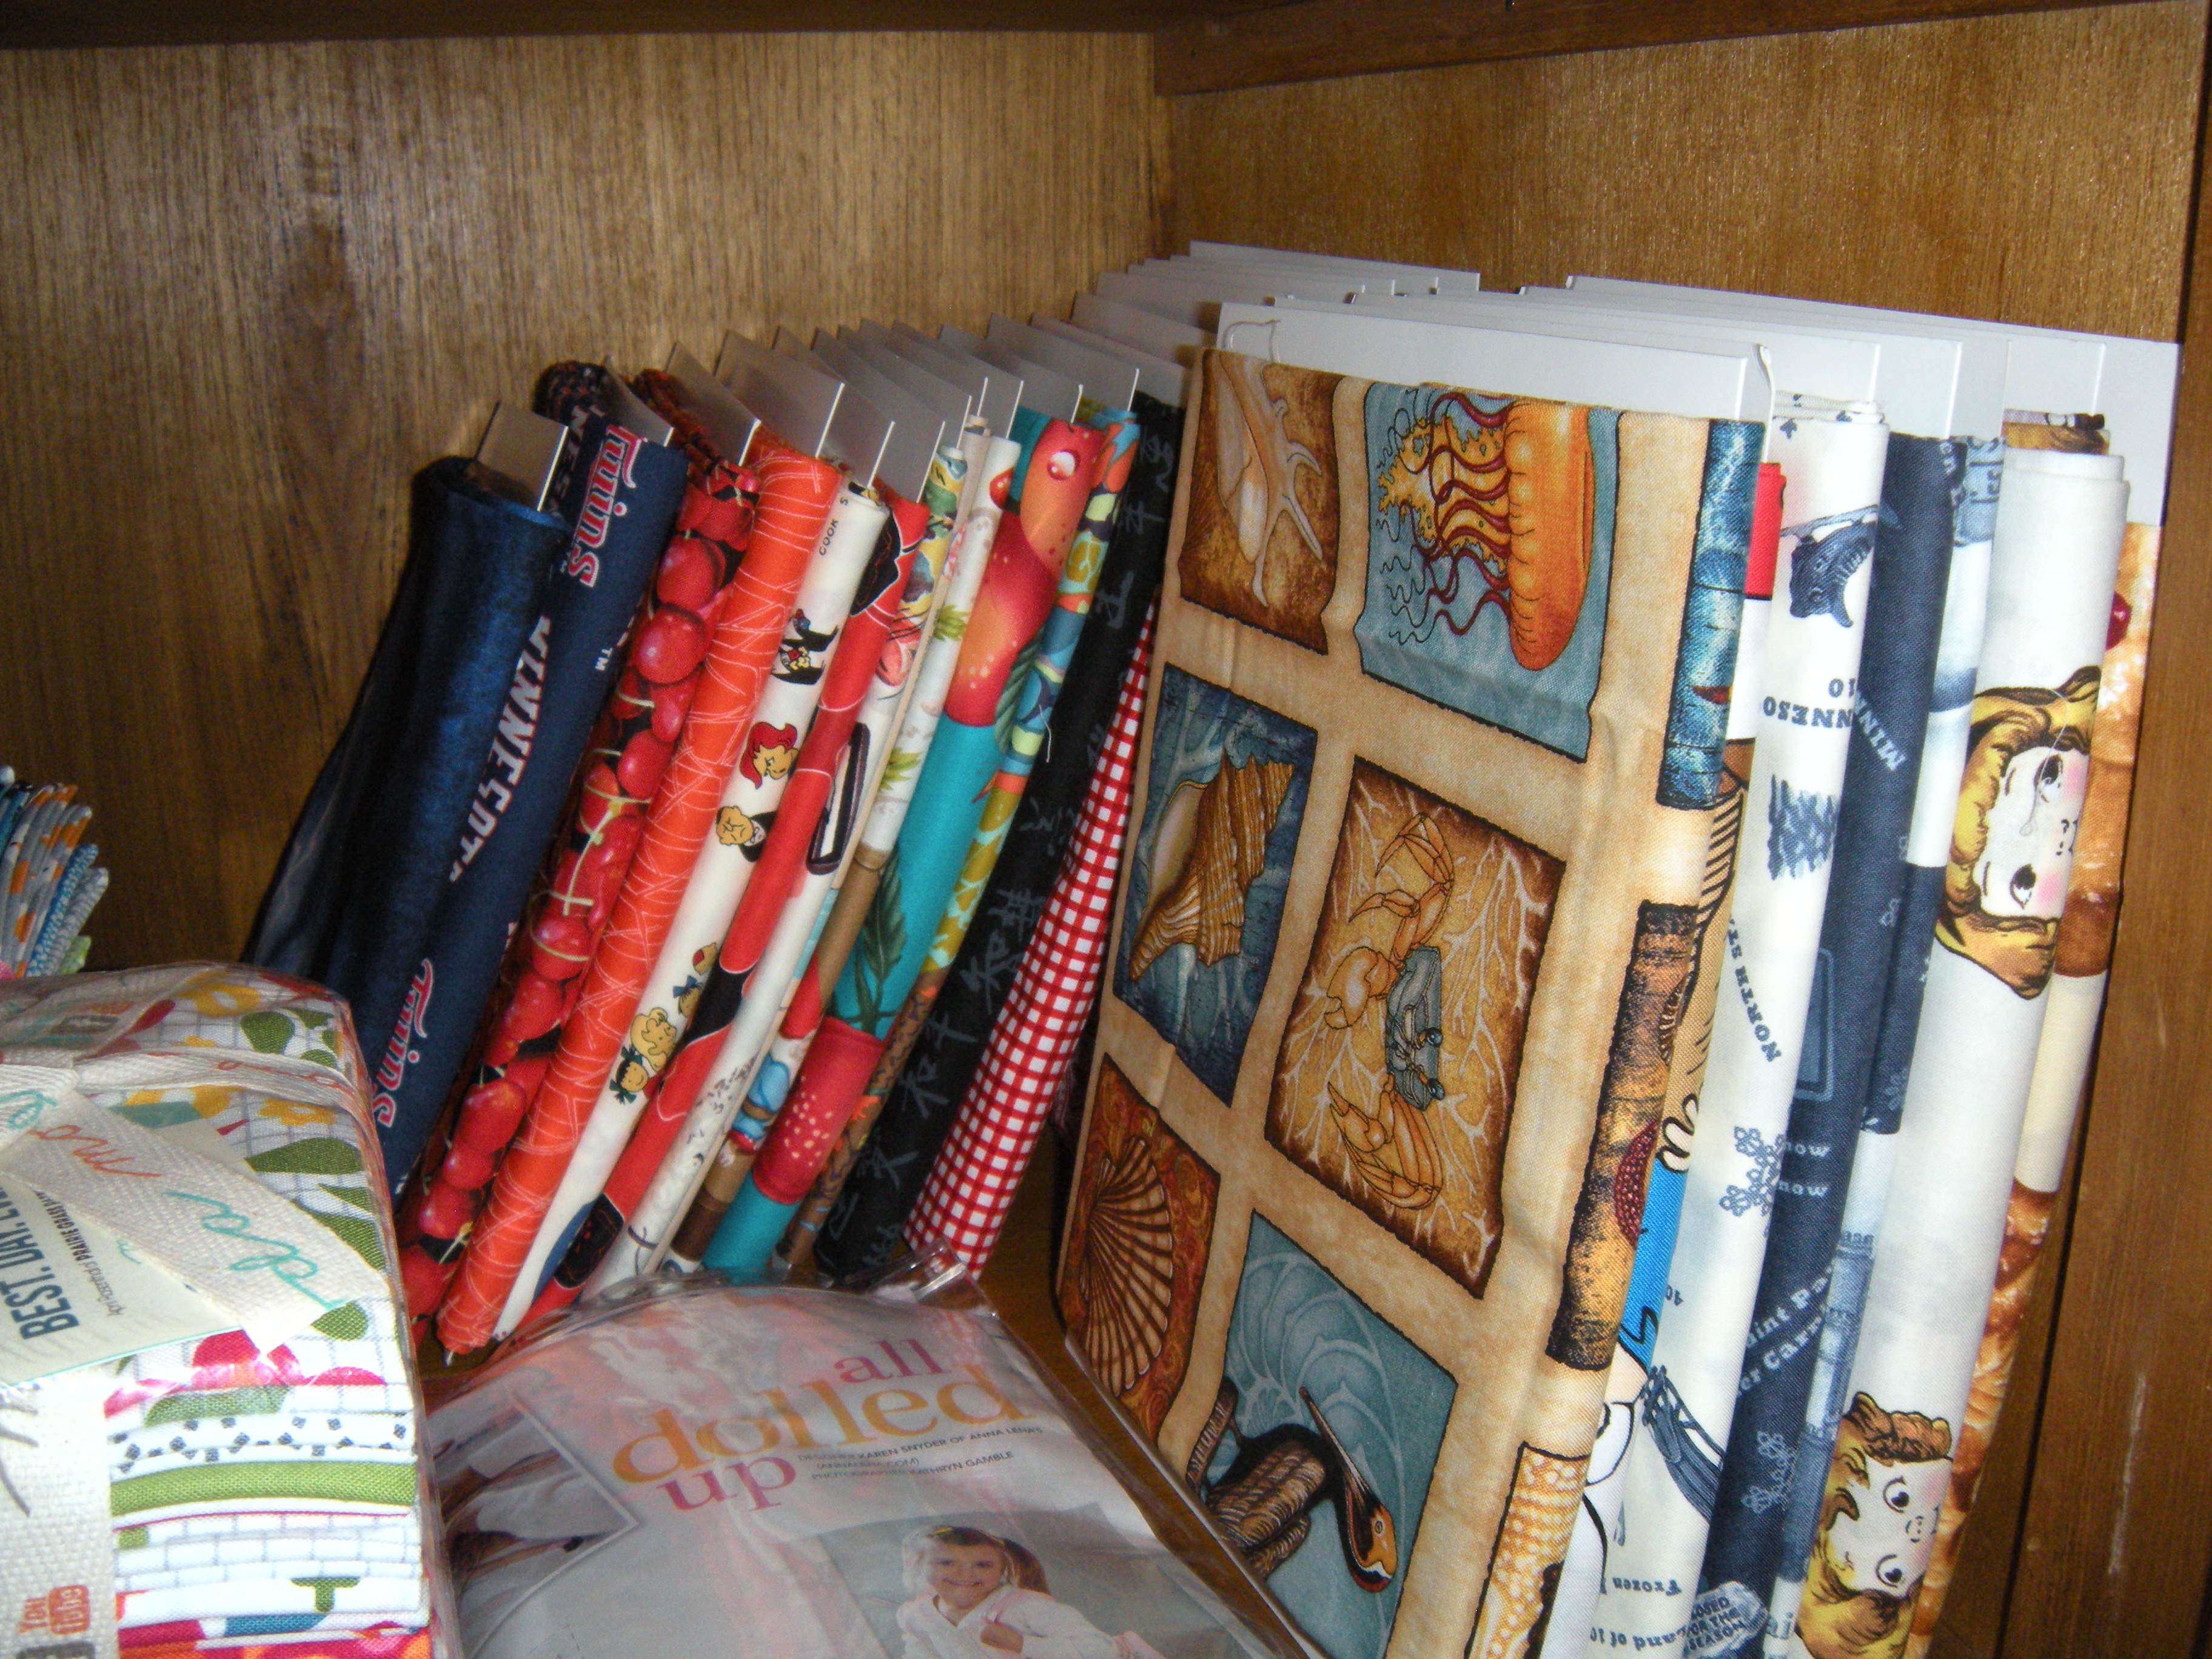
I’ve fired up Netflix, and I’ve been sitting here for days folding fabric around these boards. I can’t even begin to tell you how much space this saves. 

I am preparing to move into my much larger studio quarters. I have no idea what I will use to hold all my mini bolts, but for now they are fitting nicely in these plastic bins. And I can see ALL of my fabric. 

I also need to figure out how to sort the fabric. I do like this last bin and the rainbow sorting method. 
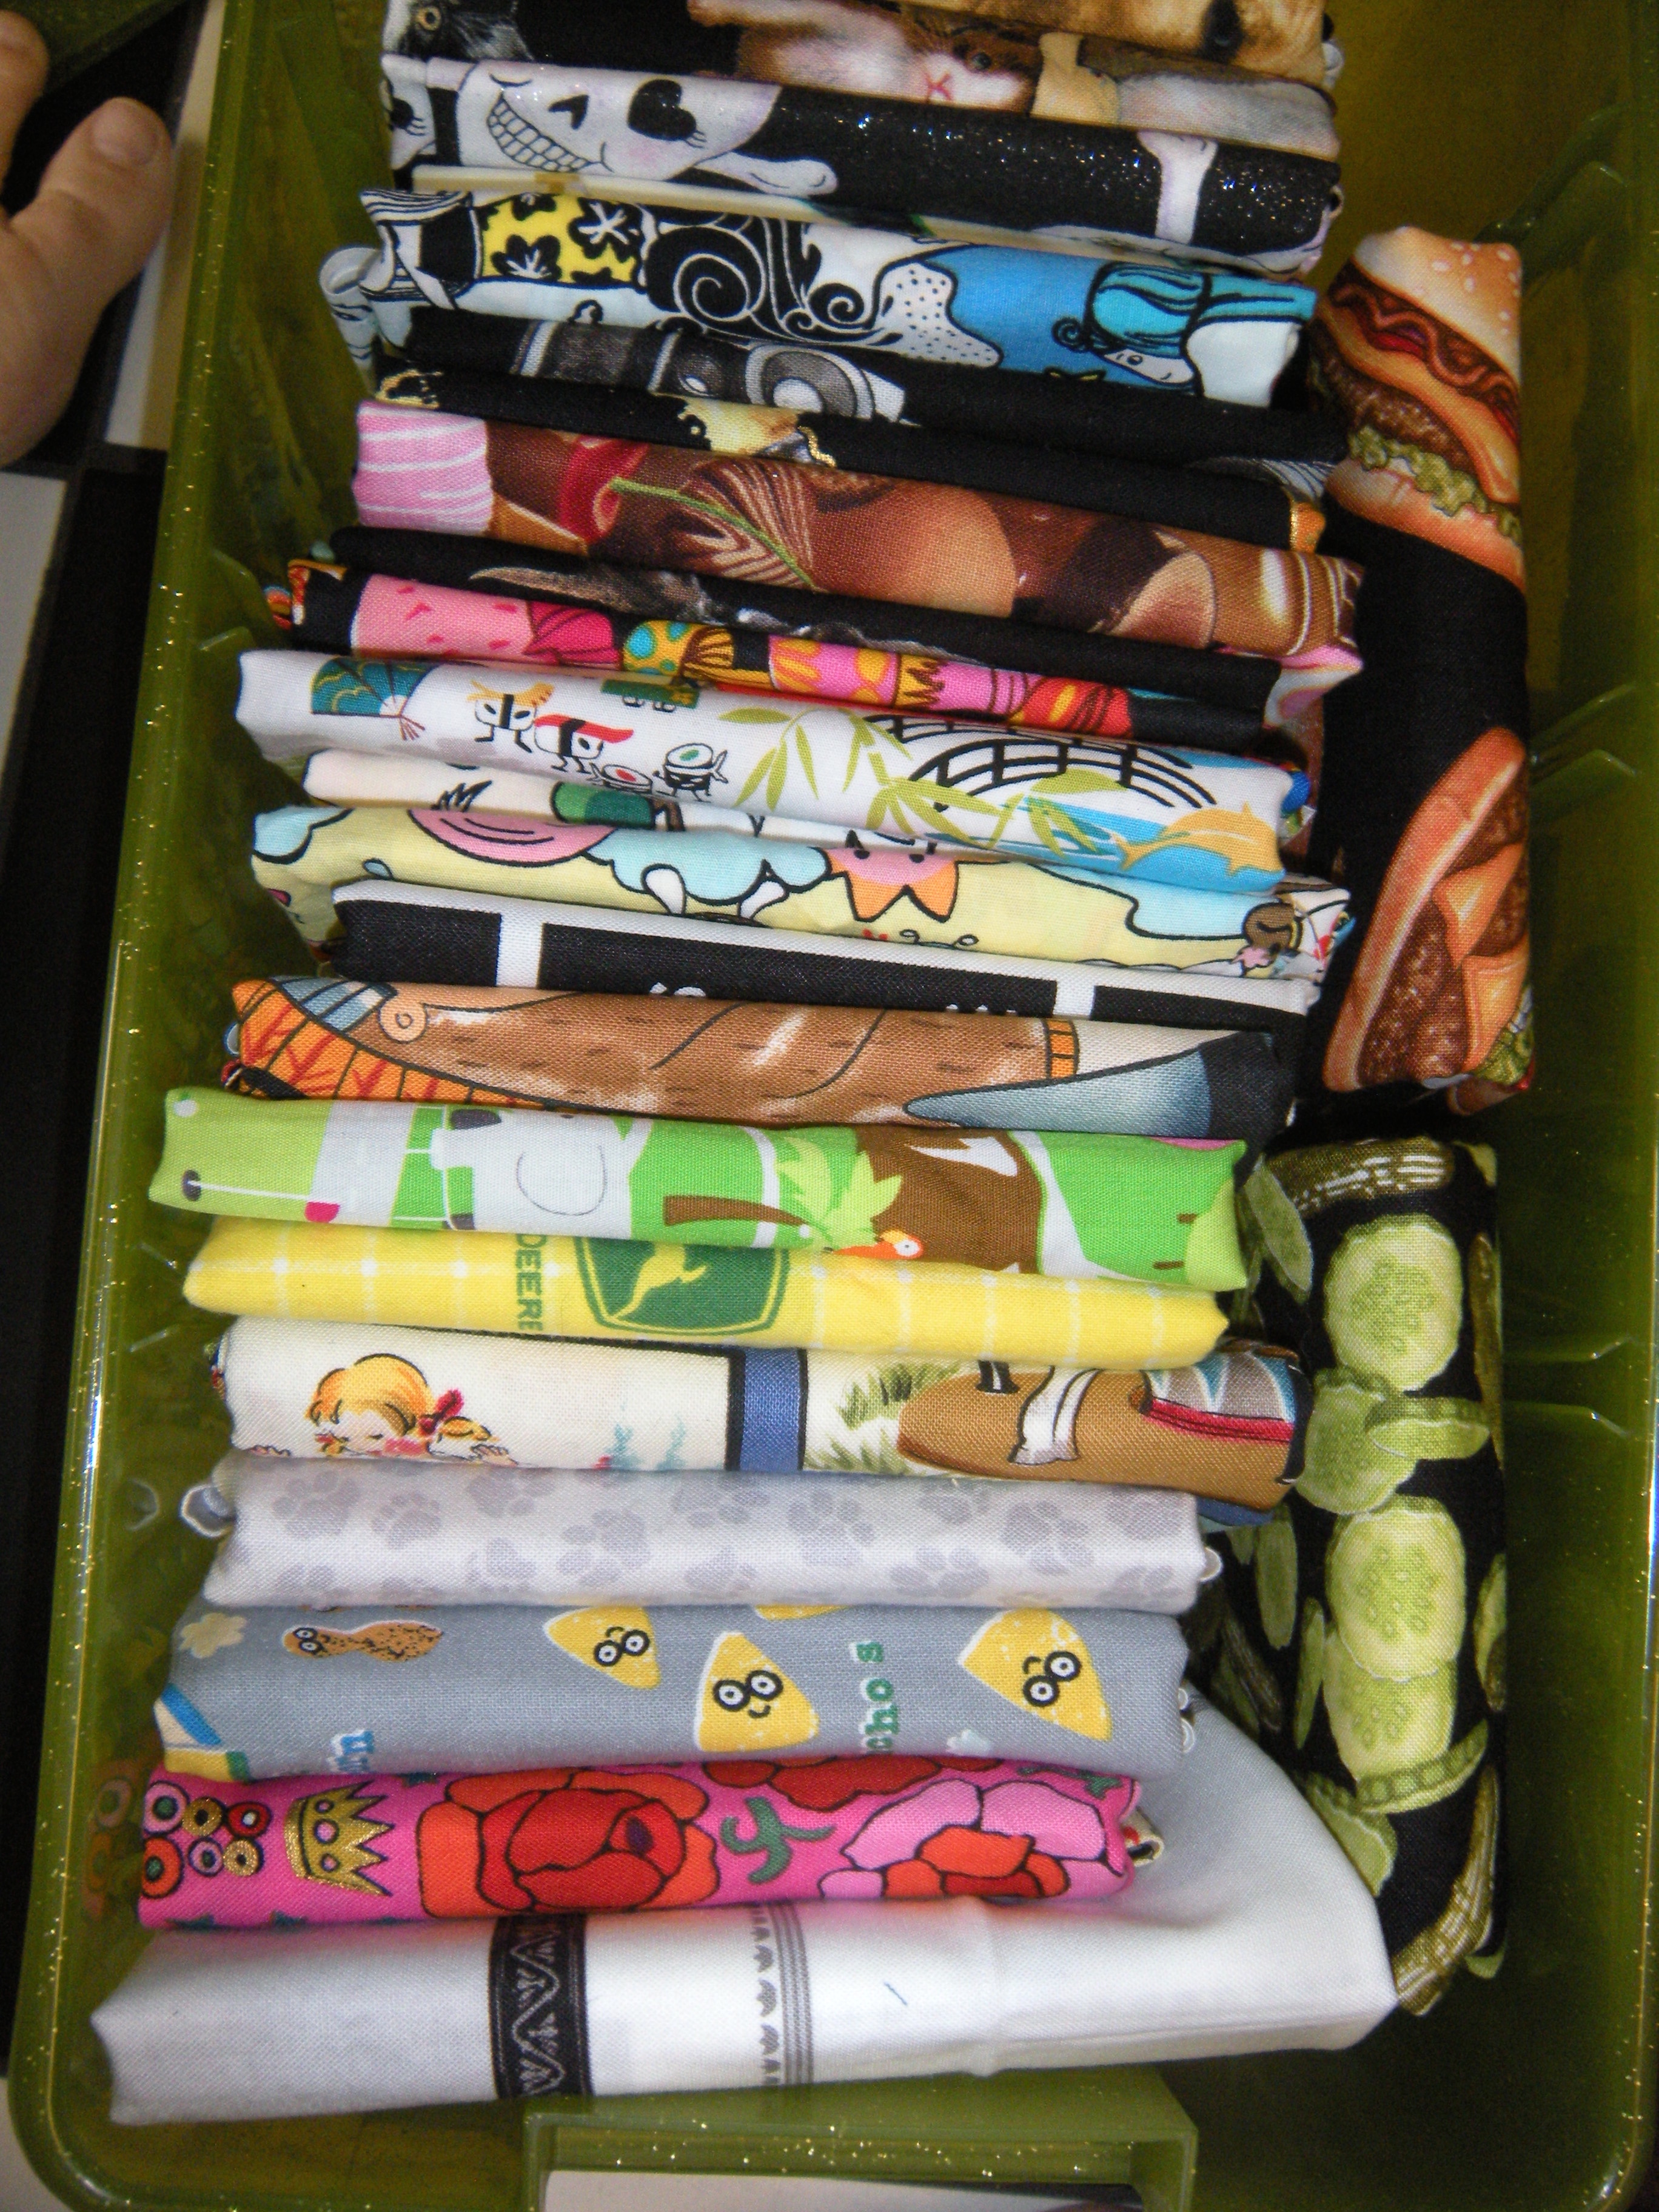
These two bins have fat quarters, half yards, and pieces under a yard.
Let’s have a show of hands, how many times have you Googled fabric storage? How many times have you oohhh-ed and aahhh-ed over fabric collections on mini-bolts? How many pictures of mini bolts have you pinned on your Fabric Storage Pinterest board?
Right here and now, I am throwing out a challenge to my cousin Kim and her new sewing room. Are YOUR fabrics on mini bolts?
This project is almost making me happy that my Destiny is in the shop. Almost. At least I can say proudly that I got something done while my machine was at the spa. I did not just curl up into a whining, little ball and watch a Downton Abbey marathon. Oh no, not me.

I really, really, REALLY want to do some sewing. At least I’ve done a few things on my wouldn’t-this-be-great-if-I-made-the-time-for-it list. Things I didn’t want to make time to do, because, well, they’re boring. Stuff like this.
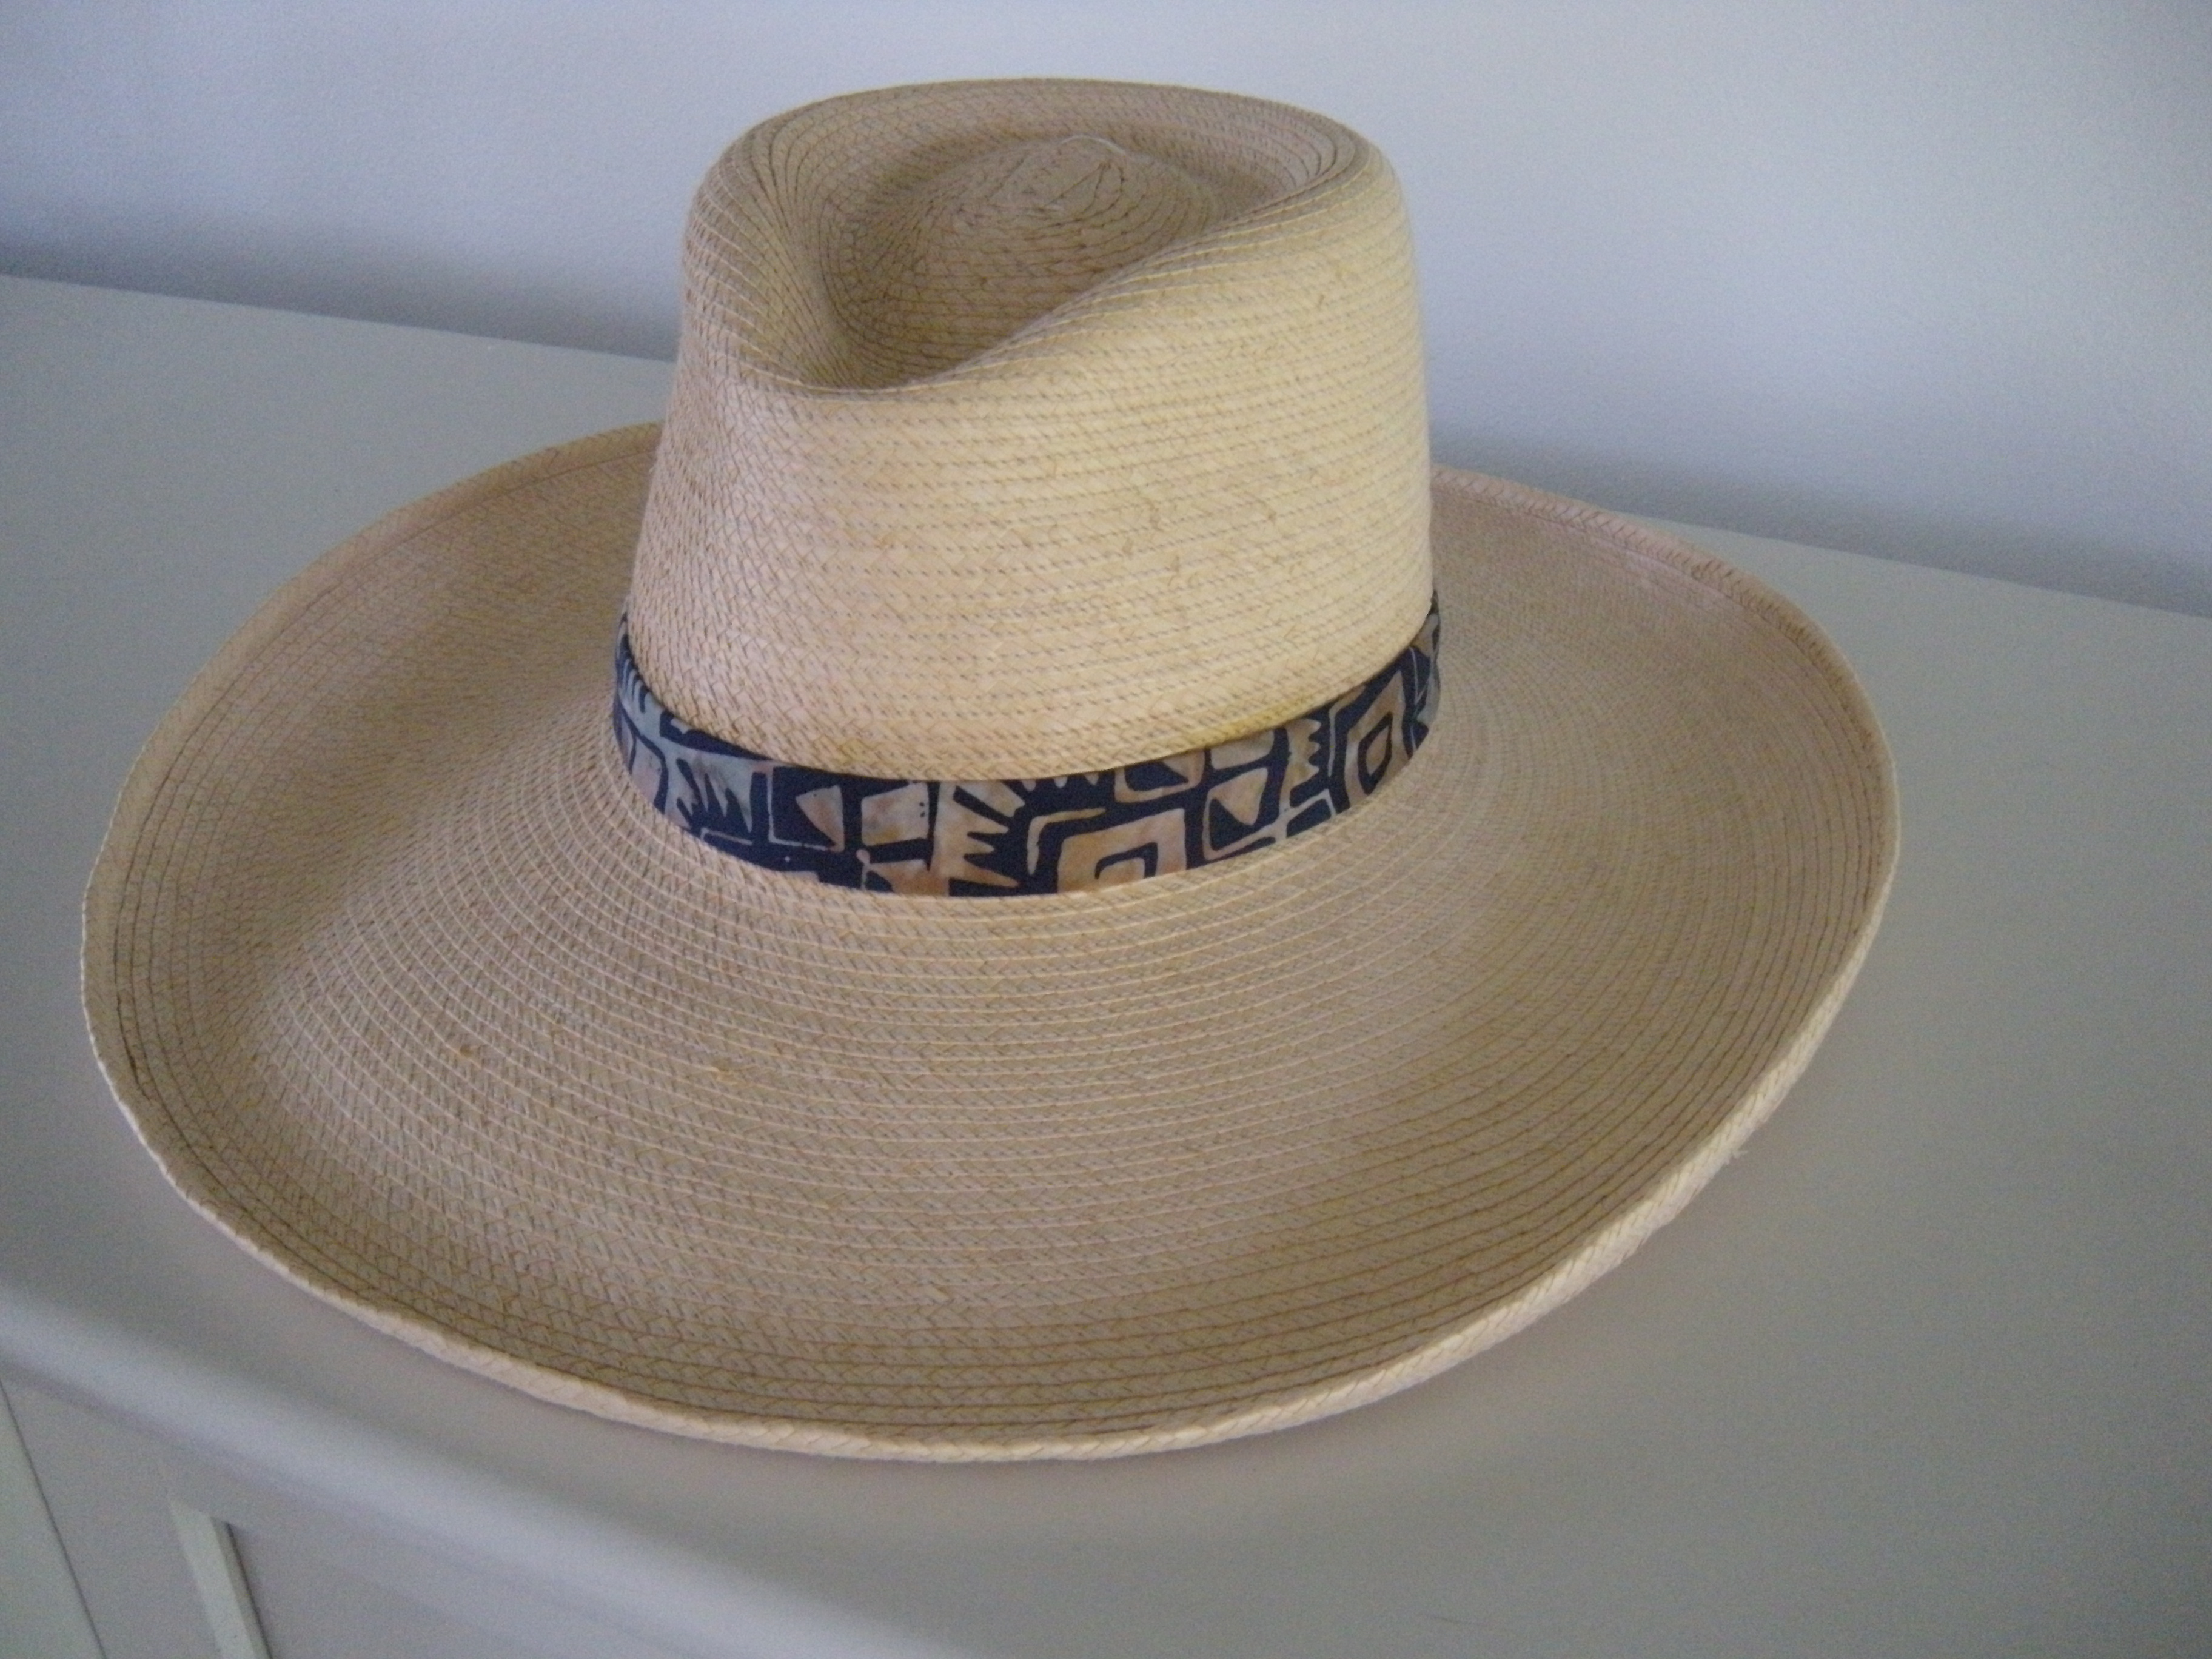
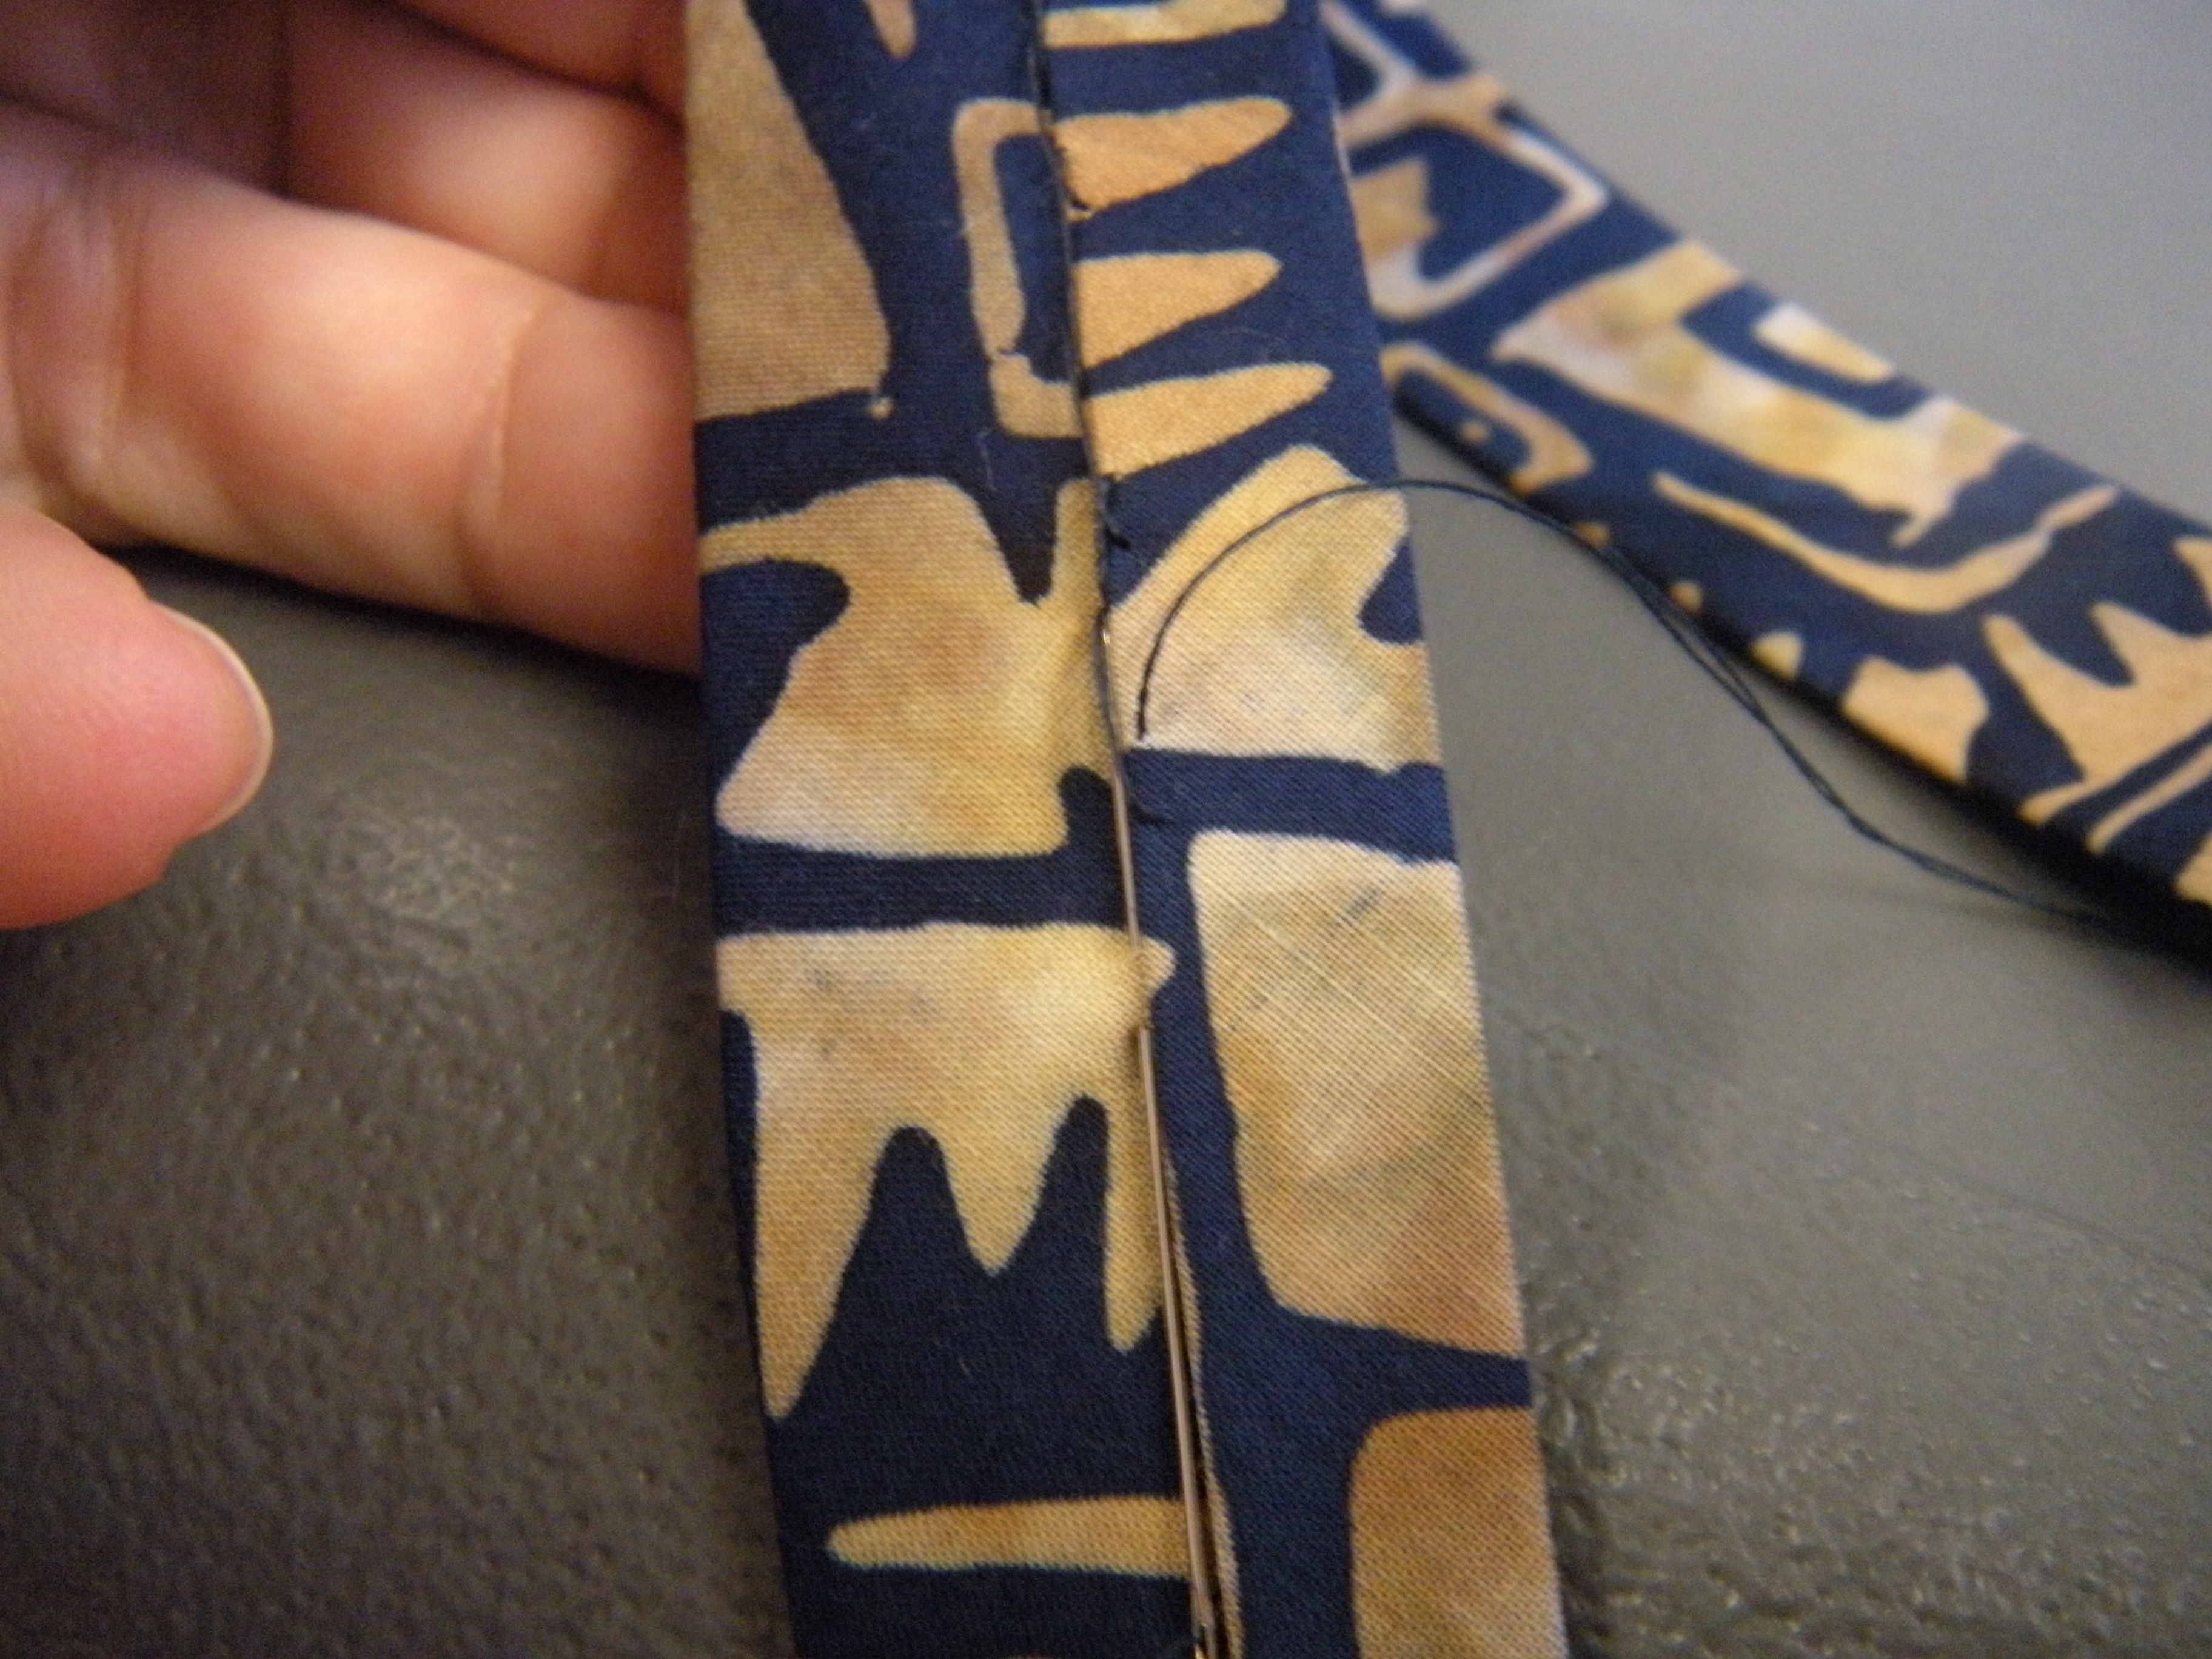
No, I didn’t make a hat. I made a hatband. Before you go all whoop-de-doo on me, I made a really NICE hatband. What a pain in the ass.


I made it like you would make a tie. I cut the batik fabric and the interfacing on the true bias. The interfacing I used is a soft, woven fusible, found while digging through an armoire. The bias allows the band to hug tight and curve onto the crown of the hat.


I chose to make the band one inch wide. I used a loose hand stitch on the reverse to seam the band.
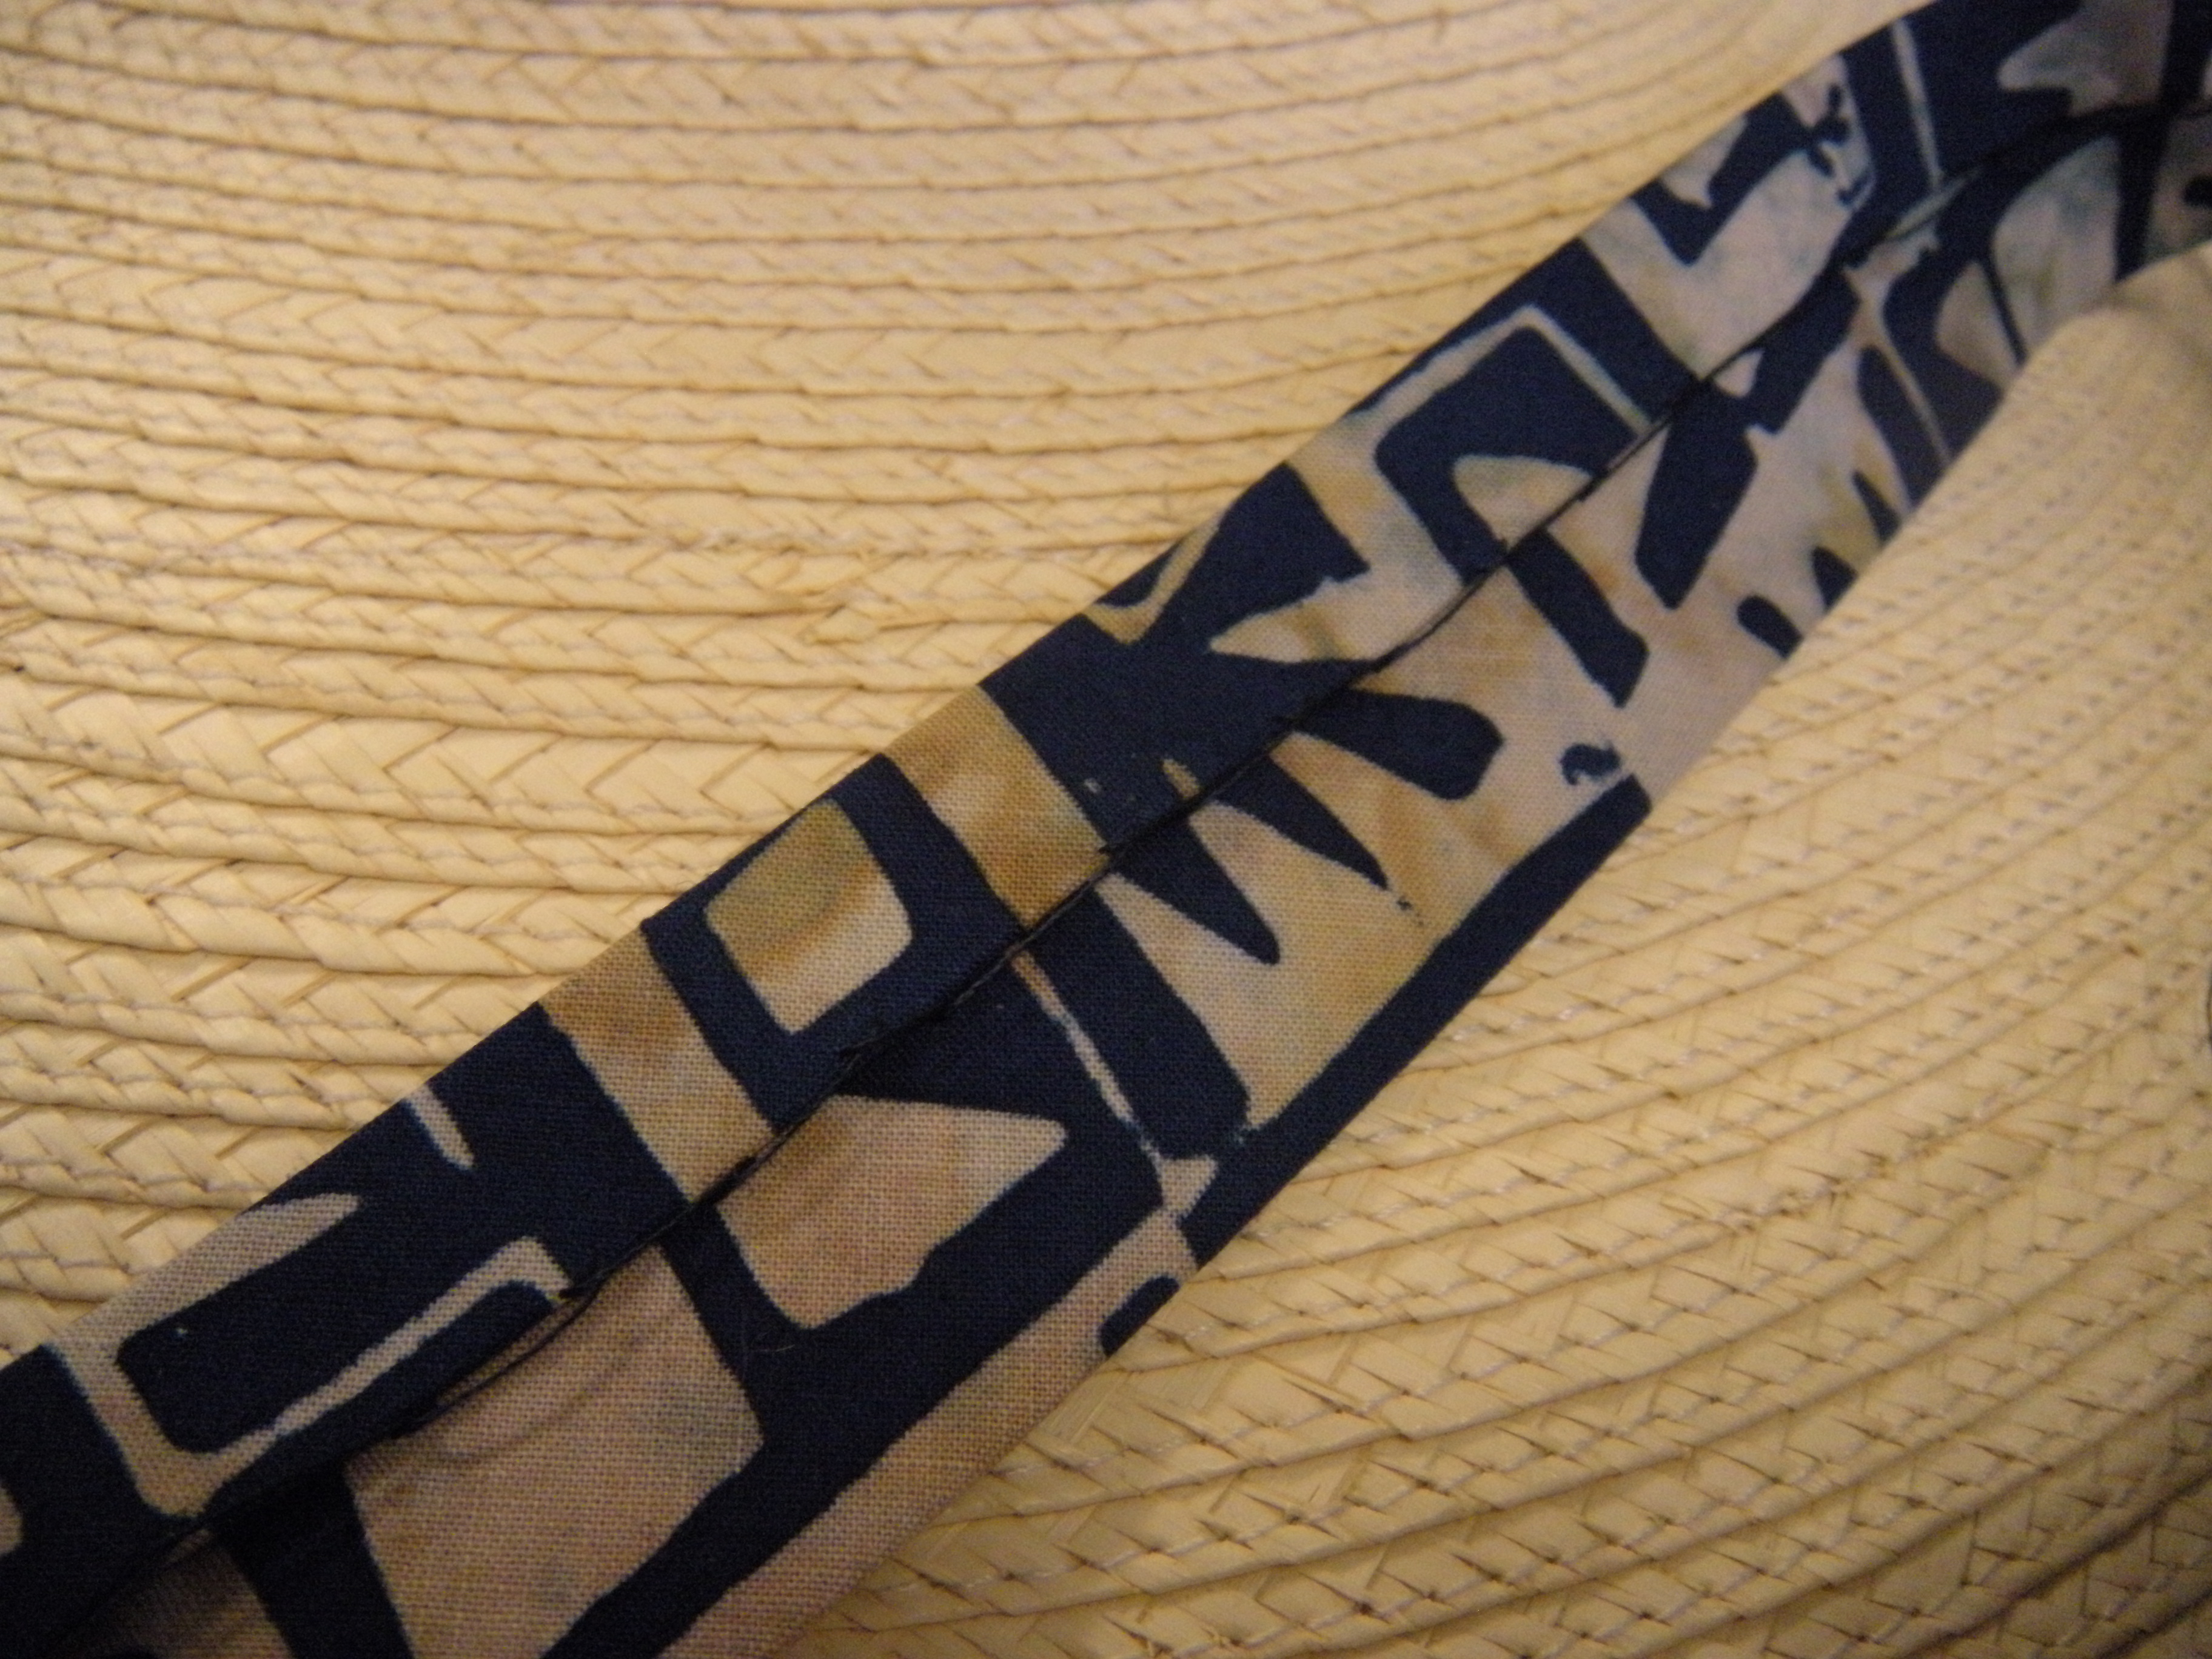
I hand stitched the band onto the hat, and voila!

A custom band for a custom hat! It has passed the tiki bar test. On Tuesday it is heading out for the golfing test.
I don’t need to be doing that again any time soon. It’s one of those futzy projects that I have been putting off, and I was running out of excuses.
I also cut out the pieces for a cute new little quilt. That was way more interesting. But you’ll just have to hold your horses, you’ll get to see it eventually.
Now go make something pretty.


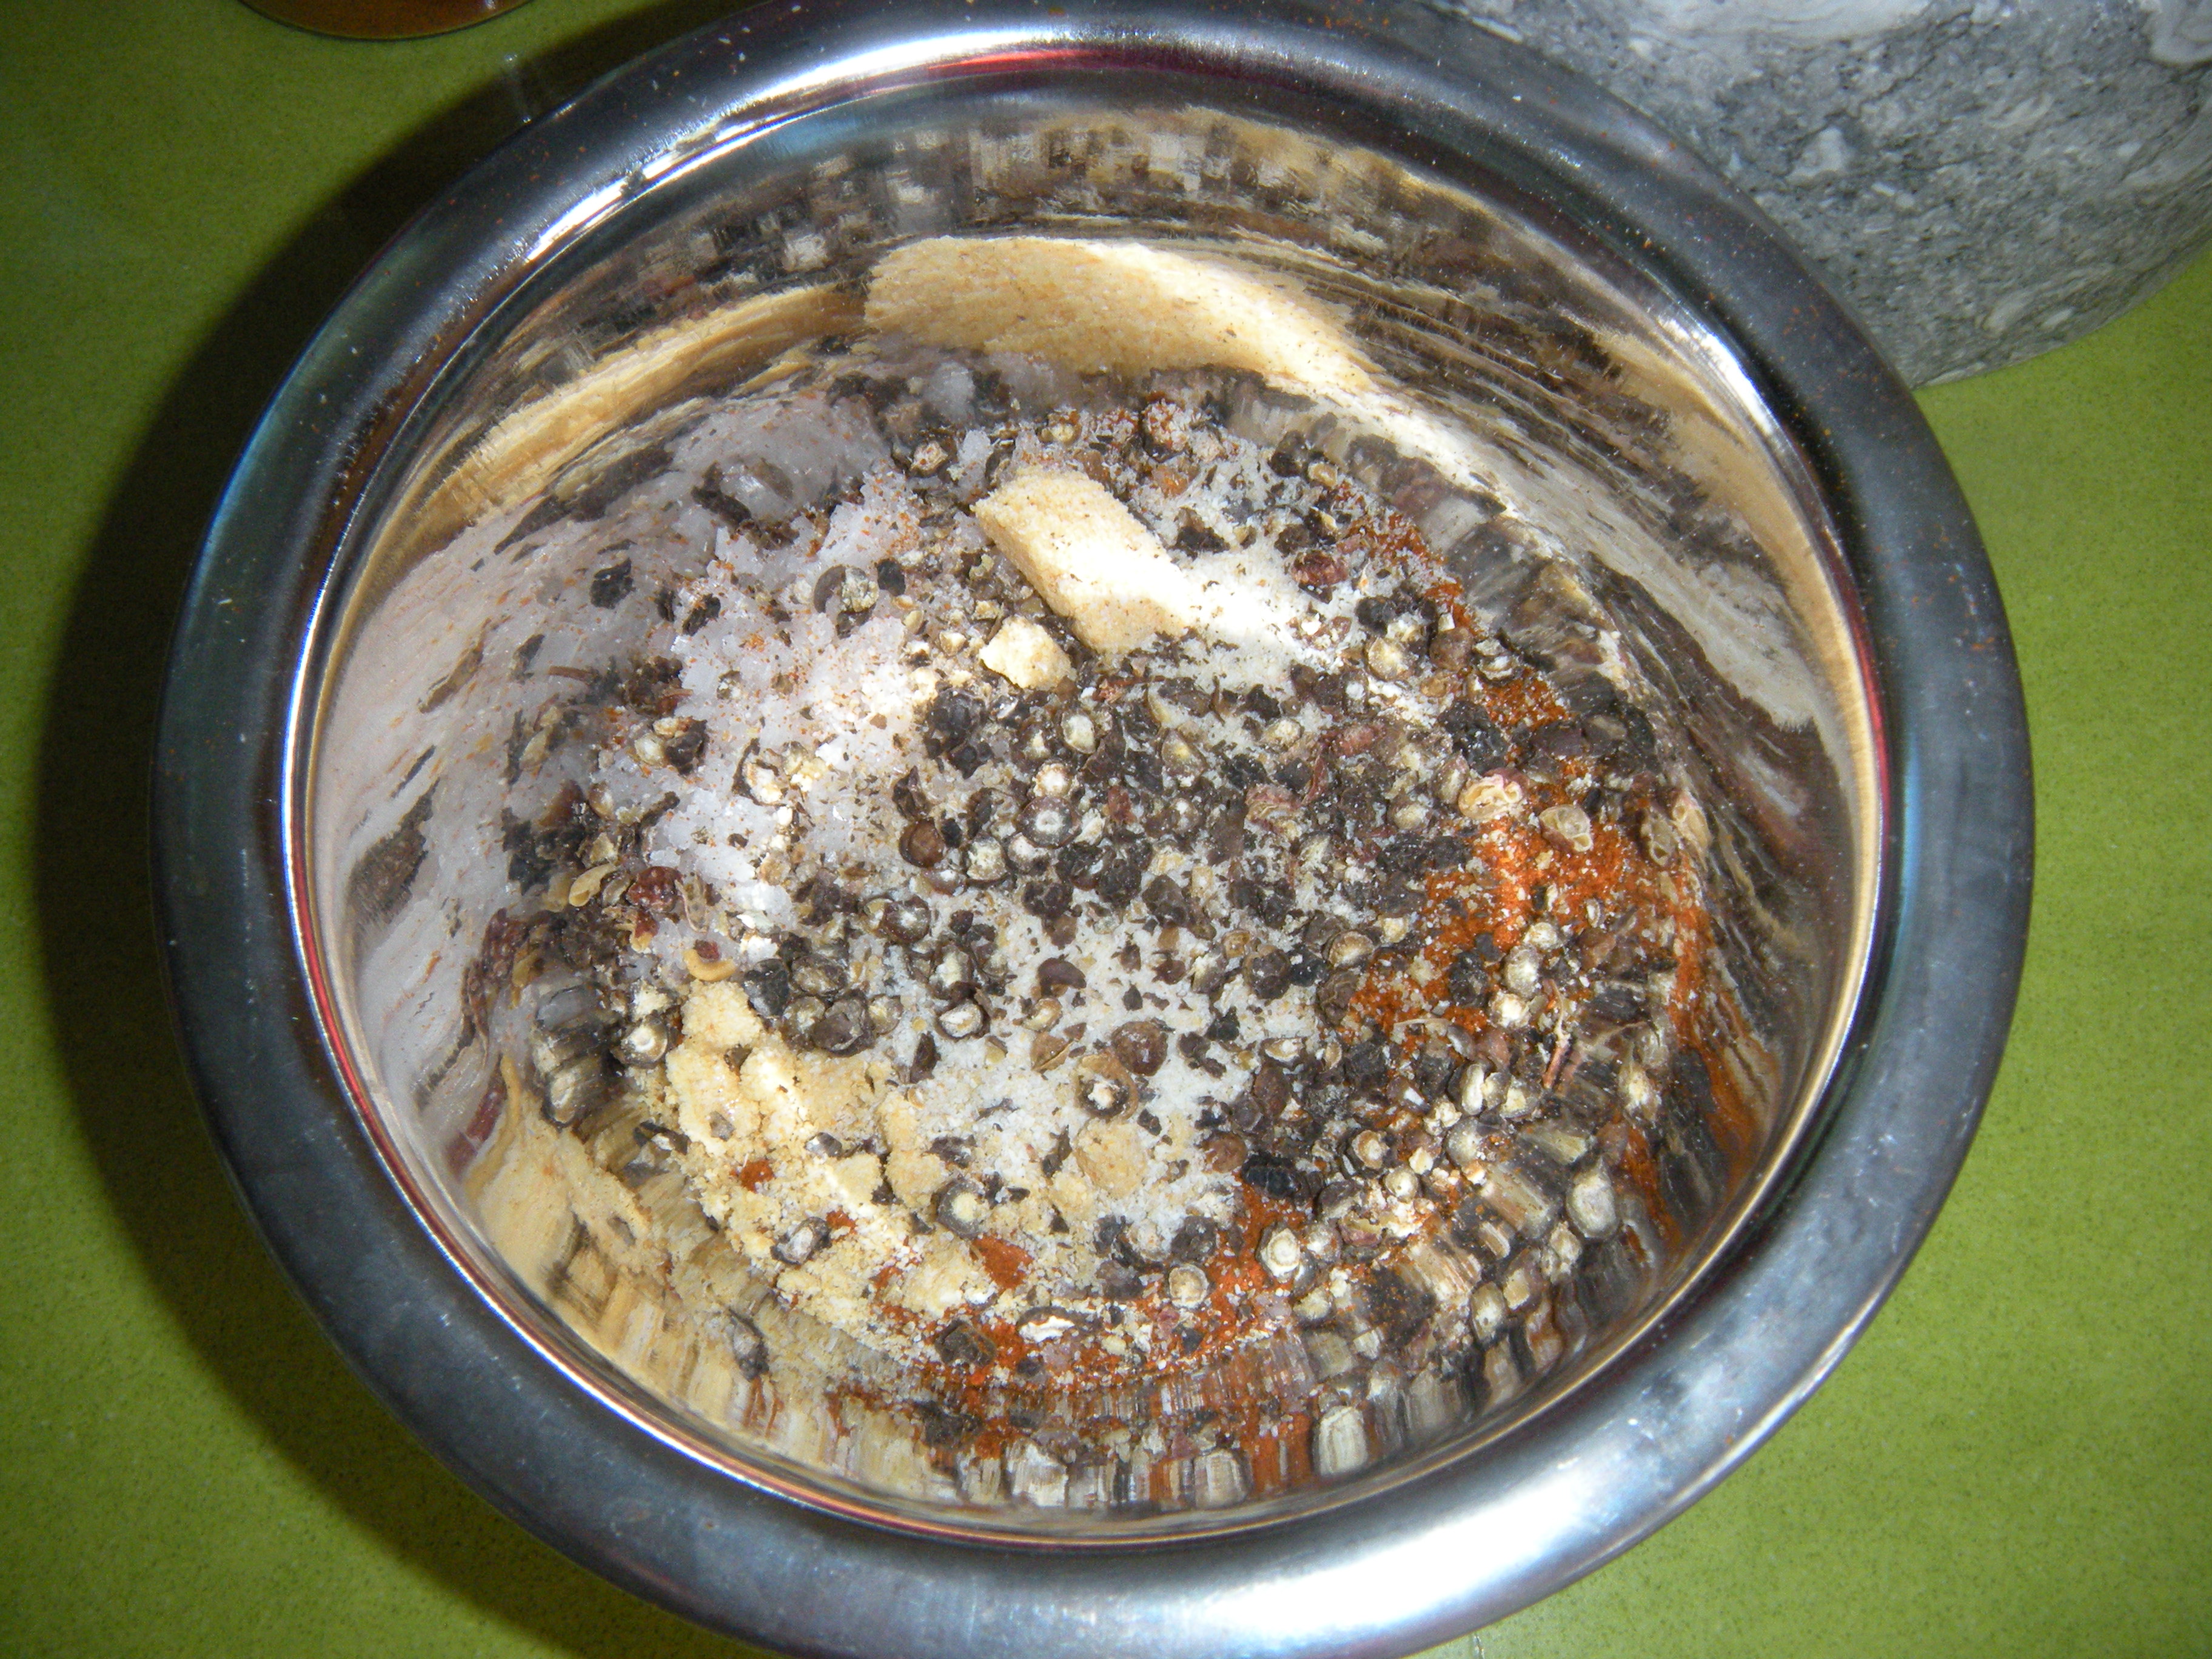
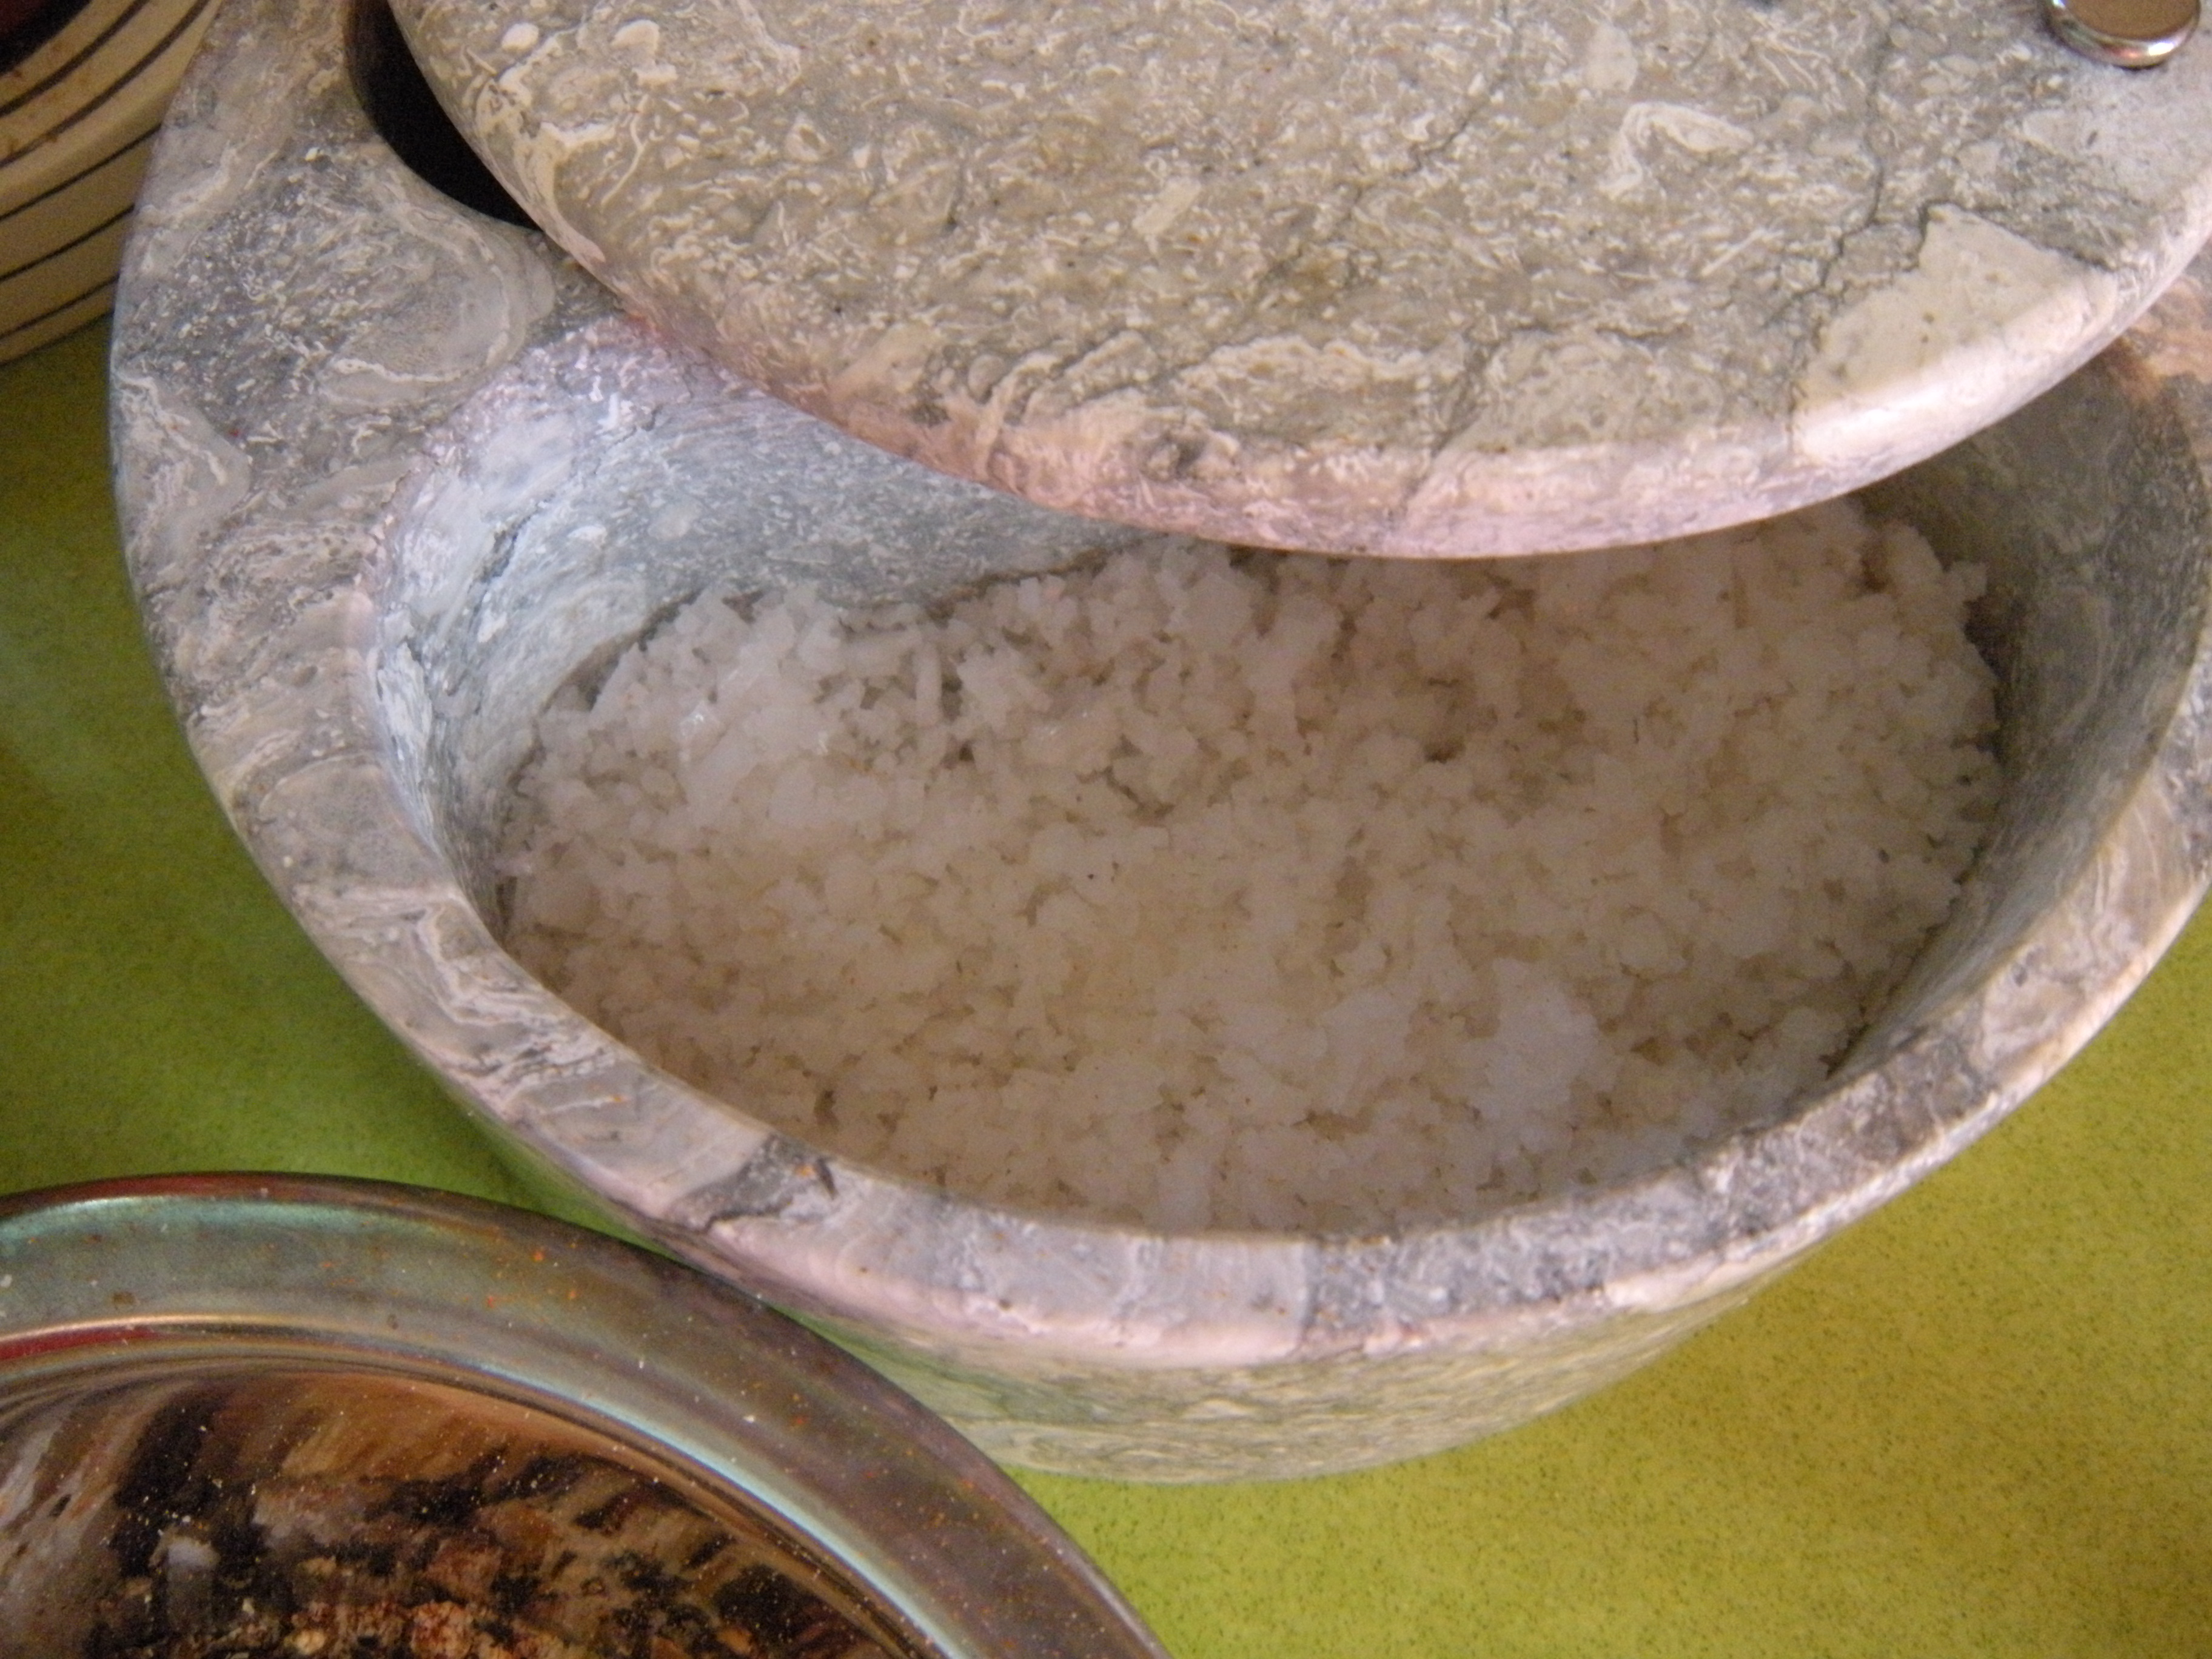
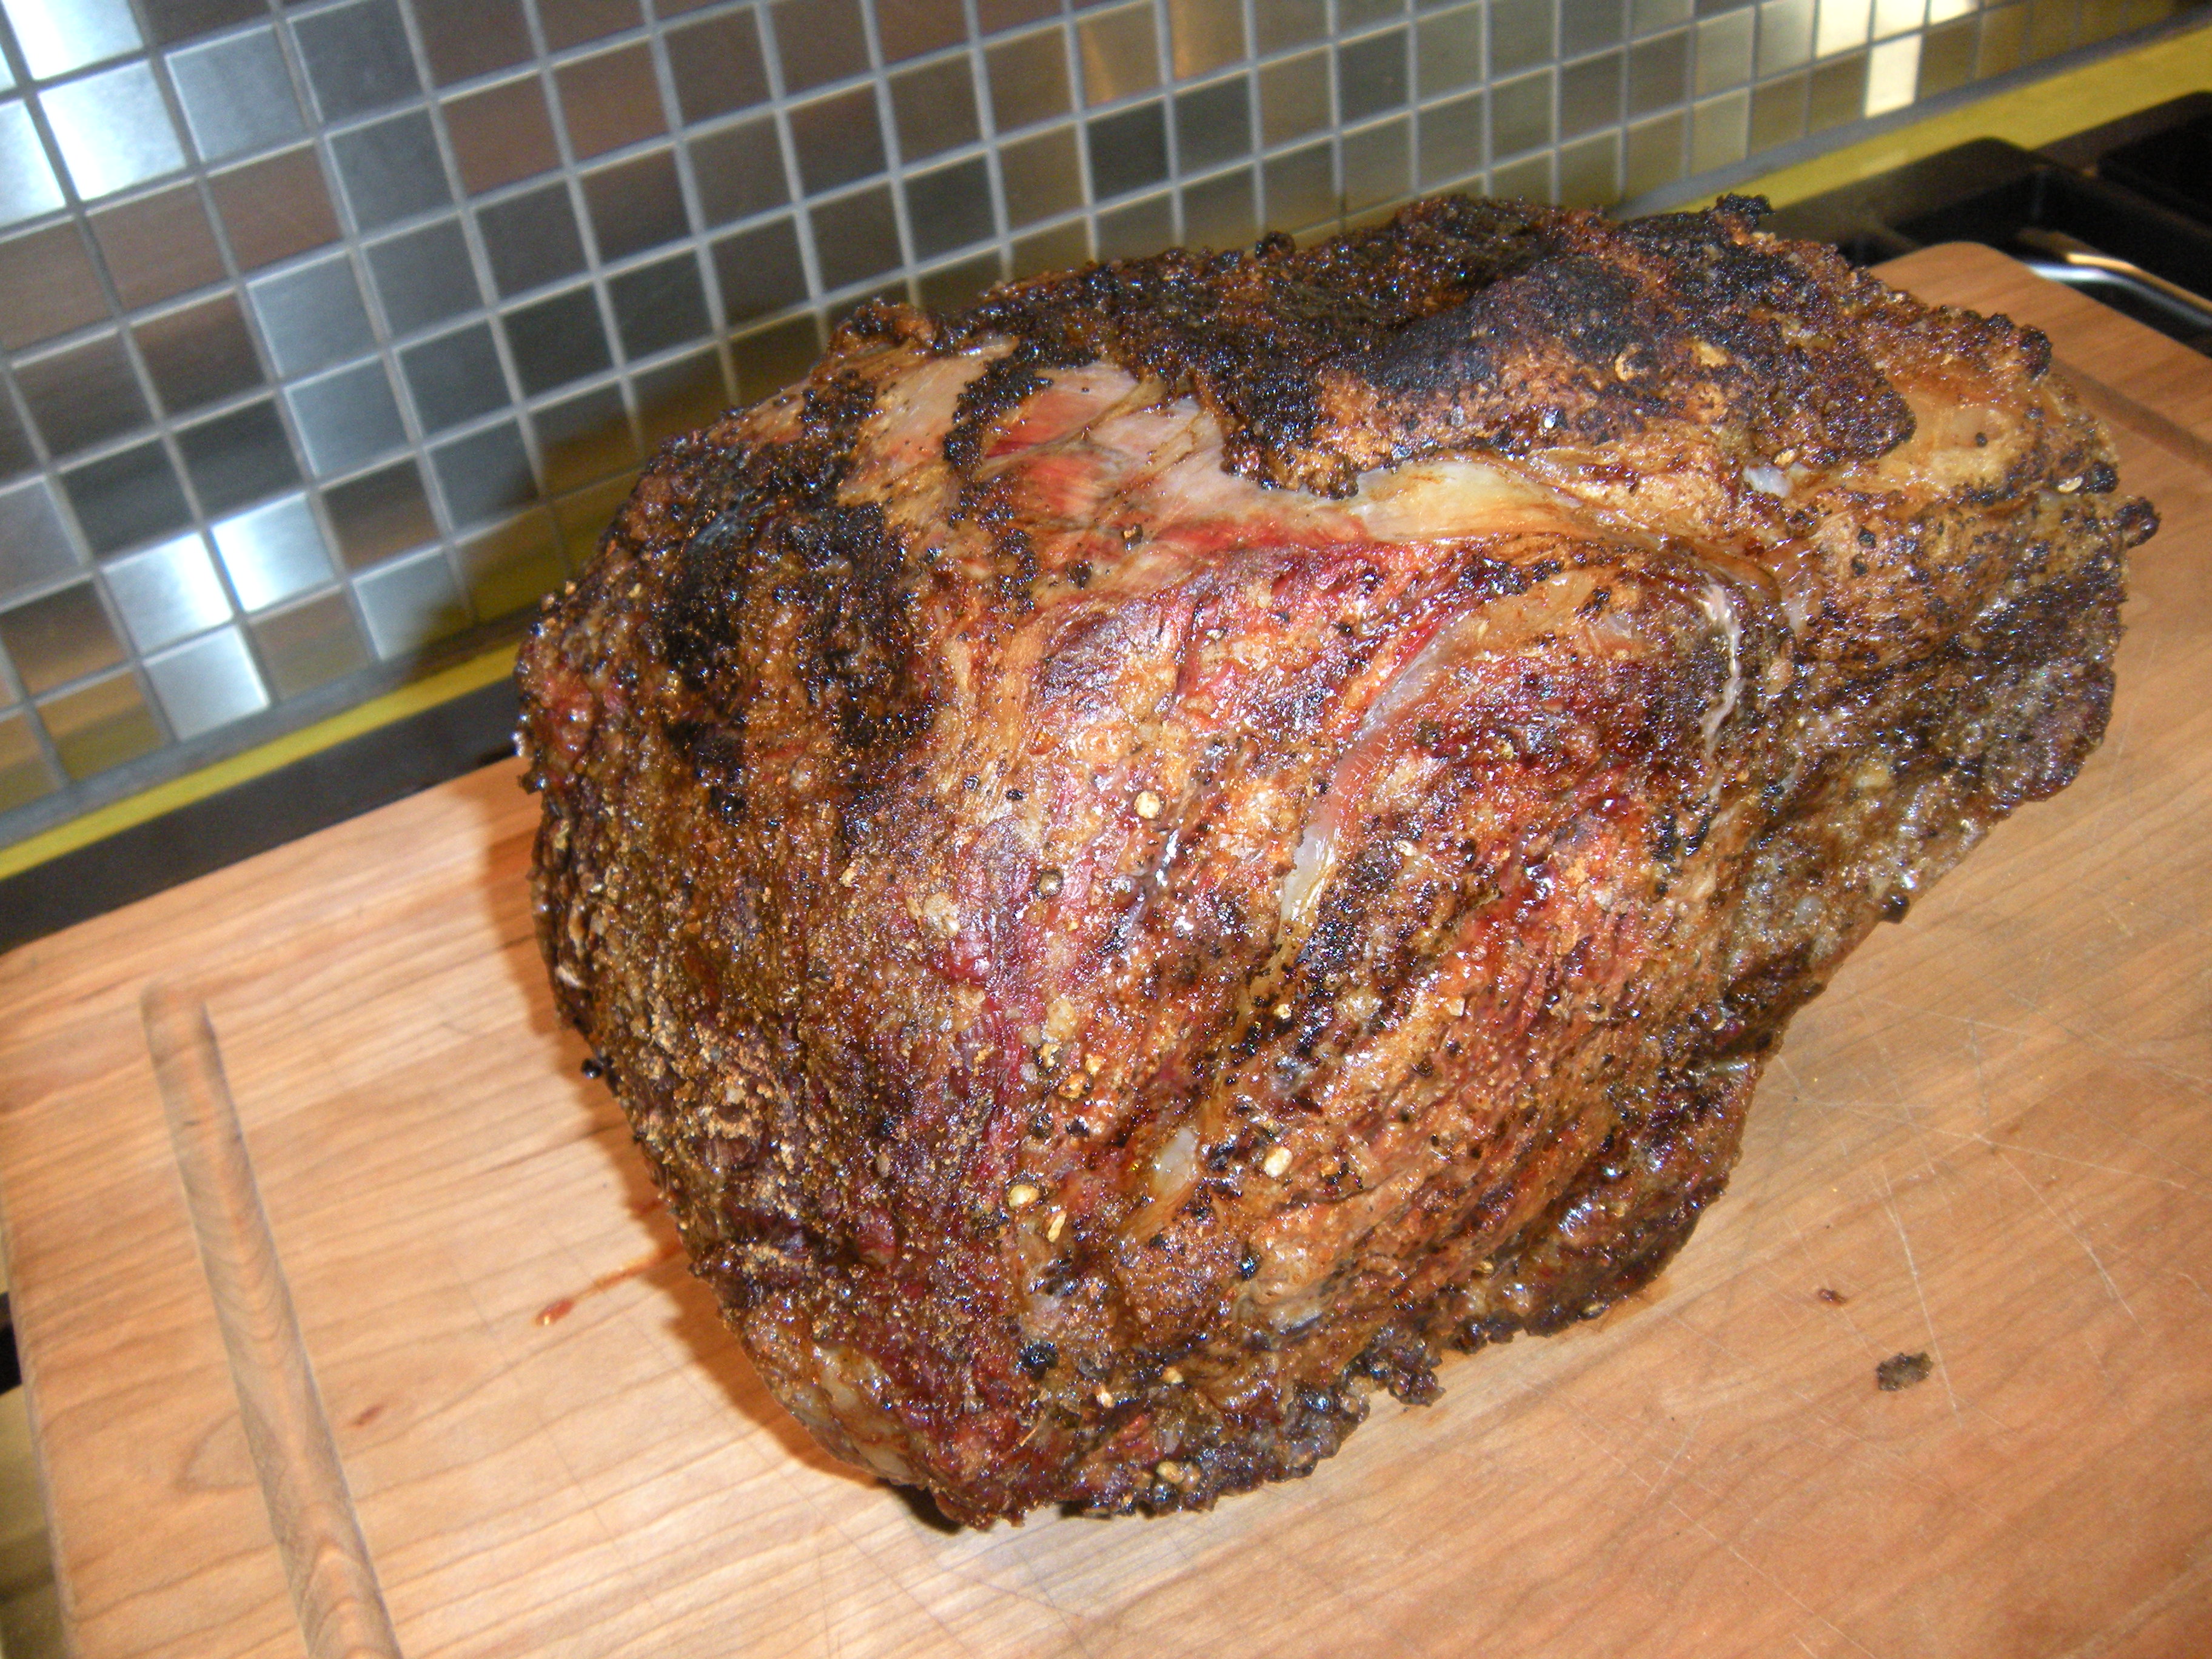
There’s something so comforting about a big chunk of beef. I had decided that this 5-1/2 pound beauty was too small for Christmas, but I’m sure glad I found it in the freezer in time for Valentine’s Day. Covered that bad boy in a dry rub made from cayenne, paprika, garlic, fresh ground pepper, and amazing, chunky Hawaiian sea salt. My daughter just loves the word chunky.

And how much fun is it to rub this stuff all over the meat? Lots. Then it’s onto the grill to sear all sides. After baking on indirect heat on the grill…

I am seriously salivating just looking at this picture. And I’m still full from dinner! Oh yeah, grilled some asparagus too!

I don’t even care that my pee is going to smell funny tomorrow. Just for good measure, I topped it off with another piece of Perfect Cheesecake.

I’m pretty sure the family is enjoying the fact that my Destiny is still in the shop. Meanies.

Don’t you just love those ah-ha! moments? I’ve been working on rosette number two from the New Hexagon Millefiore Quilt-Along. And I have bits and bobs spread all over the table next to my chair. Time to rein in my mess.
This is the Bionic Gear Bag Notions Tote, by RipStitcher. The pattern is here on Craftsy: http://www.craftsy.com/pattern/sewing/accessory/winner-bionic-gear-bag-notions-tote/93596

This has enough zipper compartments to make me do a happy dance! And I got to install four zippers! A place for everything, and everything in its’ place.

Can’t do EPP without my trusty 3M blue painters tape. And massive spools of gray thread. Here’s a small preview of some of the fabrics in my second rosette:

I may start putting this together by machine. I am very pleased with how my first rosette turned out, using invisible thread and a zig-zag stitch. If you haven’t checked out my tutorial, you can find all three parts here on my blog. https://handmadebycarolecarr.com/2015/01/23/machine-stitching-the-millefiore-quilt-tutorial-part-one-for-those-of-us-who-hand-sew-at-the-speed-of-a-turtle/

For those of you who are loving on my Shaka Hula Fork Chef Dude, here’s a gratuitous picture of his bad self.
My wonderful Destiny is still in the shop. You will never believe what I ended up doing all day yesterday. Just try to guess.
Stay crafty, my friends.


It’s so exciting when it is finally time to unfurl a cheesecake.

I think I am going to photograph every cheesecake I make for the rest of my life. It just feels like the heavens have opened up and all the angels are singing when I release that springform pan.
I swear this is the best cheesecake recipe in the world. Go here to get it: http://www.simplyrecipes.com/recipes/perfect_cheesecake/
I know I talked about this at the first of the year. But I made another one yesterday, and I am still enamored. Takes a while to make, but damn! It is seriously delicious! I didn’t change a thing, but left off the cream cheese topping. And I did make up my own fruity topping.
I couldn’t stand it last night, had to cut into it. It could have used more time in the fridge, but that’s certainly not a deal-breaker. Mmm mmm good.
Today my plan is to eat more cheesecake. And pine over my Destiny. And maybe organize my sewing room.
We should all start our day with a good laugh.
Sometimes I’m an overachiever. And sometimes I’m a hopeless procrastinator. I’m a dichotomy.

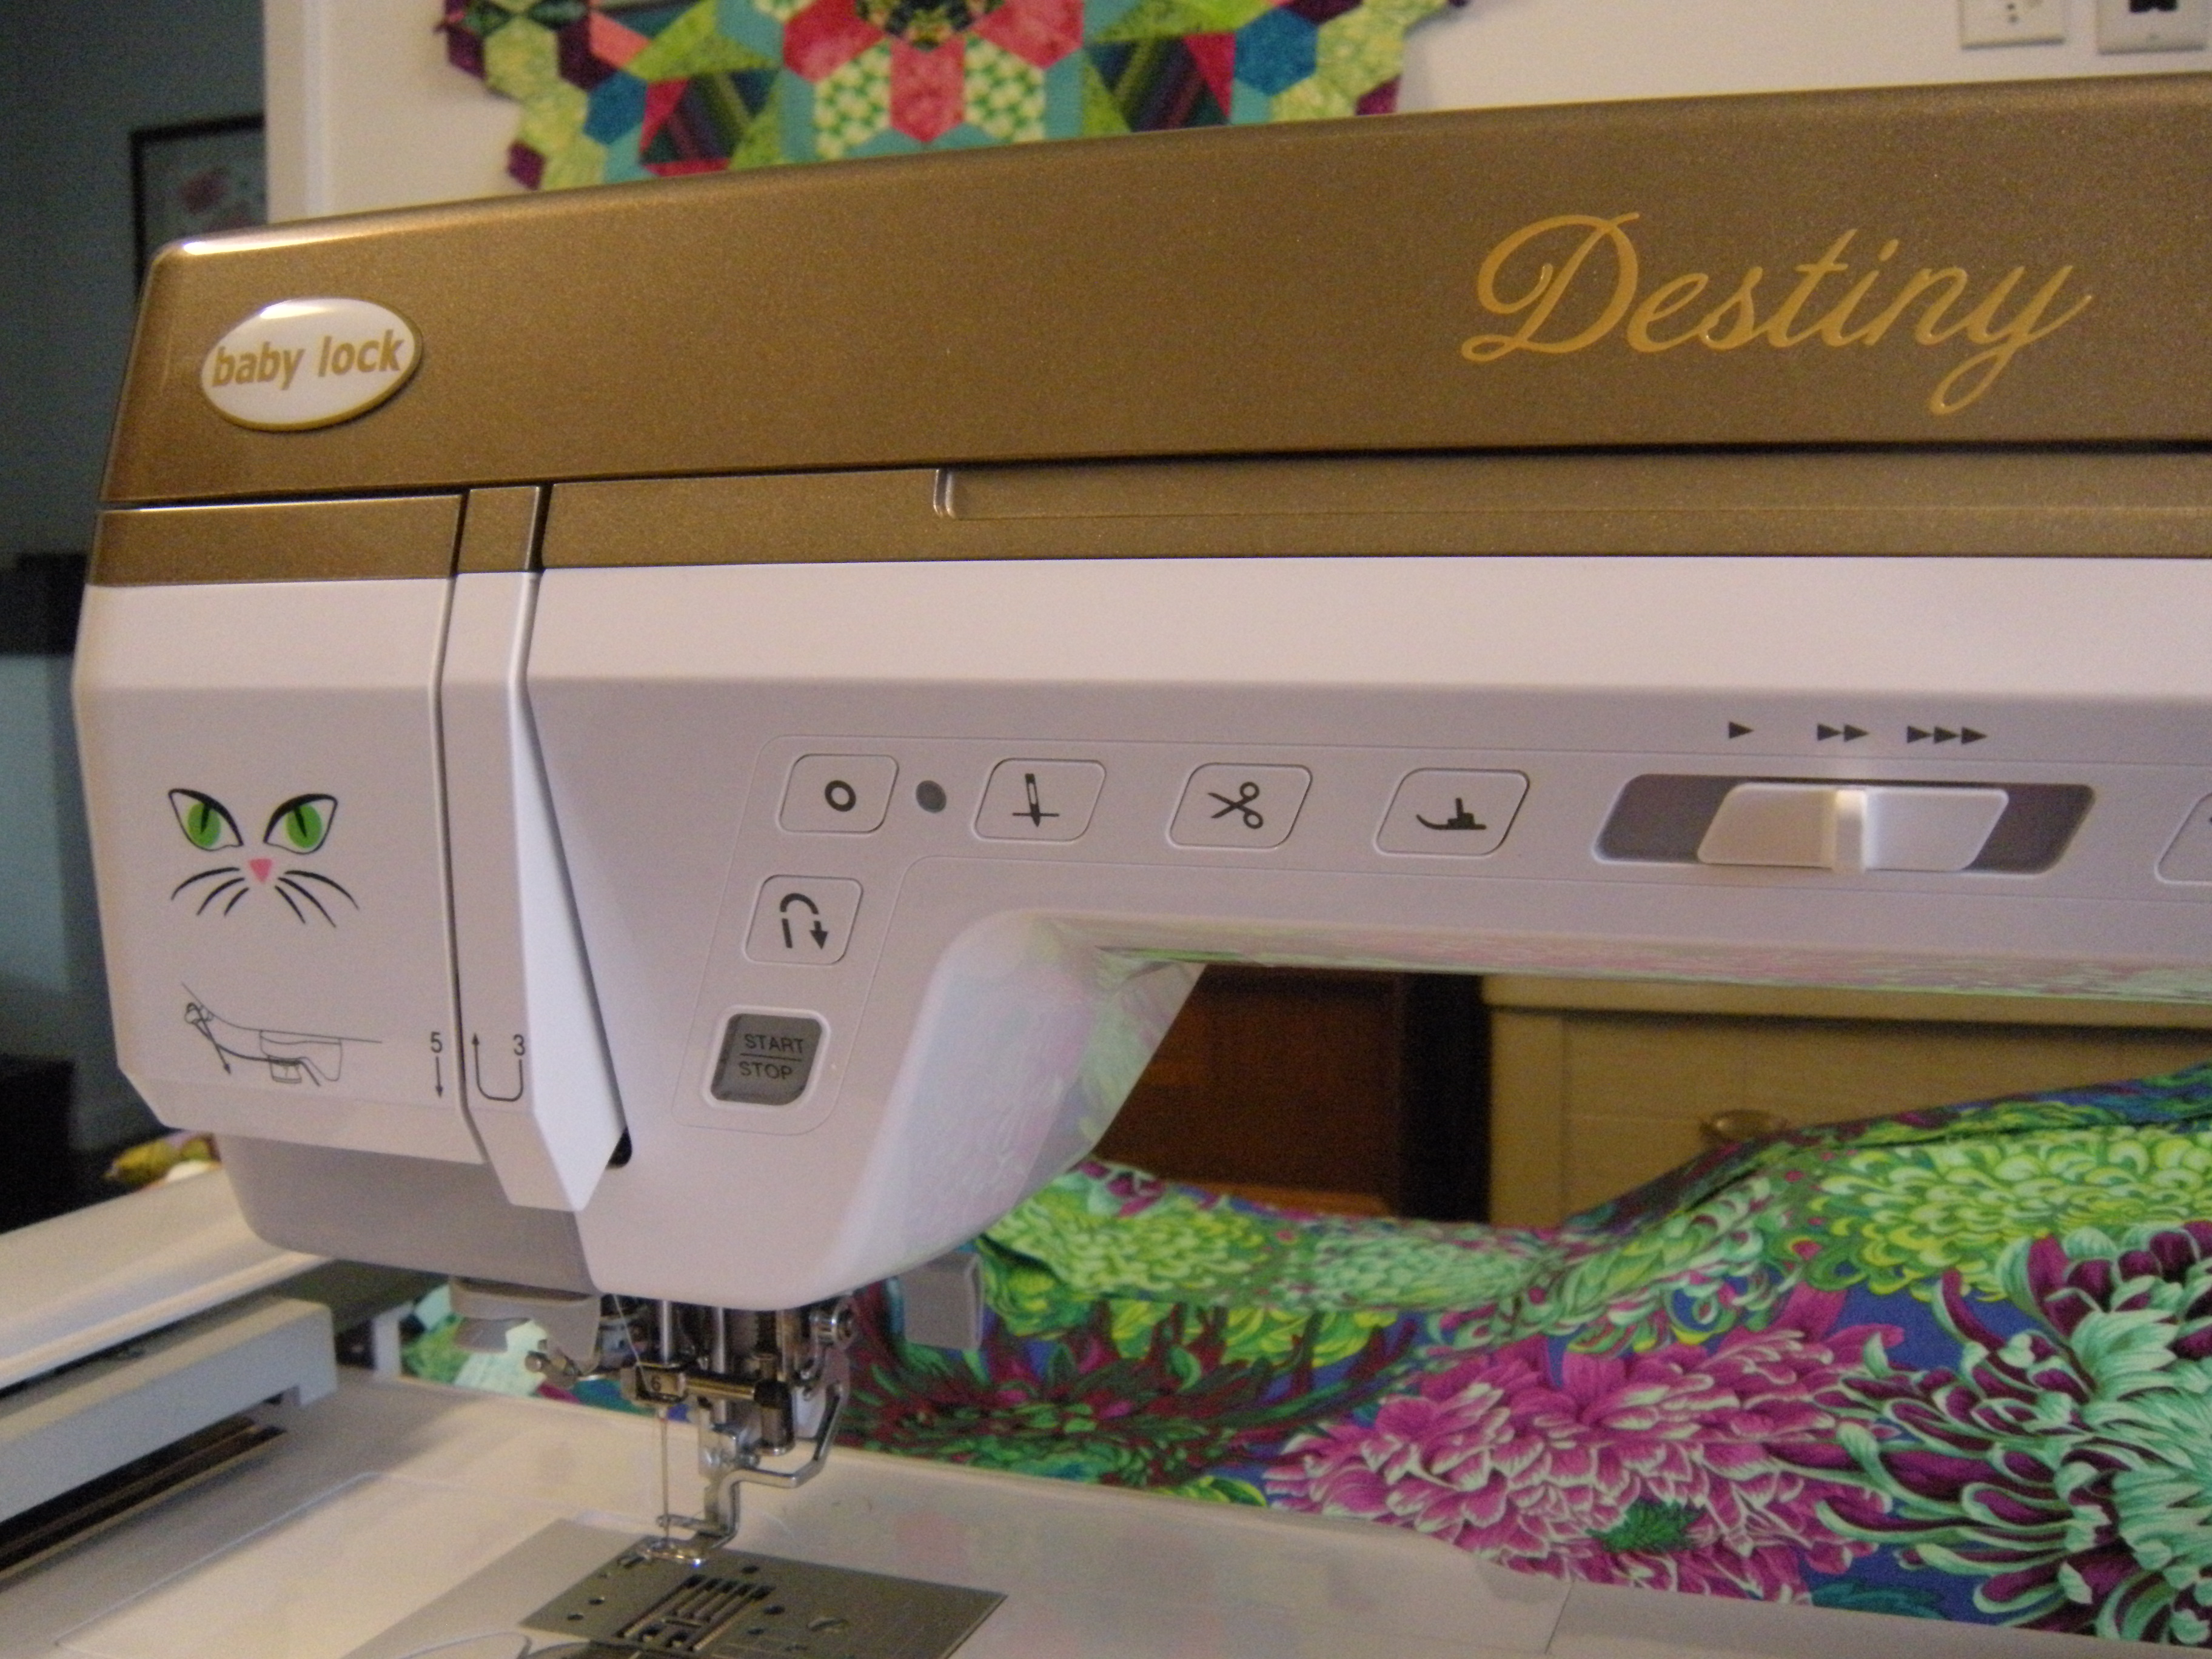
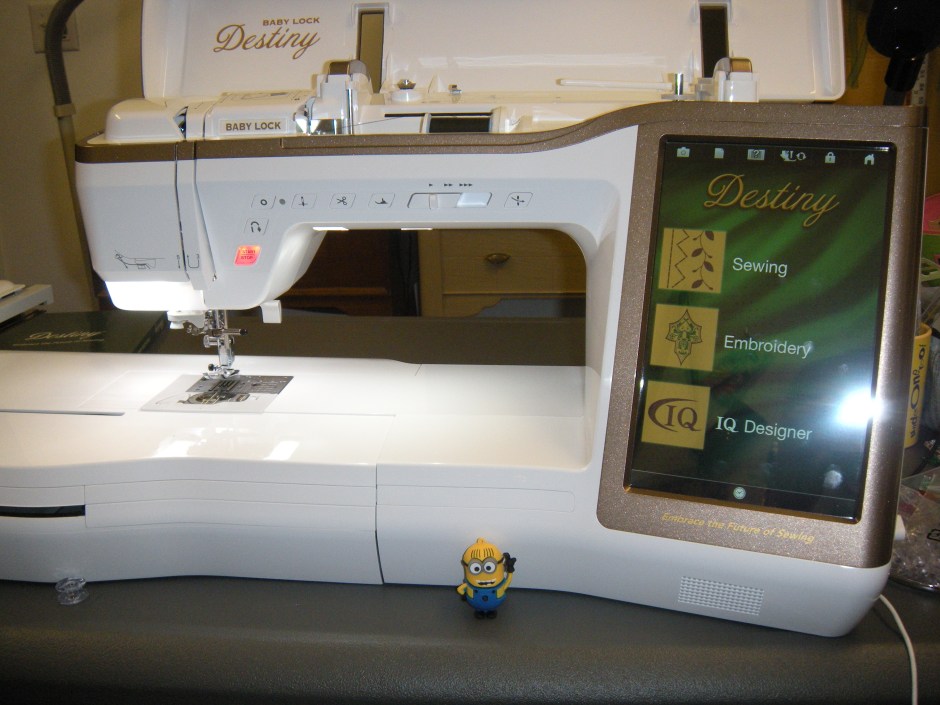
I’ve been having so much fun with my new sewing machine. Last December I got one of those fancy, new-fangled Babylock embroidery machines. I feel it was my destiny to buy a Destiny. Oh, the things it can do! Oh, the places we will go! And I was determined to get there fast.

Babylock recommends having this giant beauty serviced every one million miles (well, stitches actually.) I hit that milestone in two months. Two months. That’s fast. Somehow I outpaced everyone on the island. Even those that got their machines a couple of months before me. Not that I’m bragging, but that makes me NUMBER ONE!!!

The downside of being number one…my machine is in the shop getting a tune-up. I’m showing the symptoms of withdrawal. It’s not pretty.
On the bright side of this dilemma, I’m heading to the grocery store to buy the ingredients for a cheesecake. The best cheesecake in the world. So tomorrow, you’re going to have to suffer through pictures of today’s baking challenge.
I also have very noble intentions of organizing my sewing room.
I crack myself up.

Have I mentioned how much I like zippers? I even like installing zippers. I think that makes me a weirdo.
If you haven’t been hanging around the notions aisle at the fabric shop like me, you might not know that there are differences in the zippers that are put in garments and the ones typically used in bags. Check this out:

On the left is an all-purpose, regular old zipper. On the right is a handbag zipper. I made sure to use the same color for both examples, as I wouldn’t want you to favor one just for the color of it’s tape.
Left Zipper is the one you would typically find at the fabric store, lined up like little soldiers. Right Zipper probably isn’t at your local store. Check out the differences.

I’m sure you noticed the difference in the zipper tapes right away. The tape is the part of the zipper that gets sewn into whatever you’re making. The total width of Left Zipper is just under one inch. The width of Right Zipper is about 1-1/4 inch. The tape is wider and the teeth are wider.

What a difference in the zipper pulls! Left Zipper comes in at about 3/4 inch, and Right Zipper at about twice that length! Makes sense, doesn’t it? Think of how often you use the zipper pull on a handbag.
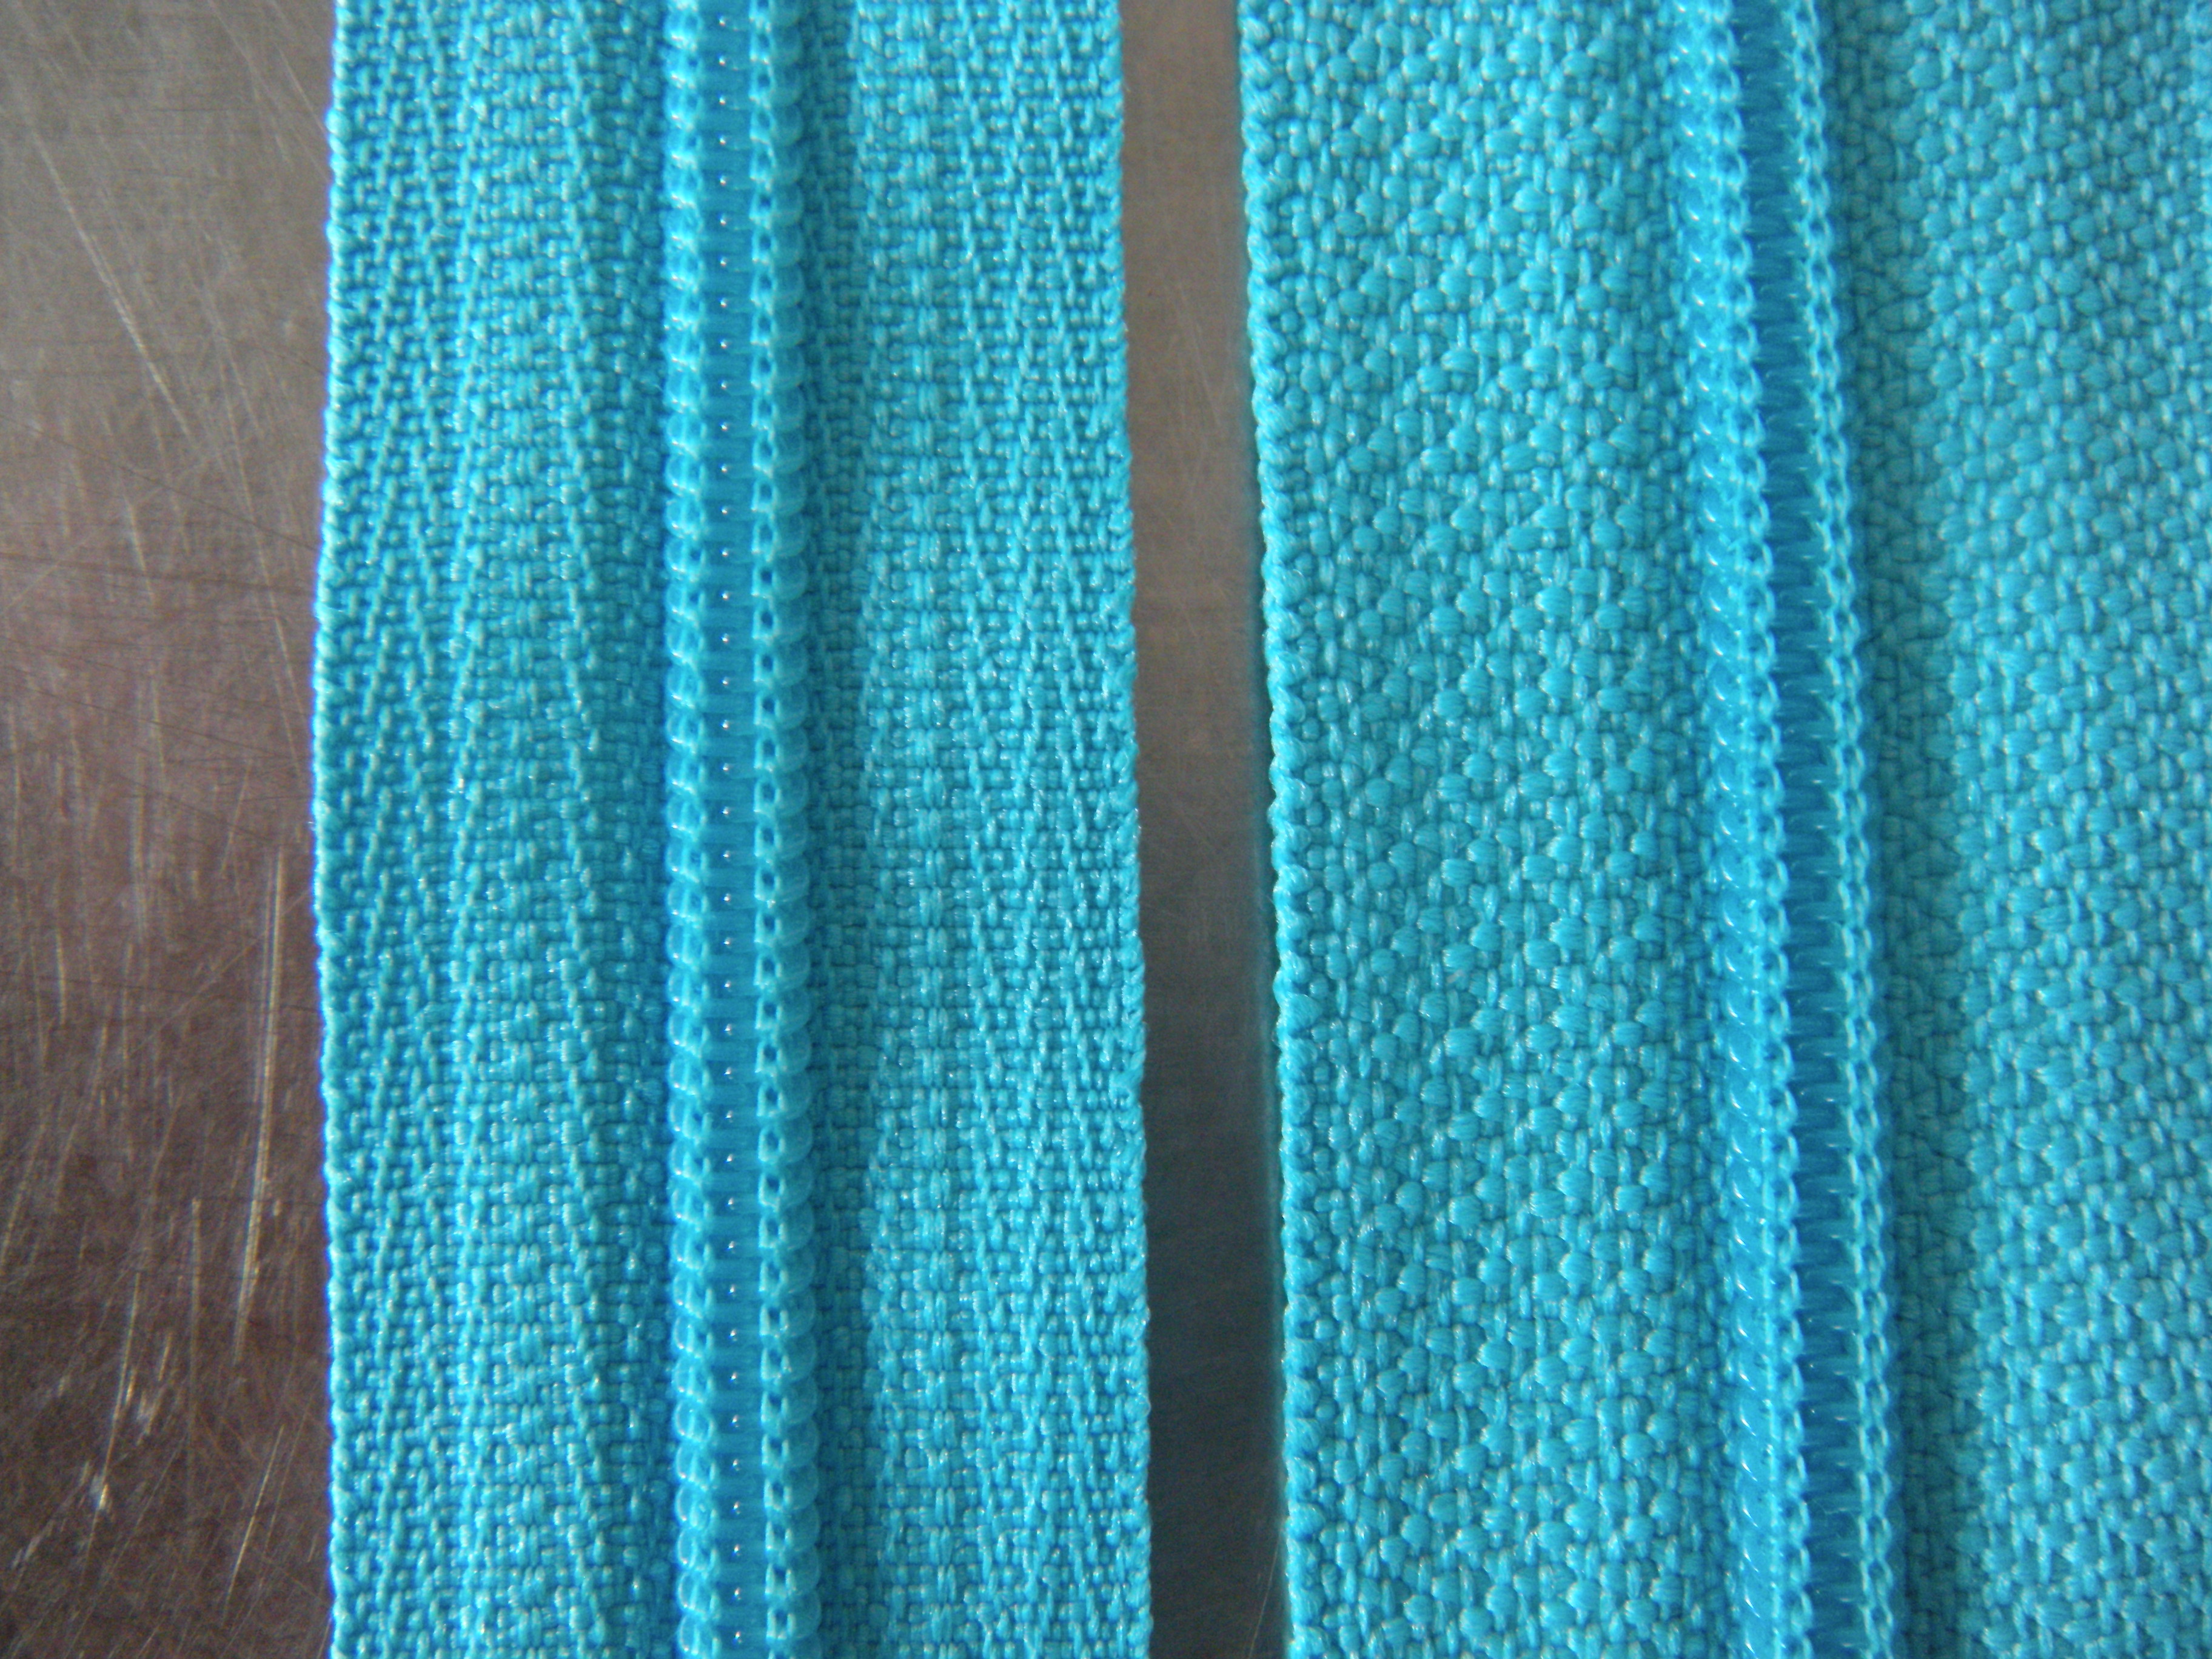
Look at the tape on these. Can you tell from the picture that the Right Zipper has a heavier, more substantial tape? Truth, not opinion.
Left Zipper is the one that you would usually find in garments. It is more flexible and lighter. Easier to hide or blend in. Small zipper pull can be less conspicuous. Right Zipper is slightly less flexible. The wider tape makes is ideal to put into bulkier applications. The wider teeth hold up to more stress. The big pull is easier to grab, especially when you use the zipper lots…like in a handbag. Of course you can use Left Zipper in a bag! And you can use Right Zipper in a garment, but I wouldn’t. It all comes down to preference, my friends. There is no wrong, only what you like.
For most of us, it takes a little more work to get our hands on Right Zipper. I buy all of my on Etsy at Zipperisland. There are several good vendors on Etsy that sell high-quality, YKK zippers in bulk. I keep a good supply on hand, so when I get a whim to make a new bag, I can whip out a matching zipper. And remember, you can always shorten a zipper! Just bar tack a new zipper stop at the length you need and cut off the excess.
Both Left Zipper and Right Zipper objected to the idea of including that roguish relative, the Invisible Zipper, into this comparison. But look back at the first picture. Invisible Zipper snuck in on the right side of the picture. You just can’t see him because, well, he’s invisible.
You’re welcome.

Look at how nice my purse looks in here!
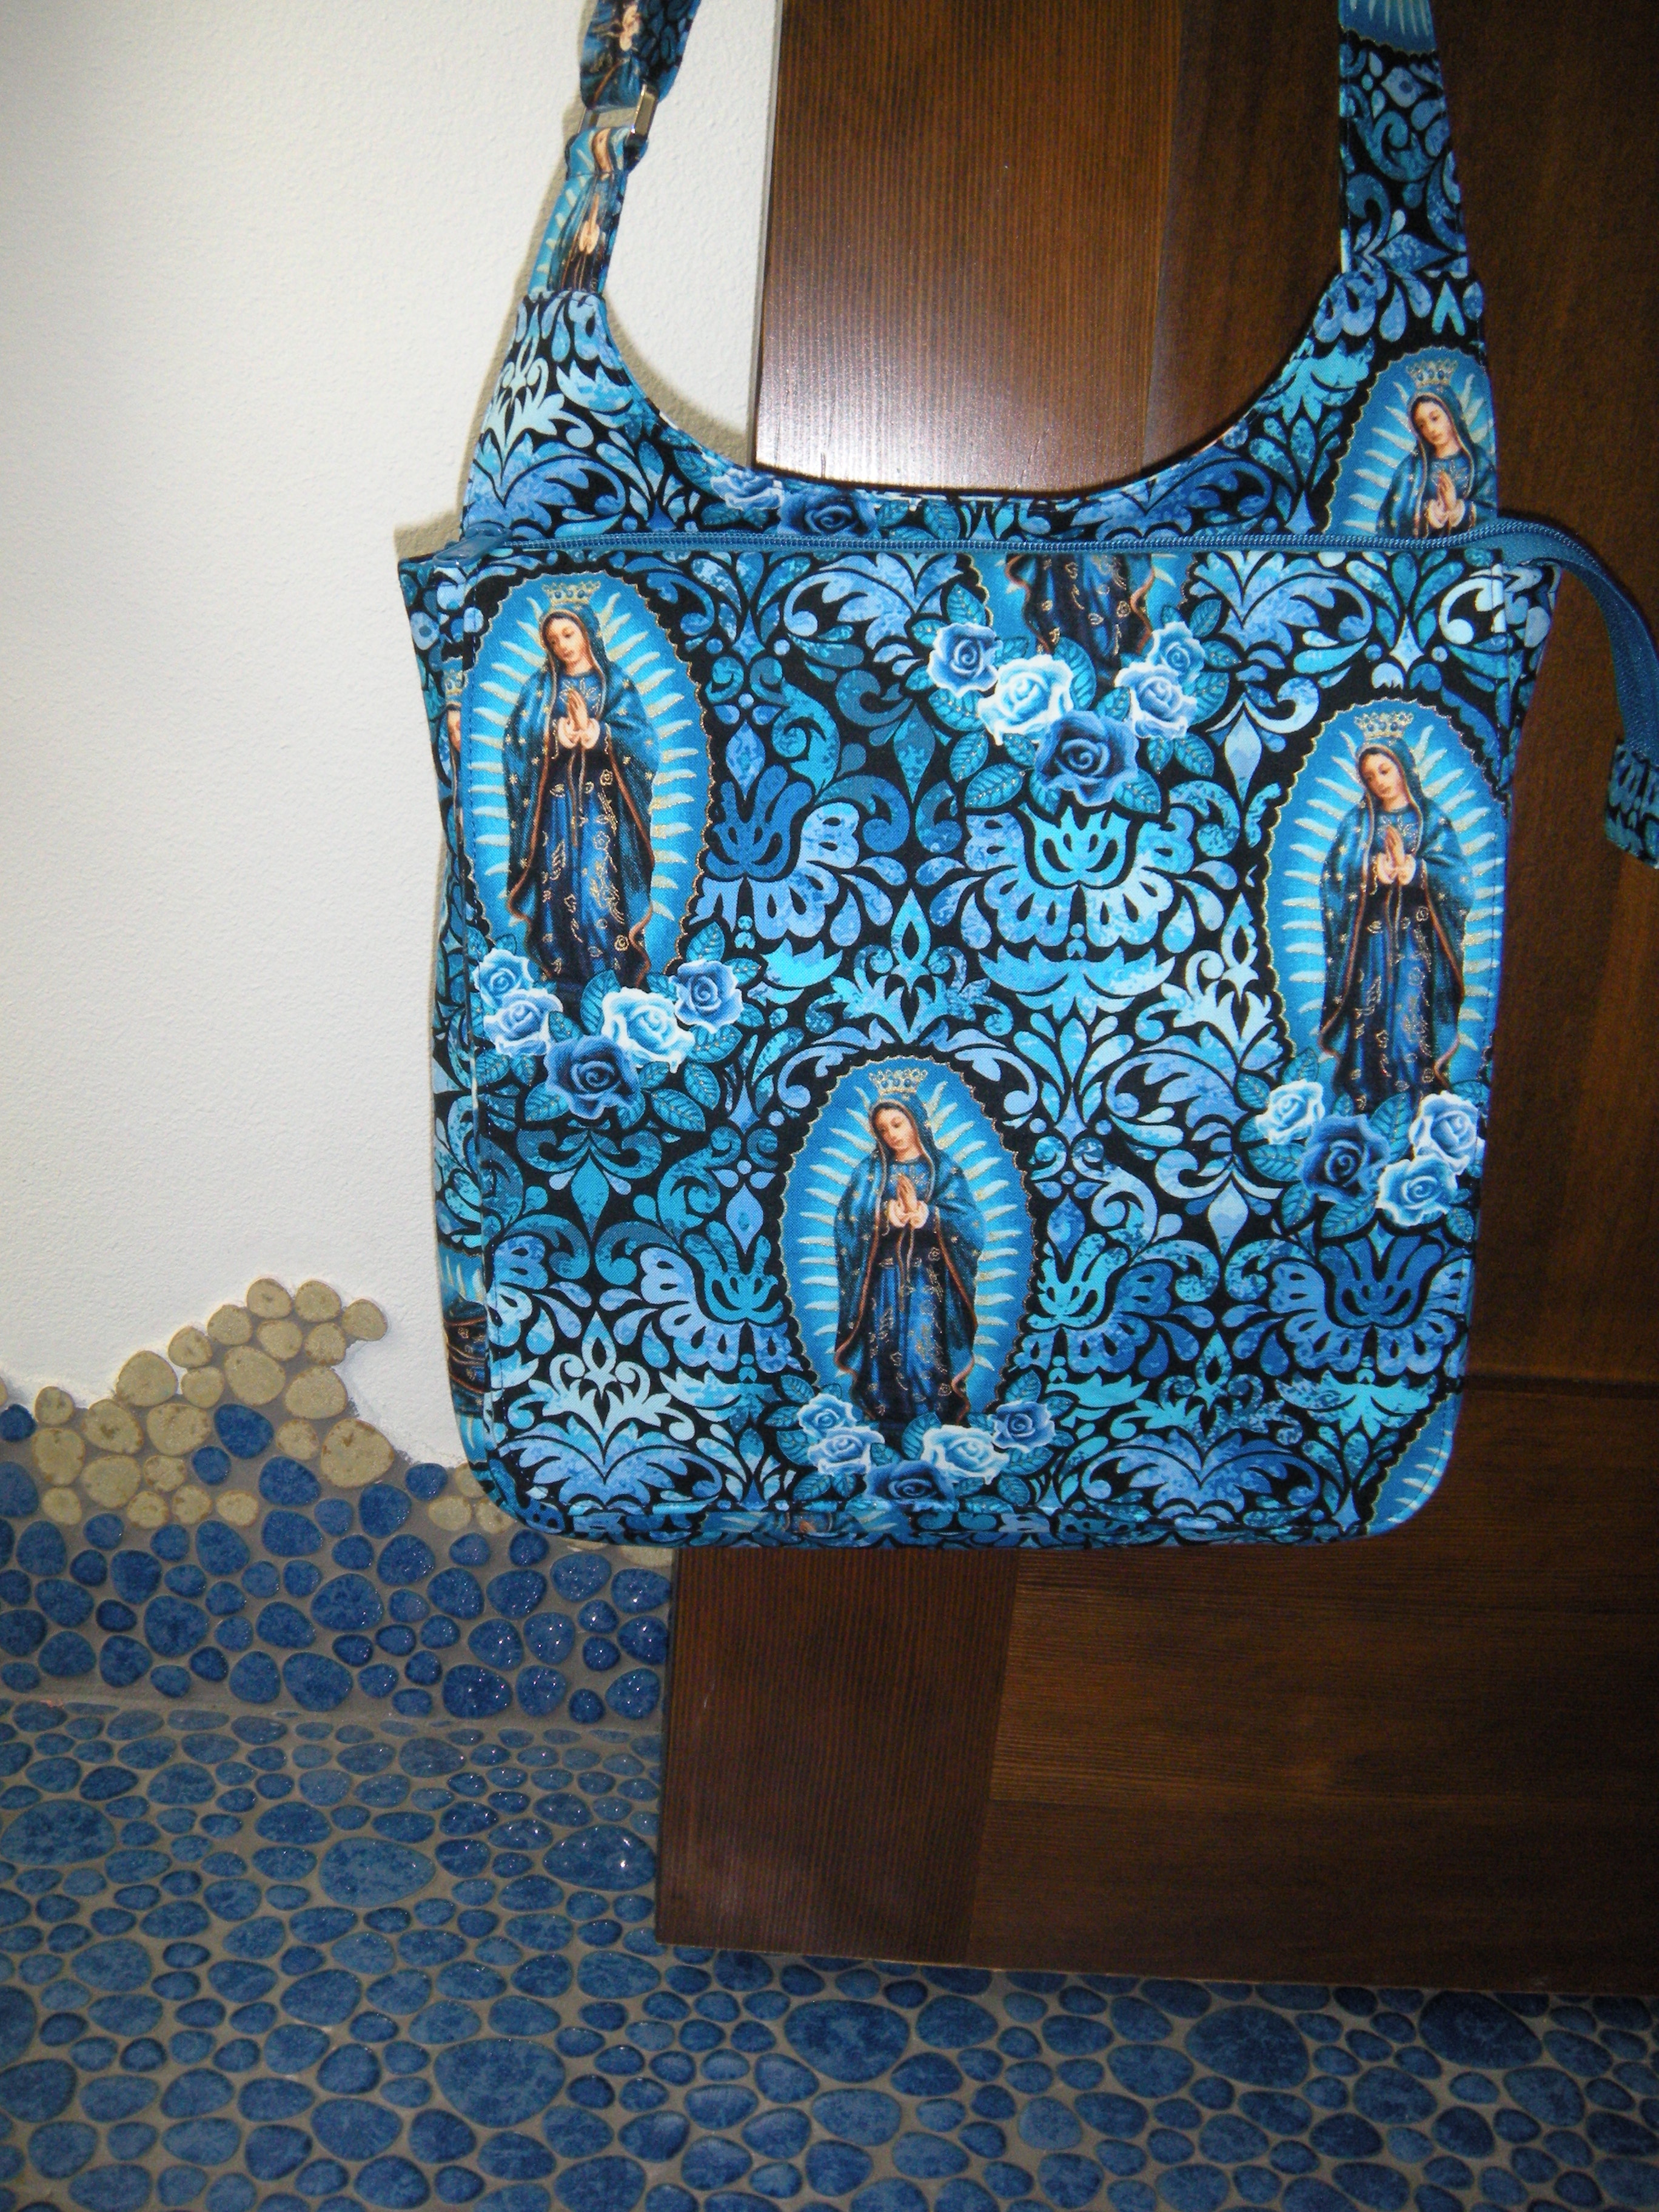
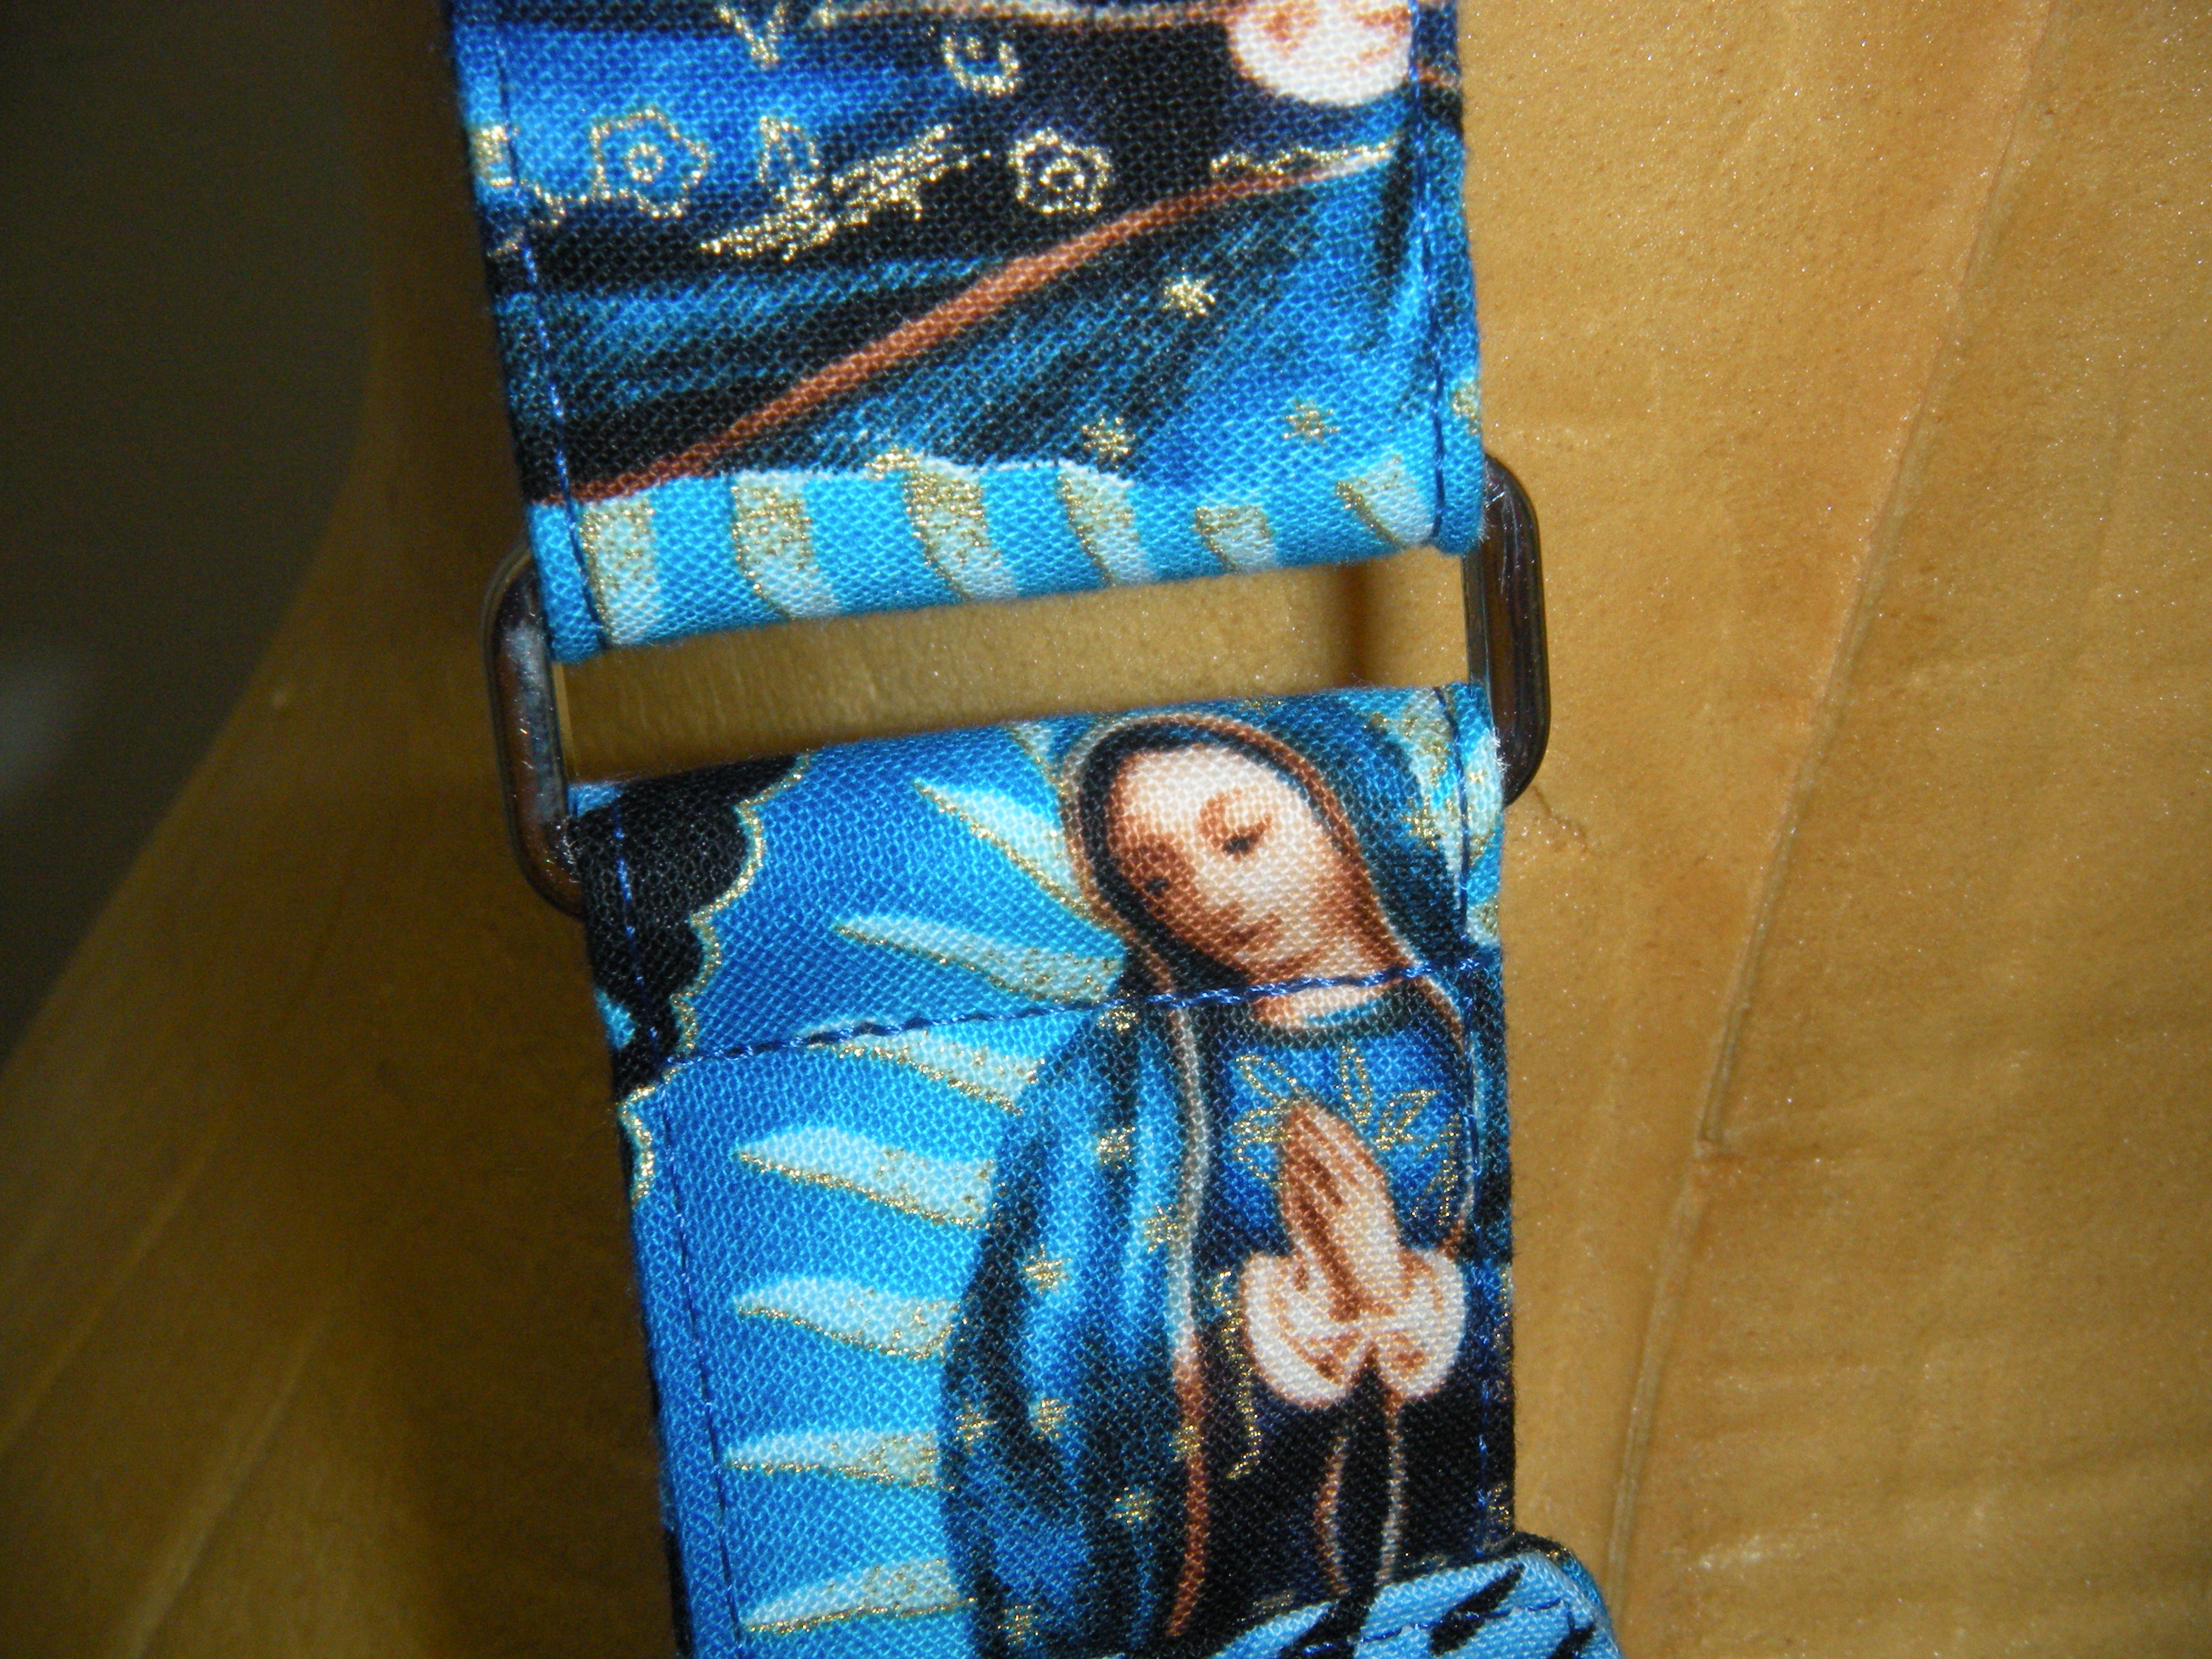
Our lady of Guada-LOO-pe. It’s the February bag-of-the-month, the Hyacinth Bag, from Sew Sweetness. I bought this fabric knowing I would find a perfect project for it. I can always do blue.

I like the way this bag sits next to the body. In this case, a foam body with really pointy boobs. You should thank me for making sure those didn’t show up in the photo. Do you like my little splashing waves made of tiles?
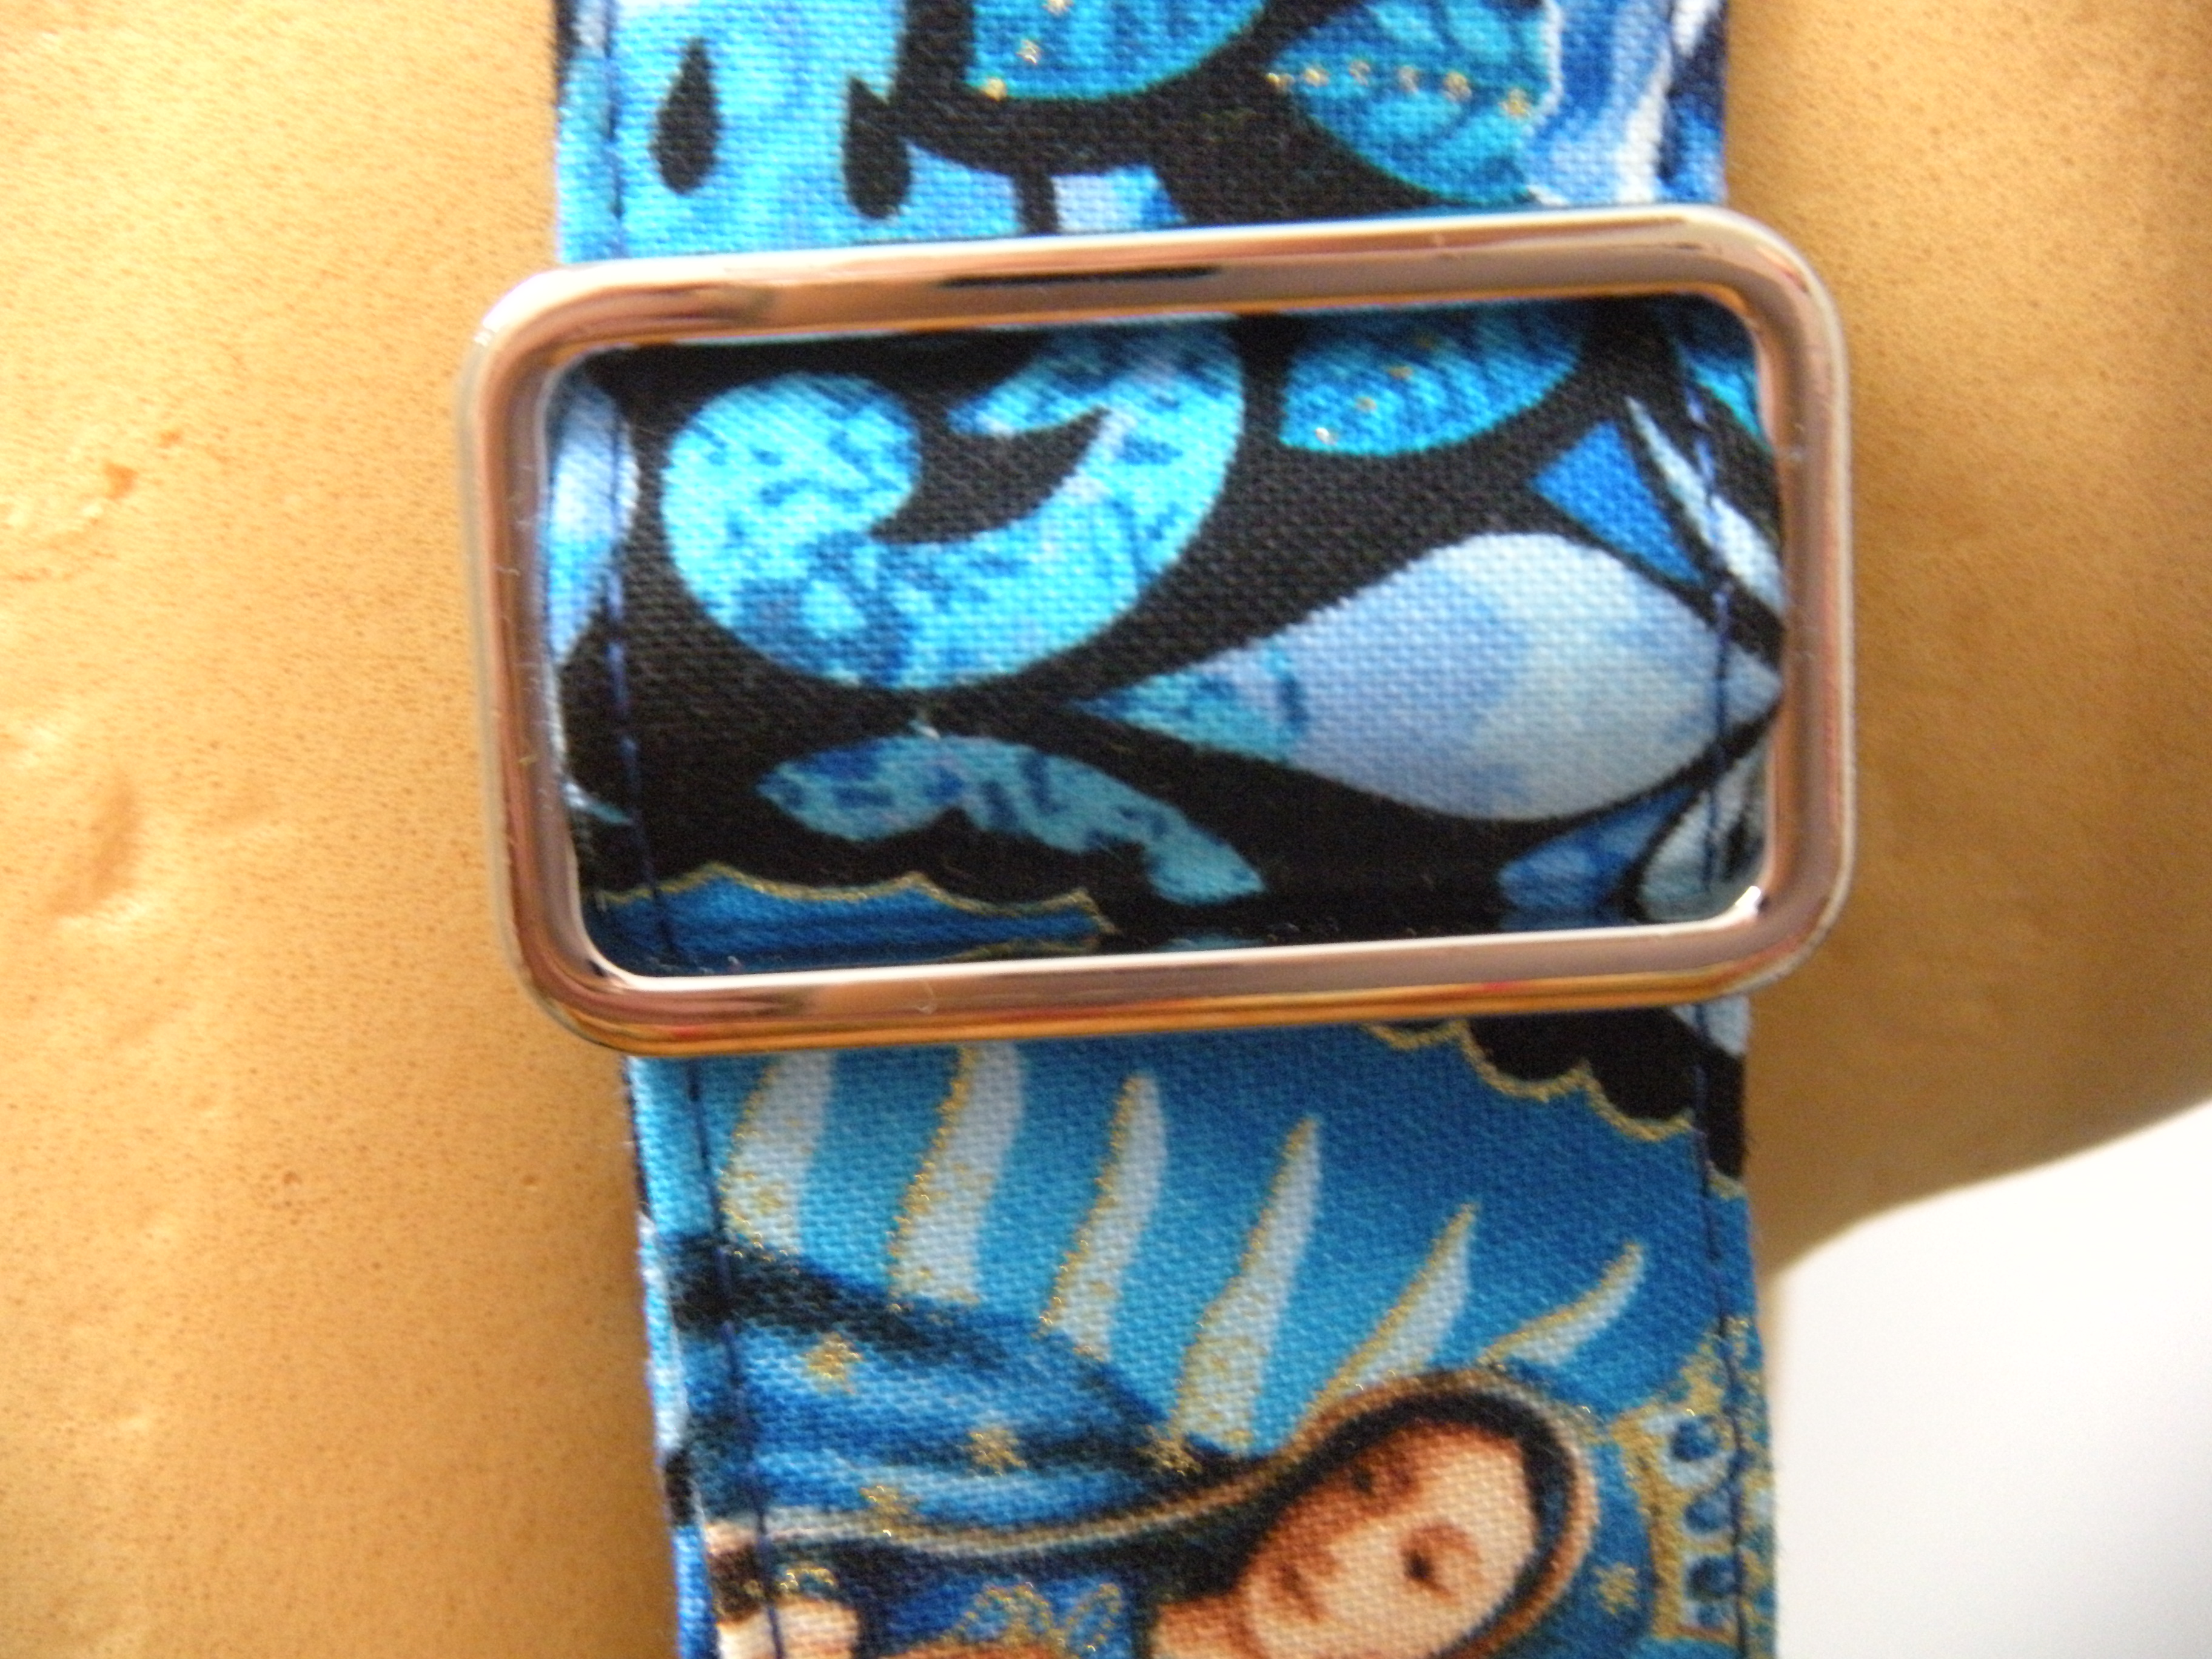
I am also digging the adjustable strap. I can wear it cross-body, two hands free. Ooh, think of the browsing I can do when both my hands are free!

The lining is so darn cute! Coordinating fabric from Kanvas, obviously. Teeny little gold shots in the roses. Color, not liquor shots.

It’s hard to tell that this is the across-the-body shot, because I worked so hard to leave out the boobies. But it is.

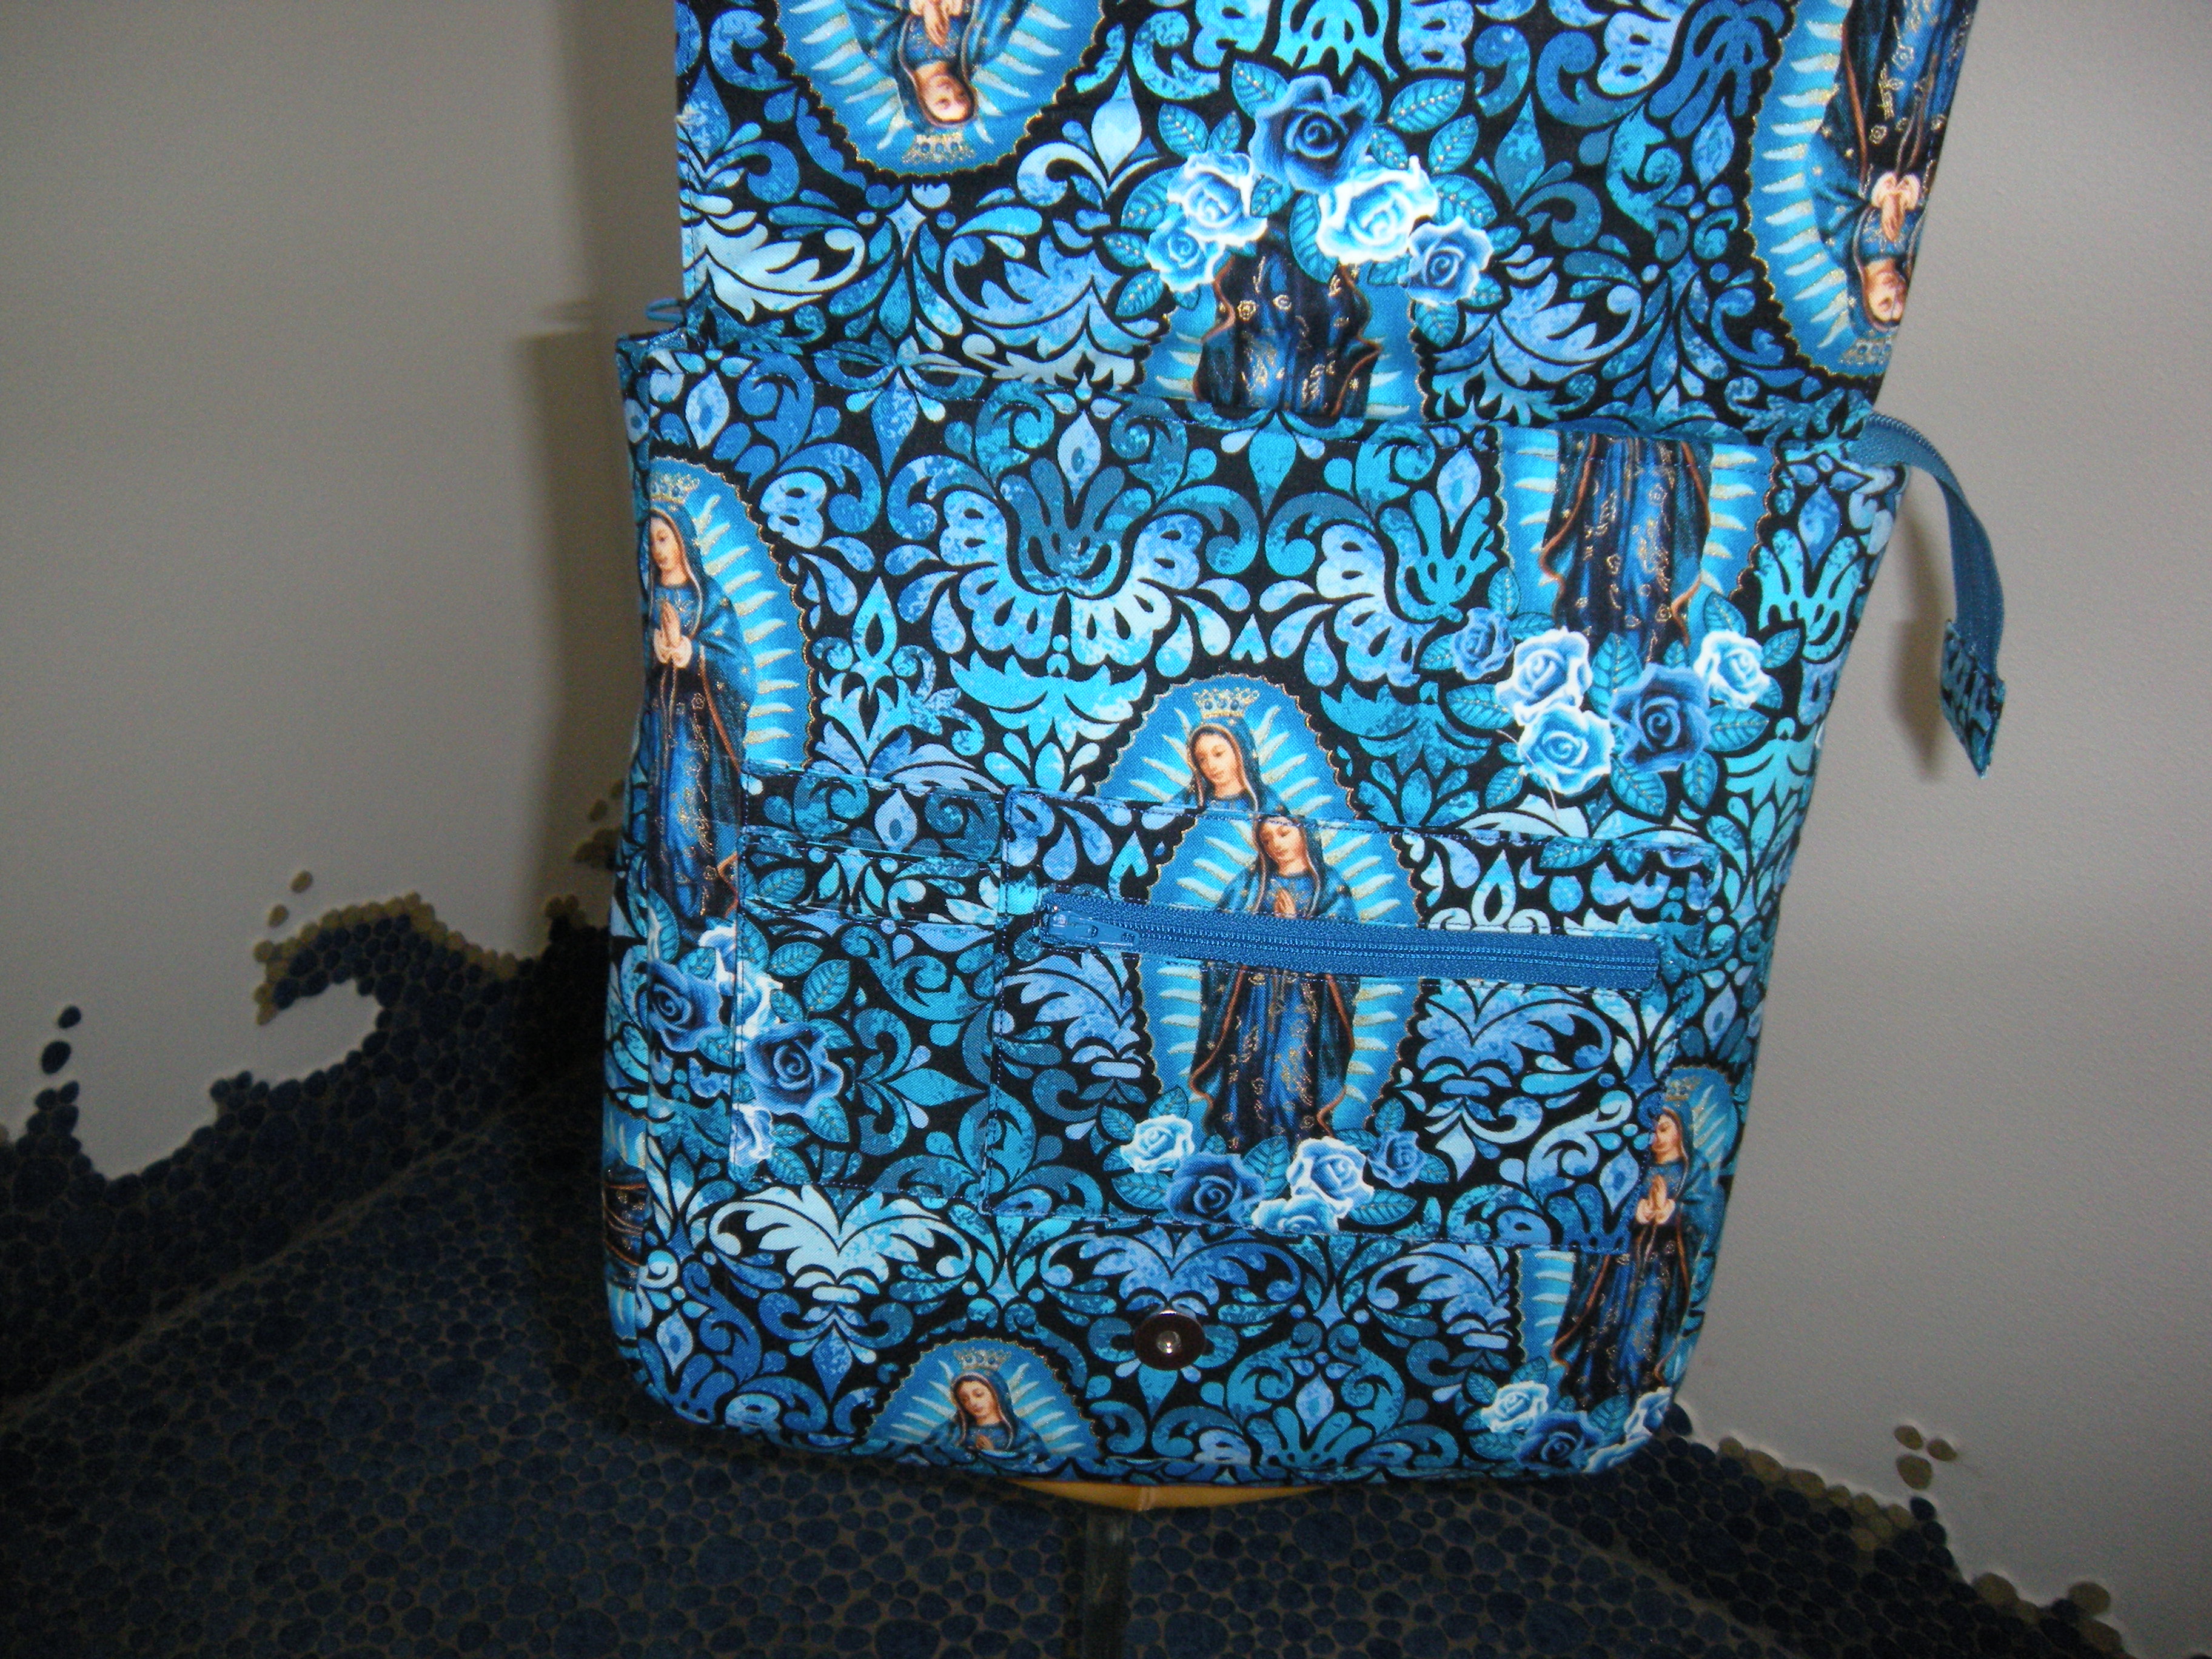
Under the flap, we have all the built-ins. Coin pocket, card holders.

This is the back side of the bag. That one lady is doing pretty good, considering the fact that she has been bisected by a blue zipper.
My sister in law is already trying to lay claim to this beauty, but I think I need to give it a test drive. I feel like if I am carrying this bag, the force will be with me. I’ll let you know how that works out.
Live long and prosper.
