Machine stitching the New Hexagon Millefiore quilt: rosette 6

DSCN0804

Yahoo, it’s still June and number 6 is done!

DSCN0805

I’m still using the glue basting method that I learned from Katja’s wonderful book, The New Hexagon.  I hand stitched the center star, and completed the rest of the center and all the other rounds using invisible thread and a narrow zigzag.

DSCN0808

It’s all about feeling good about your projects, isn’t it?  This project was so far out of my comfort zone when I approached it with the notion of hand sewing.  I never could have made a dent in it!

DSCN0810

It’s so exciting to see stitchers from all over the world embracing this project.  And all the ingenuity going into the fabric choices  – and construction methods – makes it all the more inspirational.

DSCN0812

If you want to try the method I am using, check out my 3-part tutorial, starting here:

https://handmadebycarolecarr.com/2015/01/23/machine-stitching-the-millefiore-quilt-tutorial-part-one-for-those-of-us-who-hand-sew-at-the-speed-of-a-turtle/

Machine stitching the New Hexagon Millefiore Quilt rosette #2: I still love paper and glue, but mostly fabric

DSCN5555

Most of the time I think it is wonderful that I don’t know today’s date.  That’s one of the perks of retirement.  But on Friday, I had a lightbulb moment.  I realized there was only one week left in February.  And I had finished only the center of my “assignment” in the New Hexagon Millefiore Quilt along!

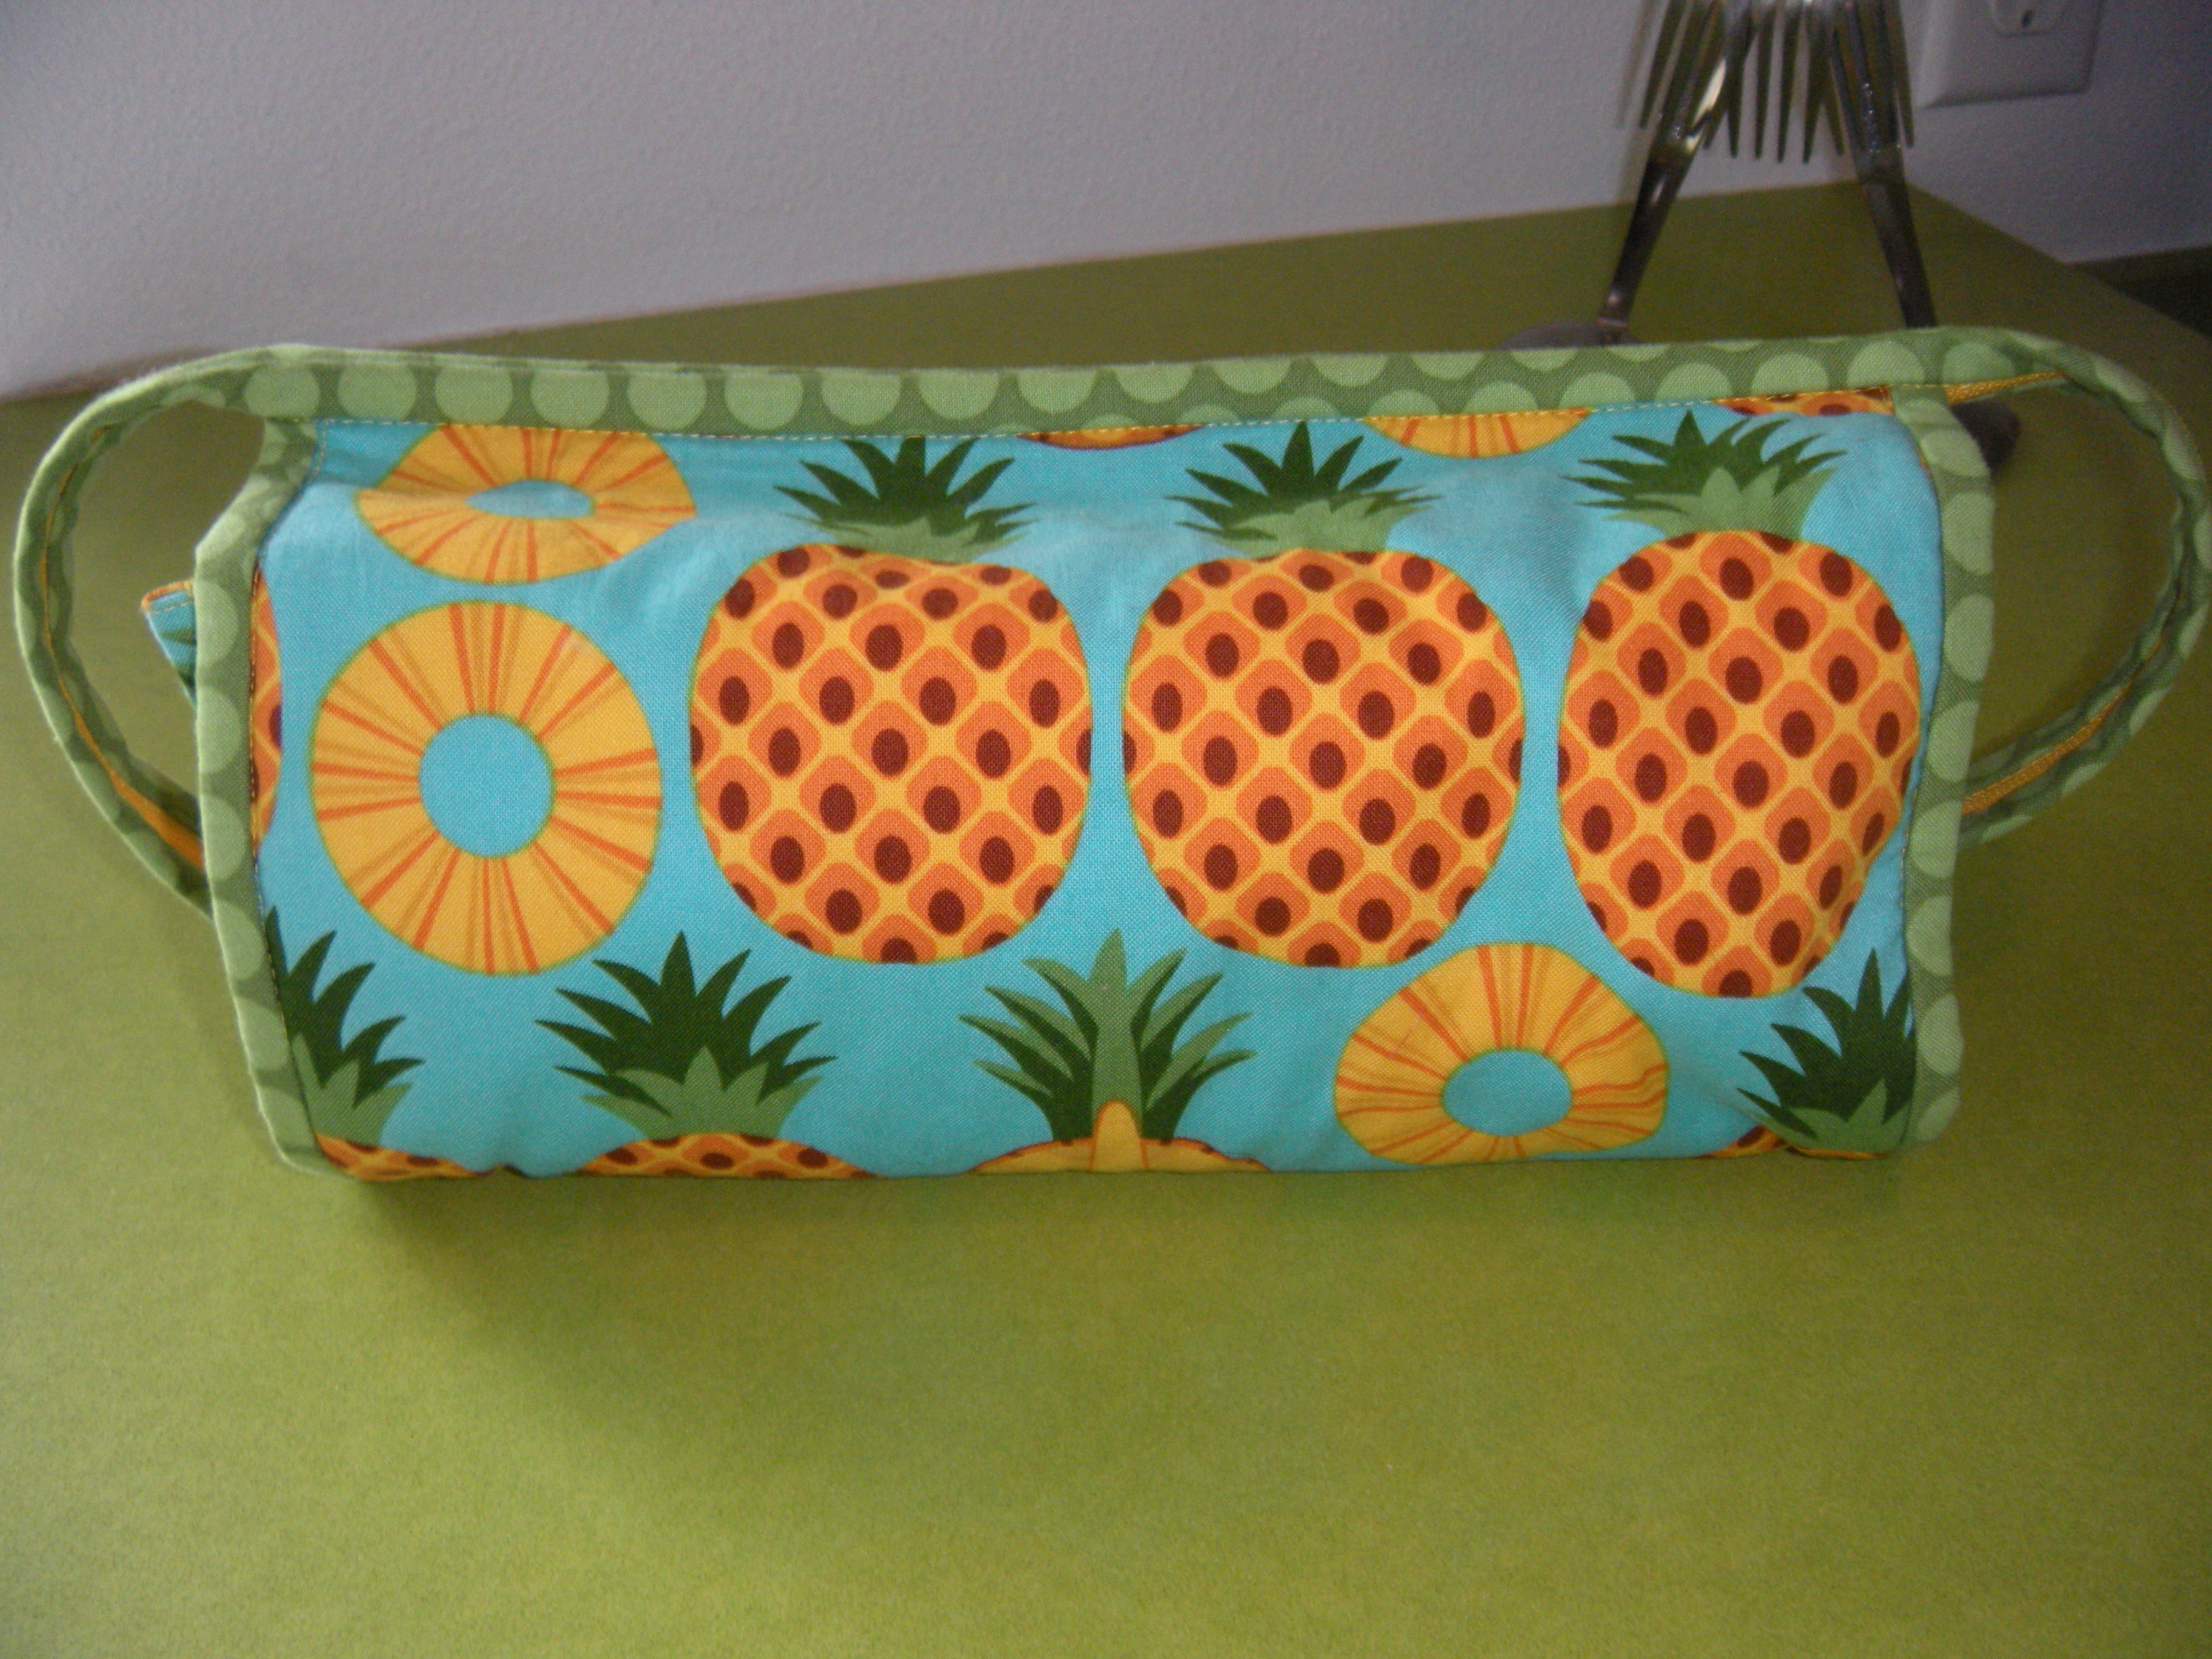
Although I had cut and glued the pieces for the first round, there they were, sitting on the table next to my chair.  I had stuffed them into a cute little bag.  But I could hear them whispering.  Kinda like Clarice in Silence of the Lambs.

Before I tell you what I did on Saturday,  I want to give you a little back story.  I am not a block of the month kind of gal.  I’m not overly fond of randomly imposed deadlines.  If I am doing a project, I want to do it because I WANT to, and WHEN I want to.  Especially if it is something that I am supposed to be enjoying.  Something I voluntarily chose to do because it would be fun.  Or because I could learn something.

Really, a project needs to speak to me in some way.  So I don’t want that project to get all sassy and belligerent, up in my face looking at it’s little timepiece and telling me to get moving.  Why would any of us want to do that?  Time is precious.  Life is short.  There are cats waiting to be petted, chocolate waiting to be eaten, naps that need taking.  And I, for one, intend to honor all those important things.

DSCN5553

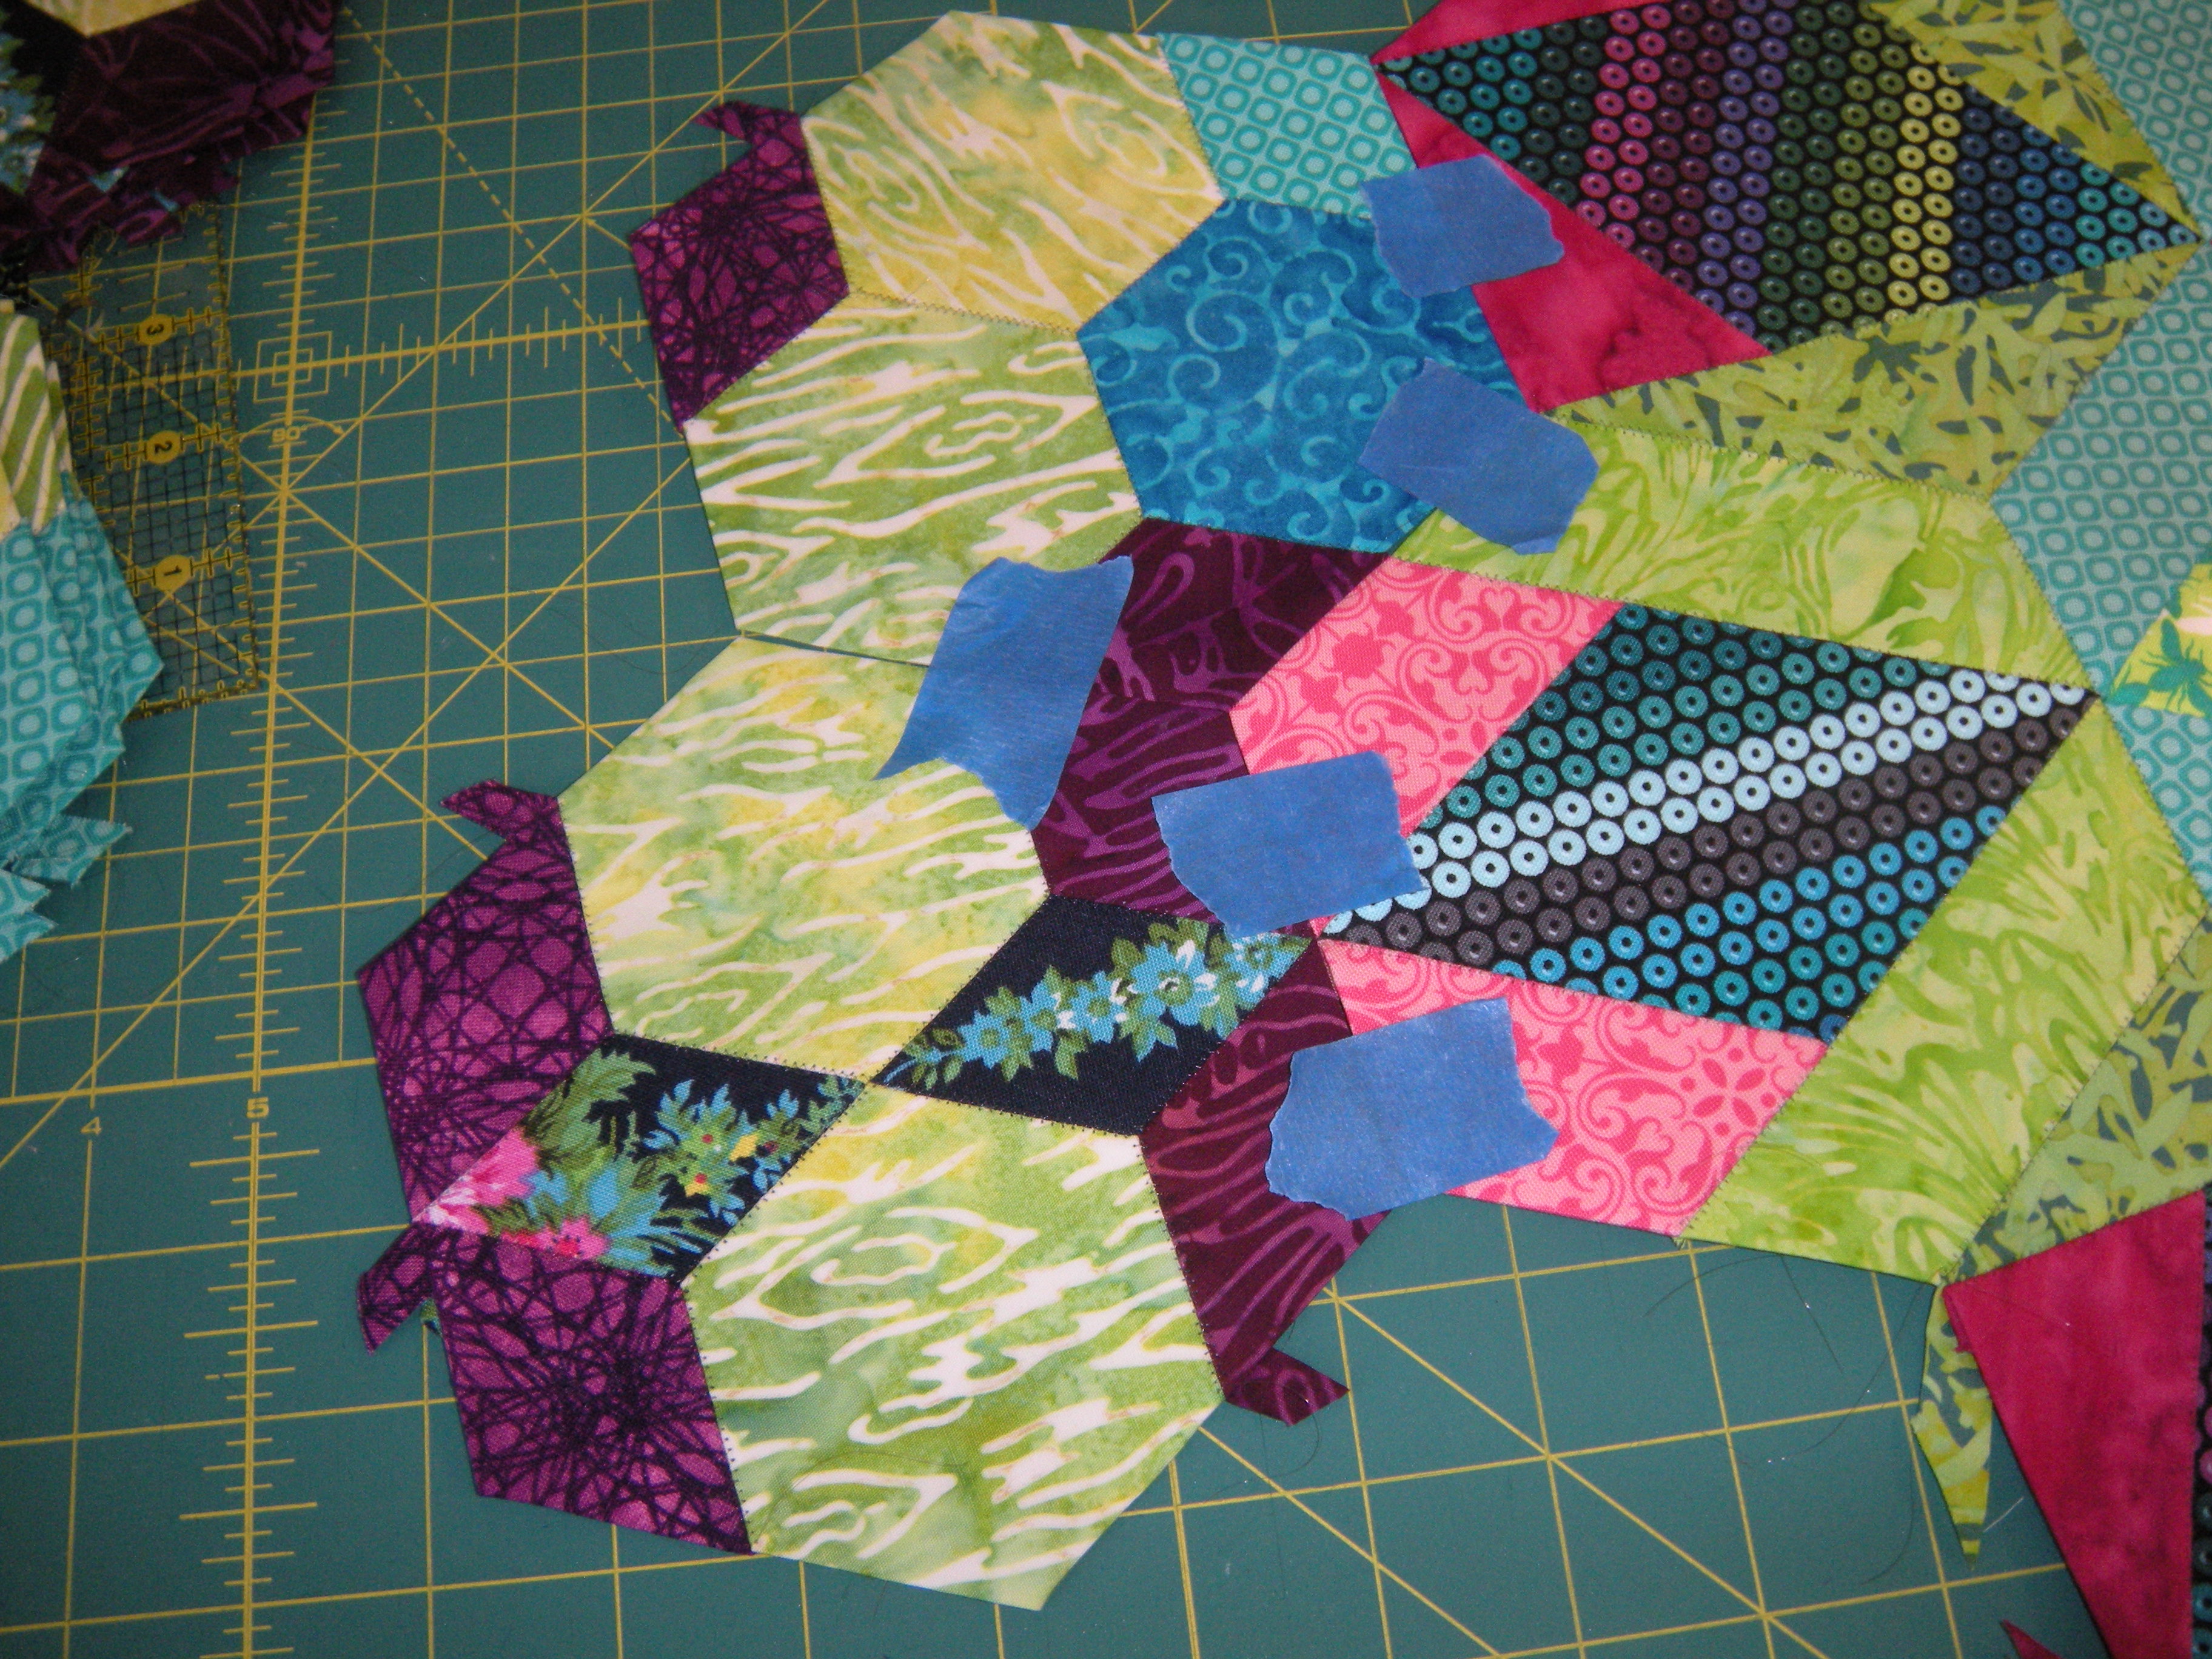
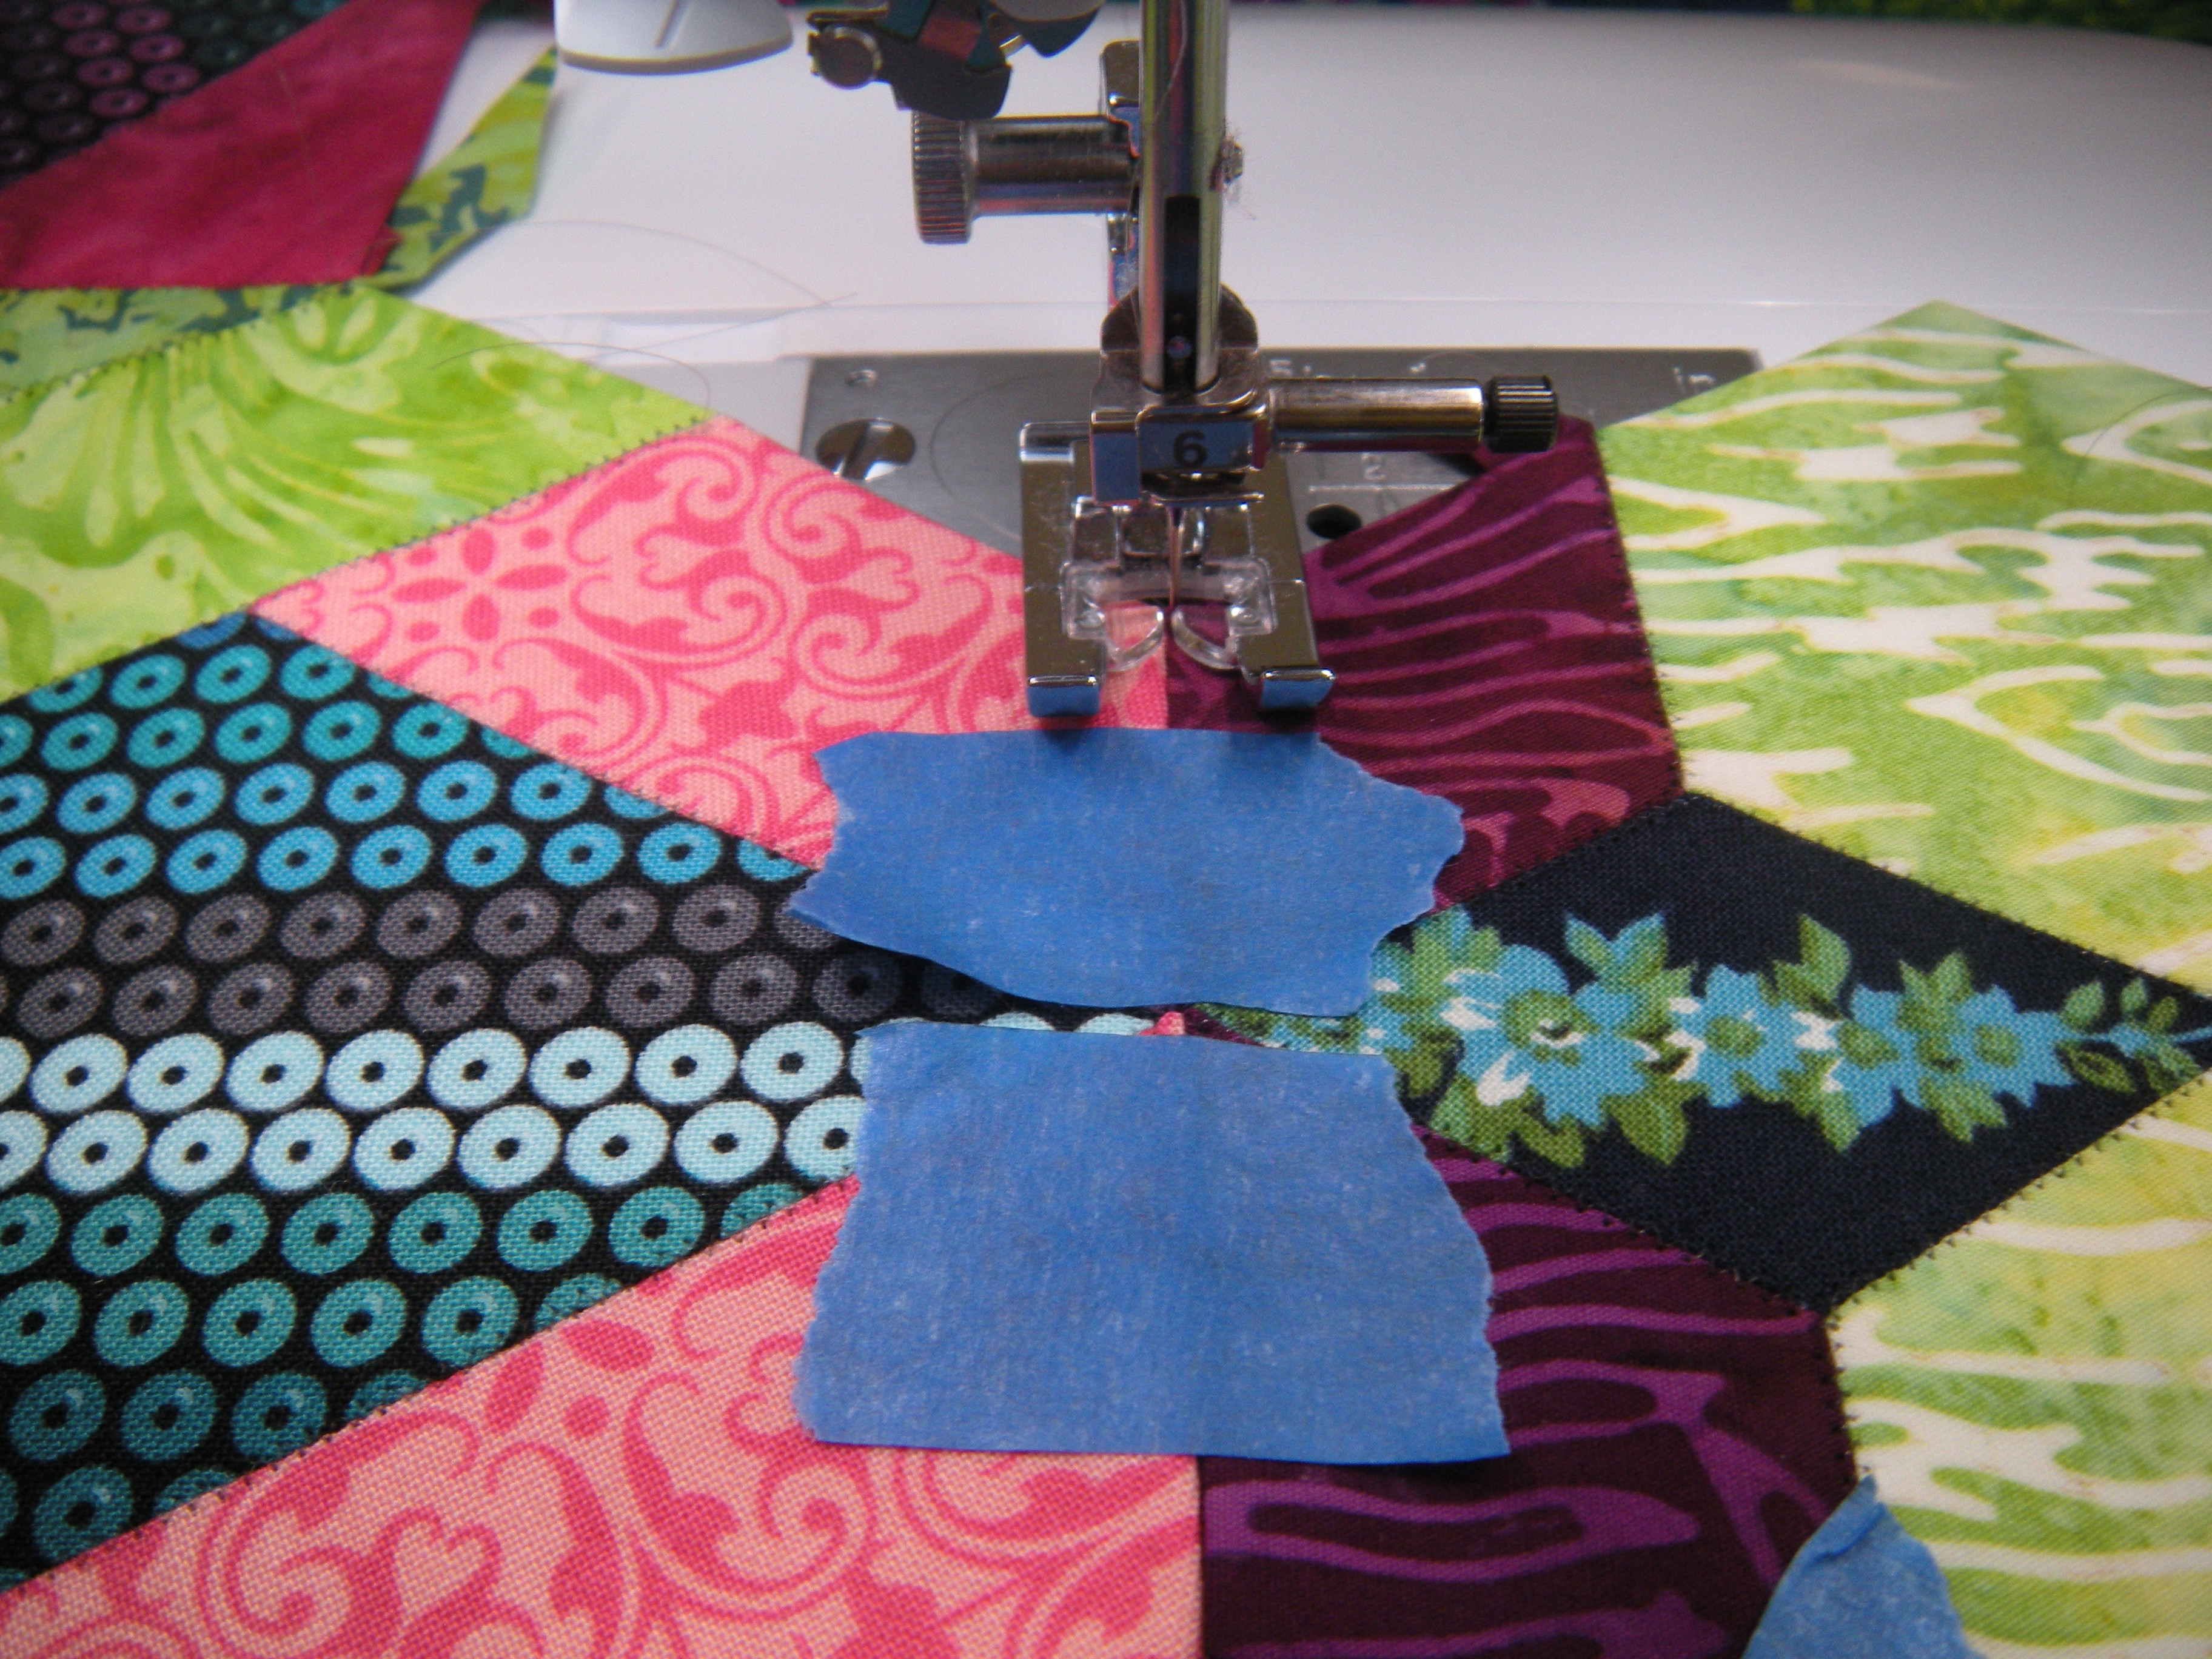
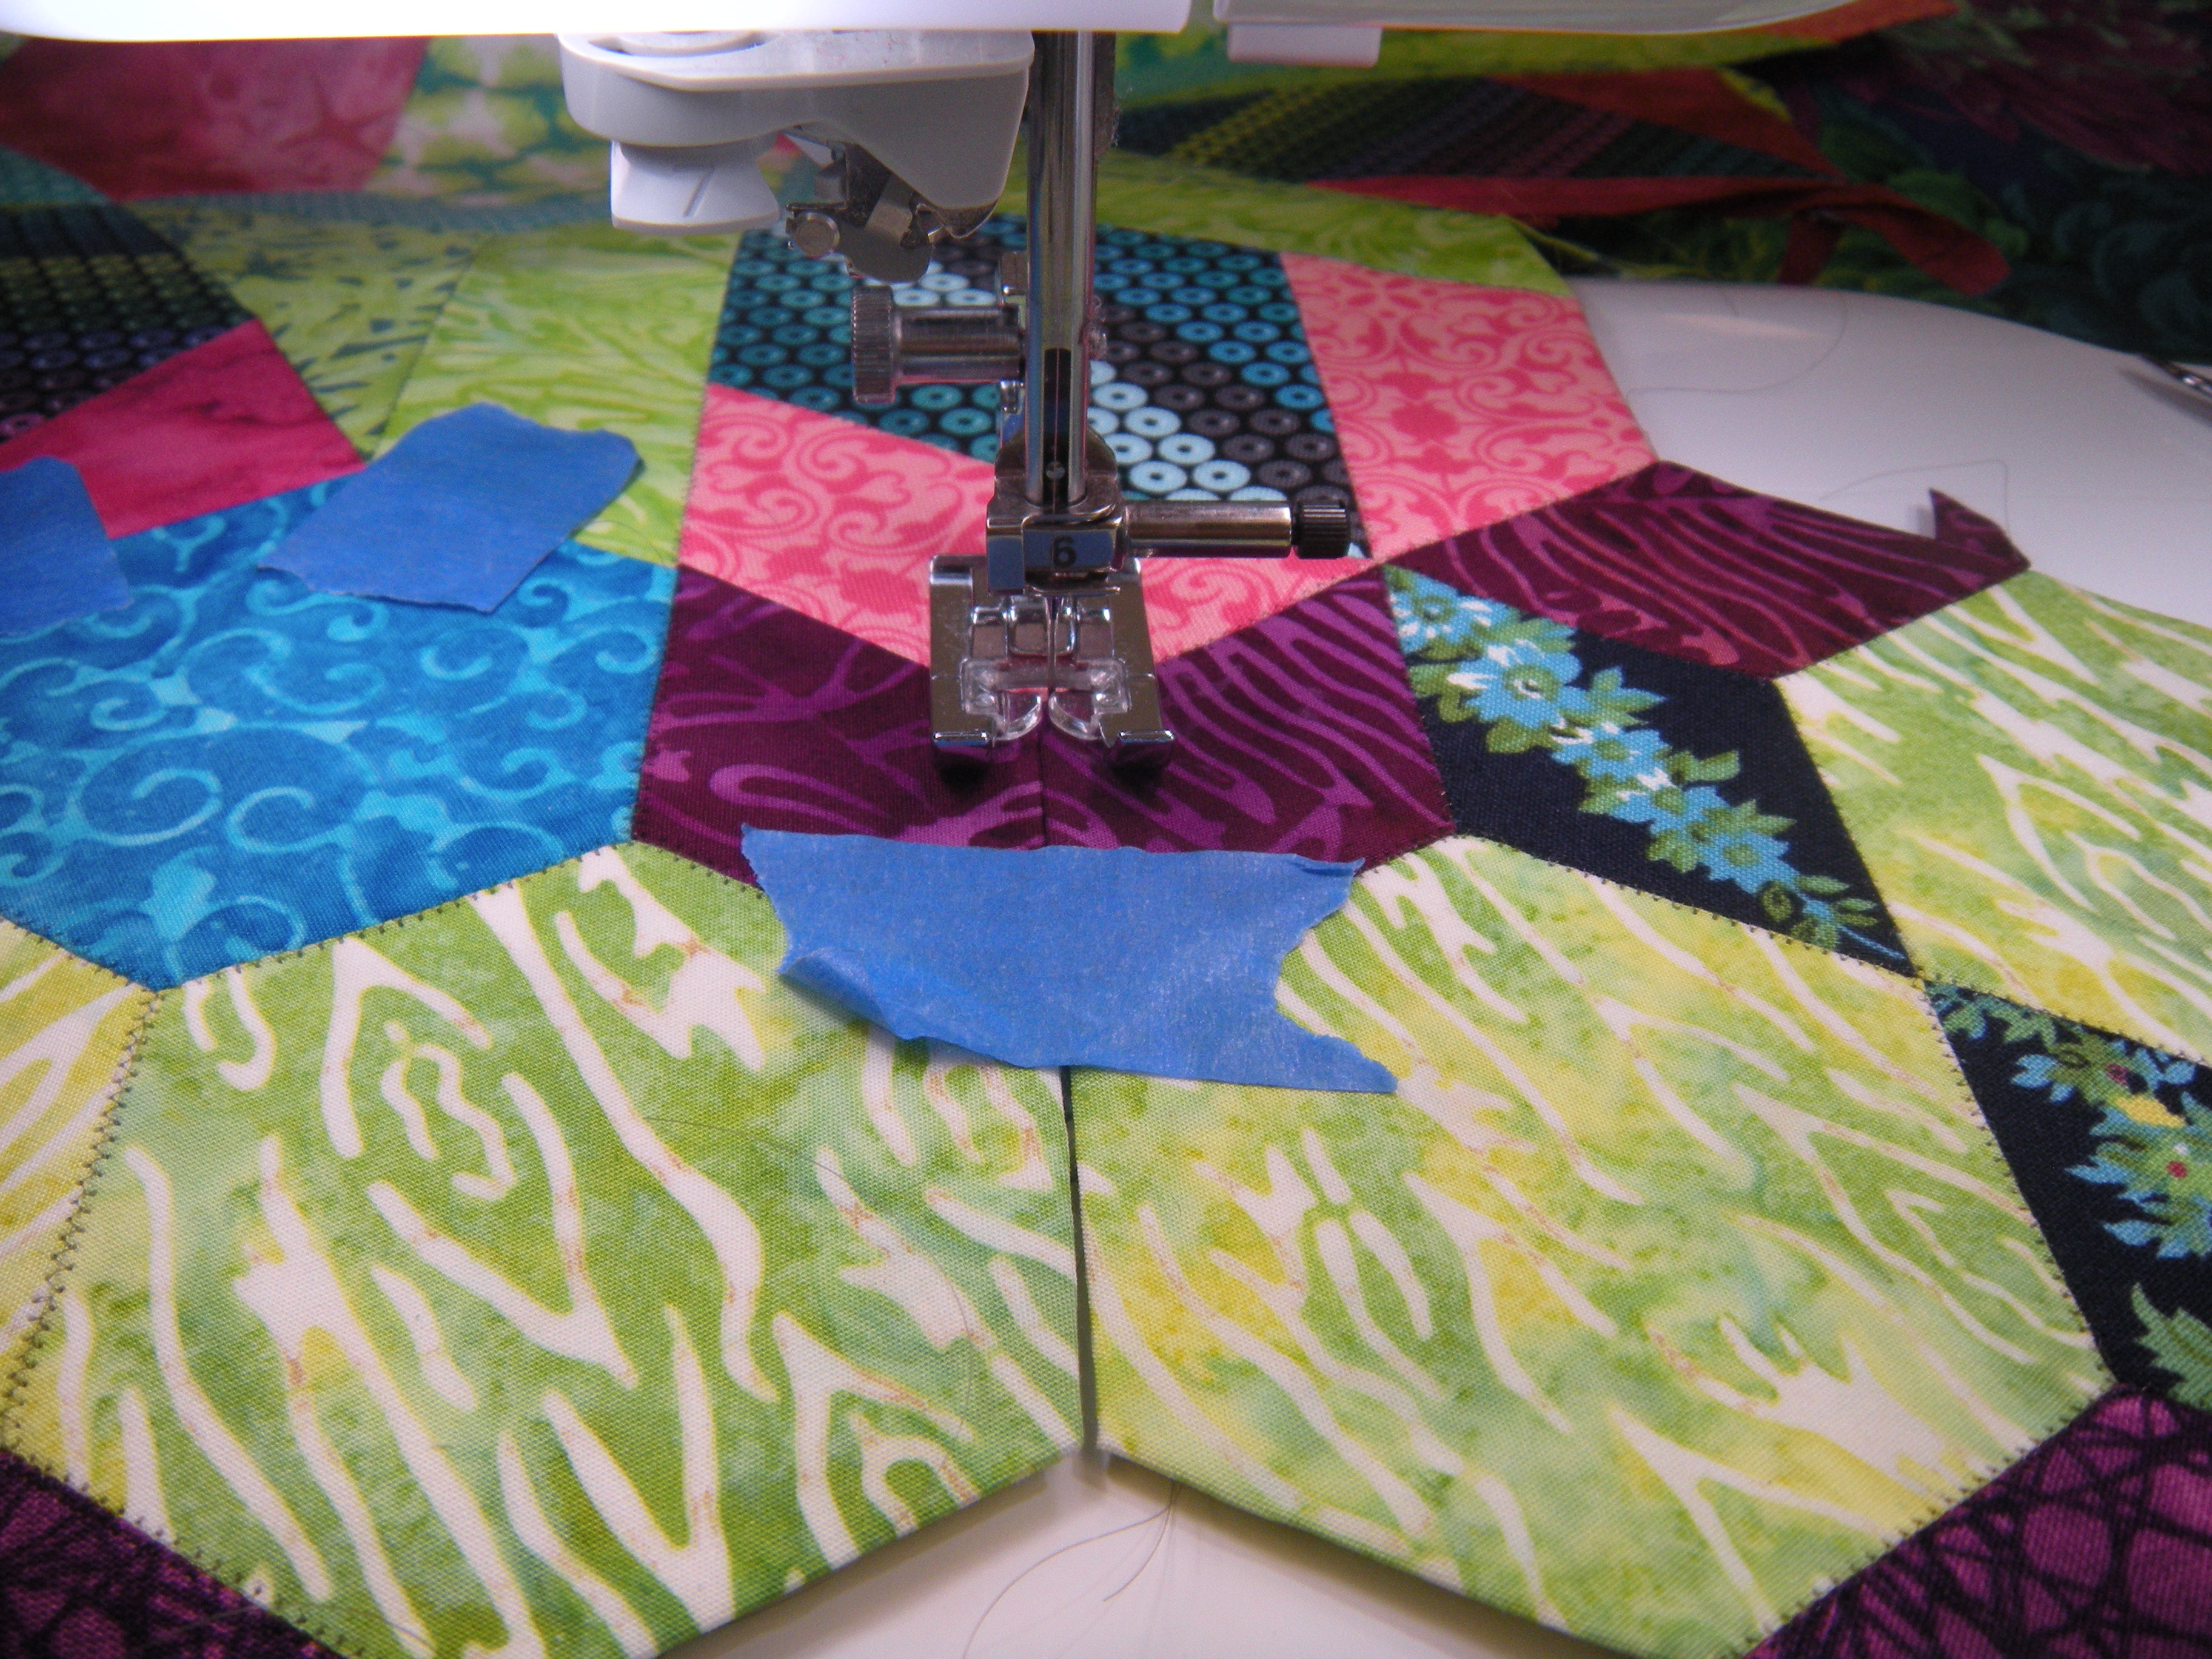
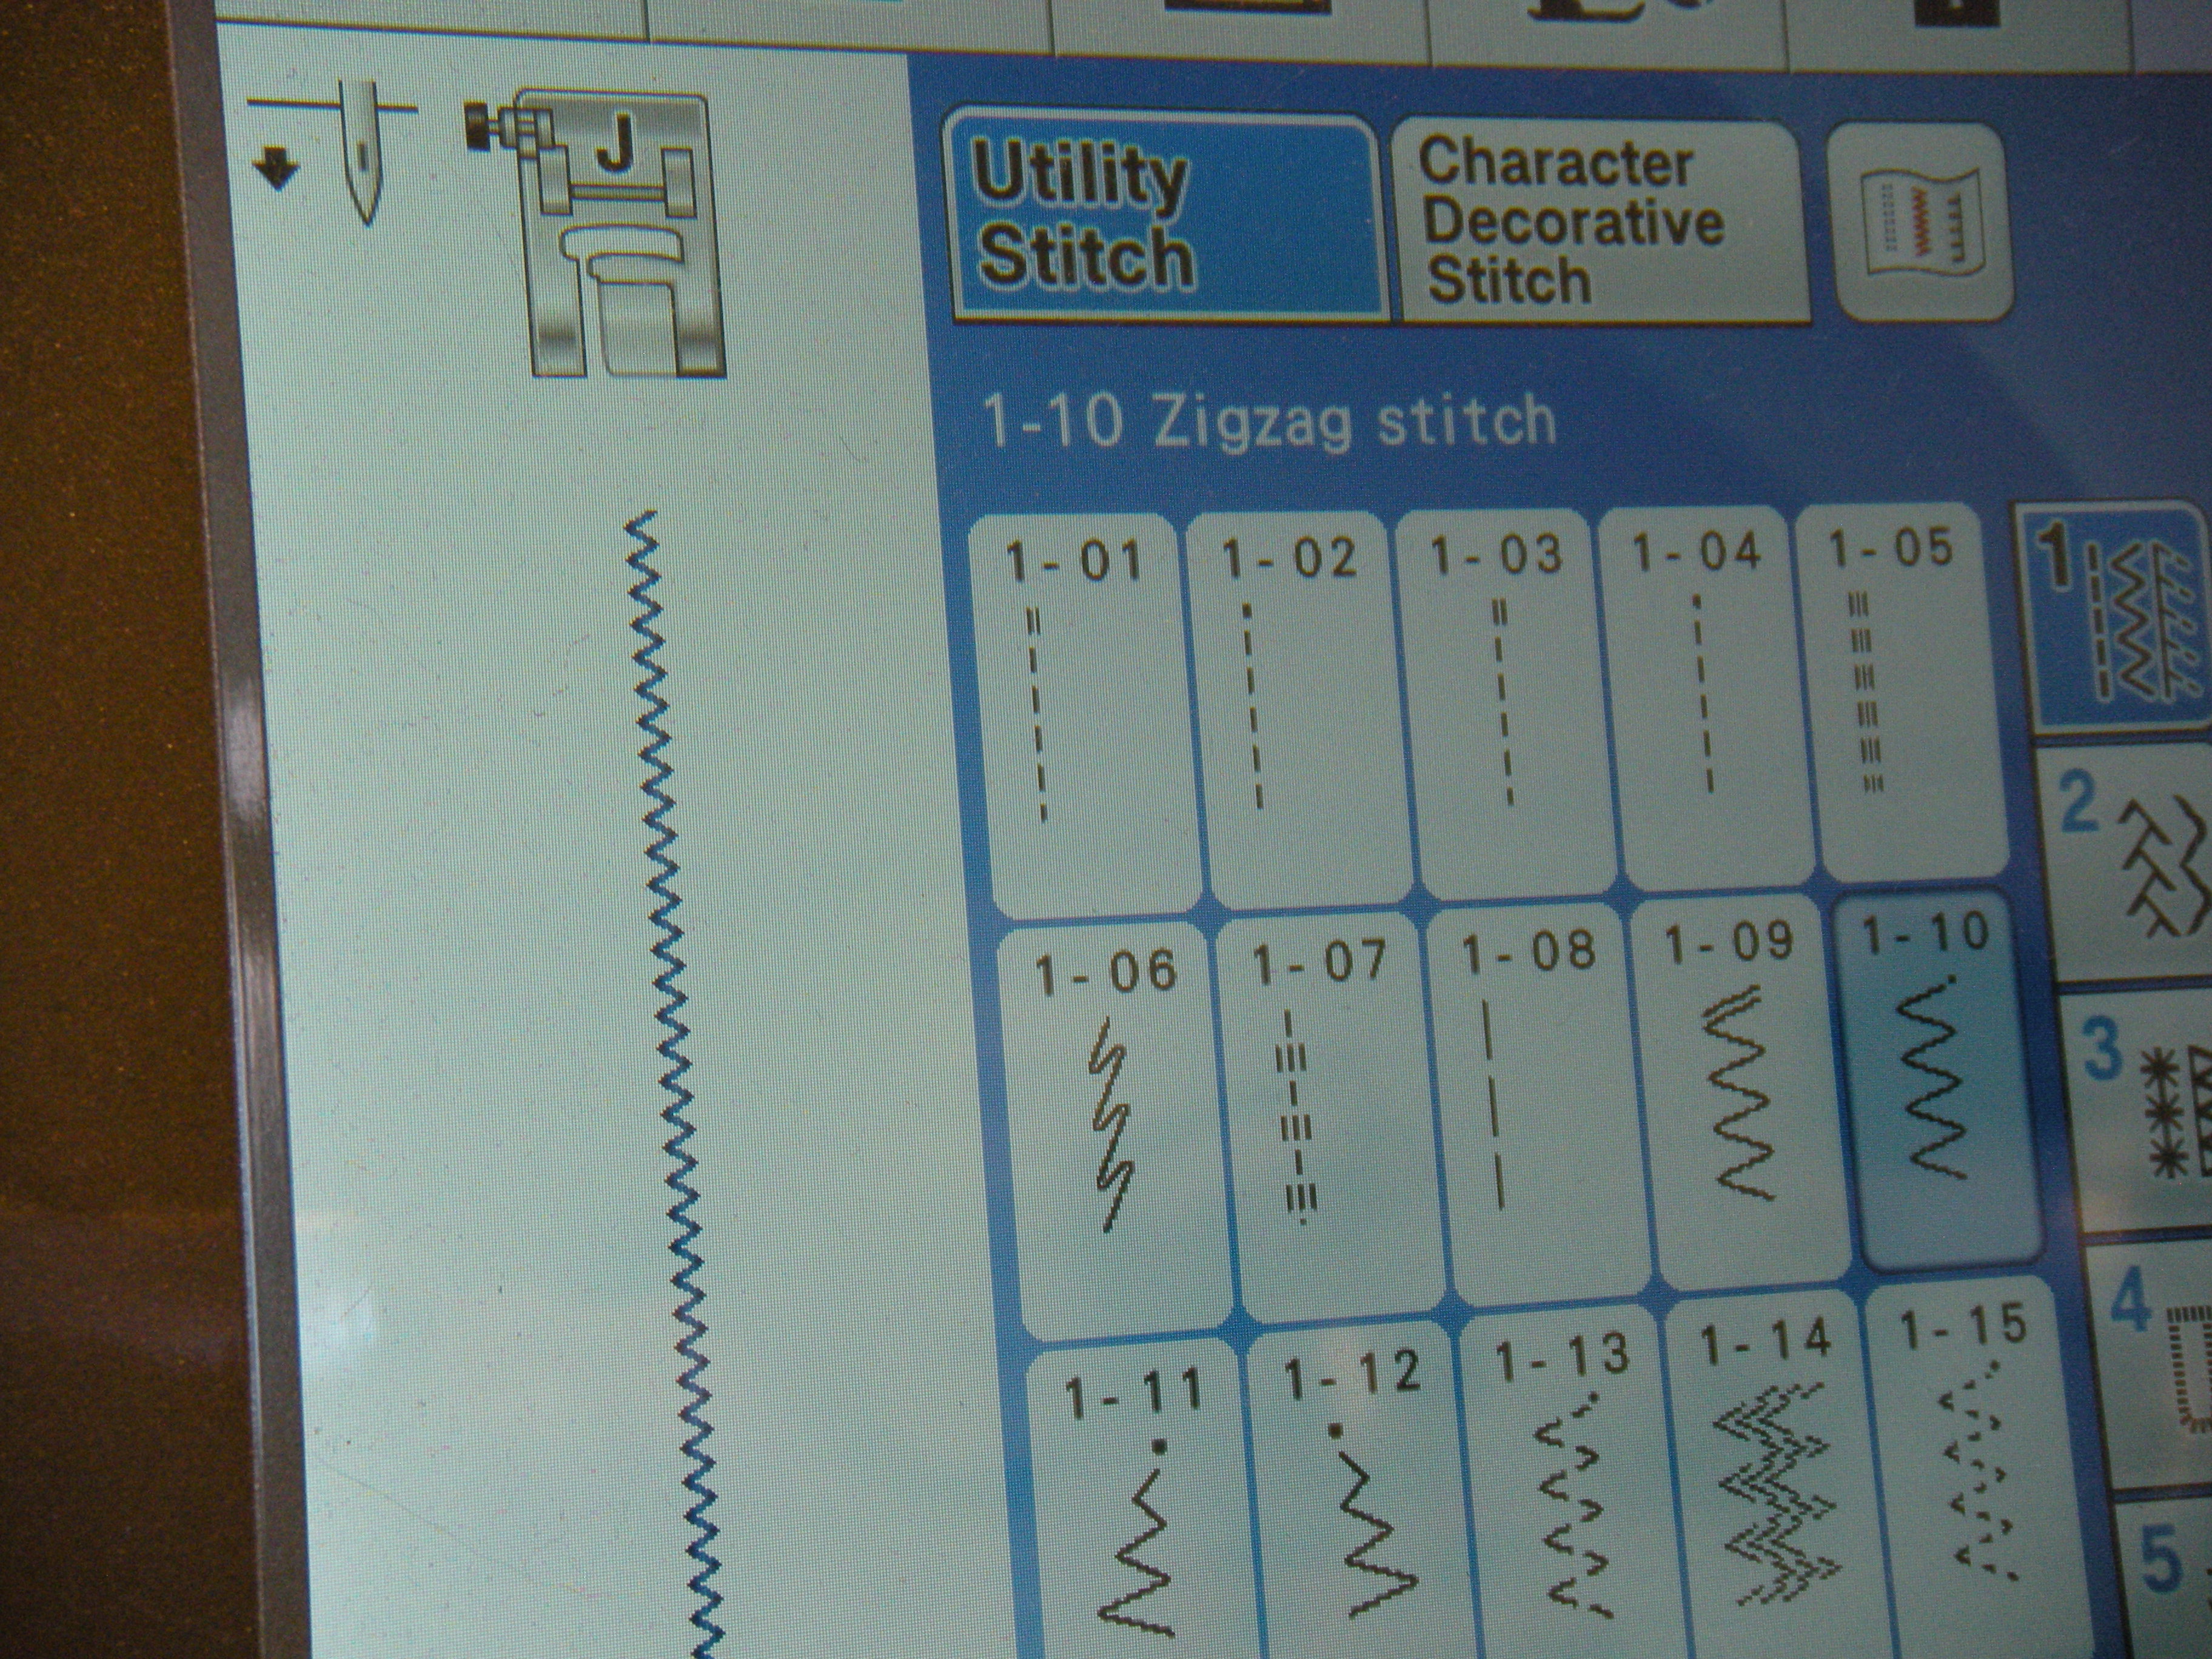
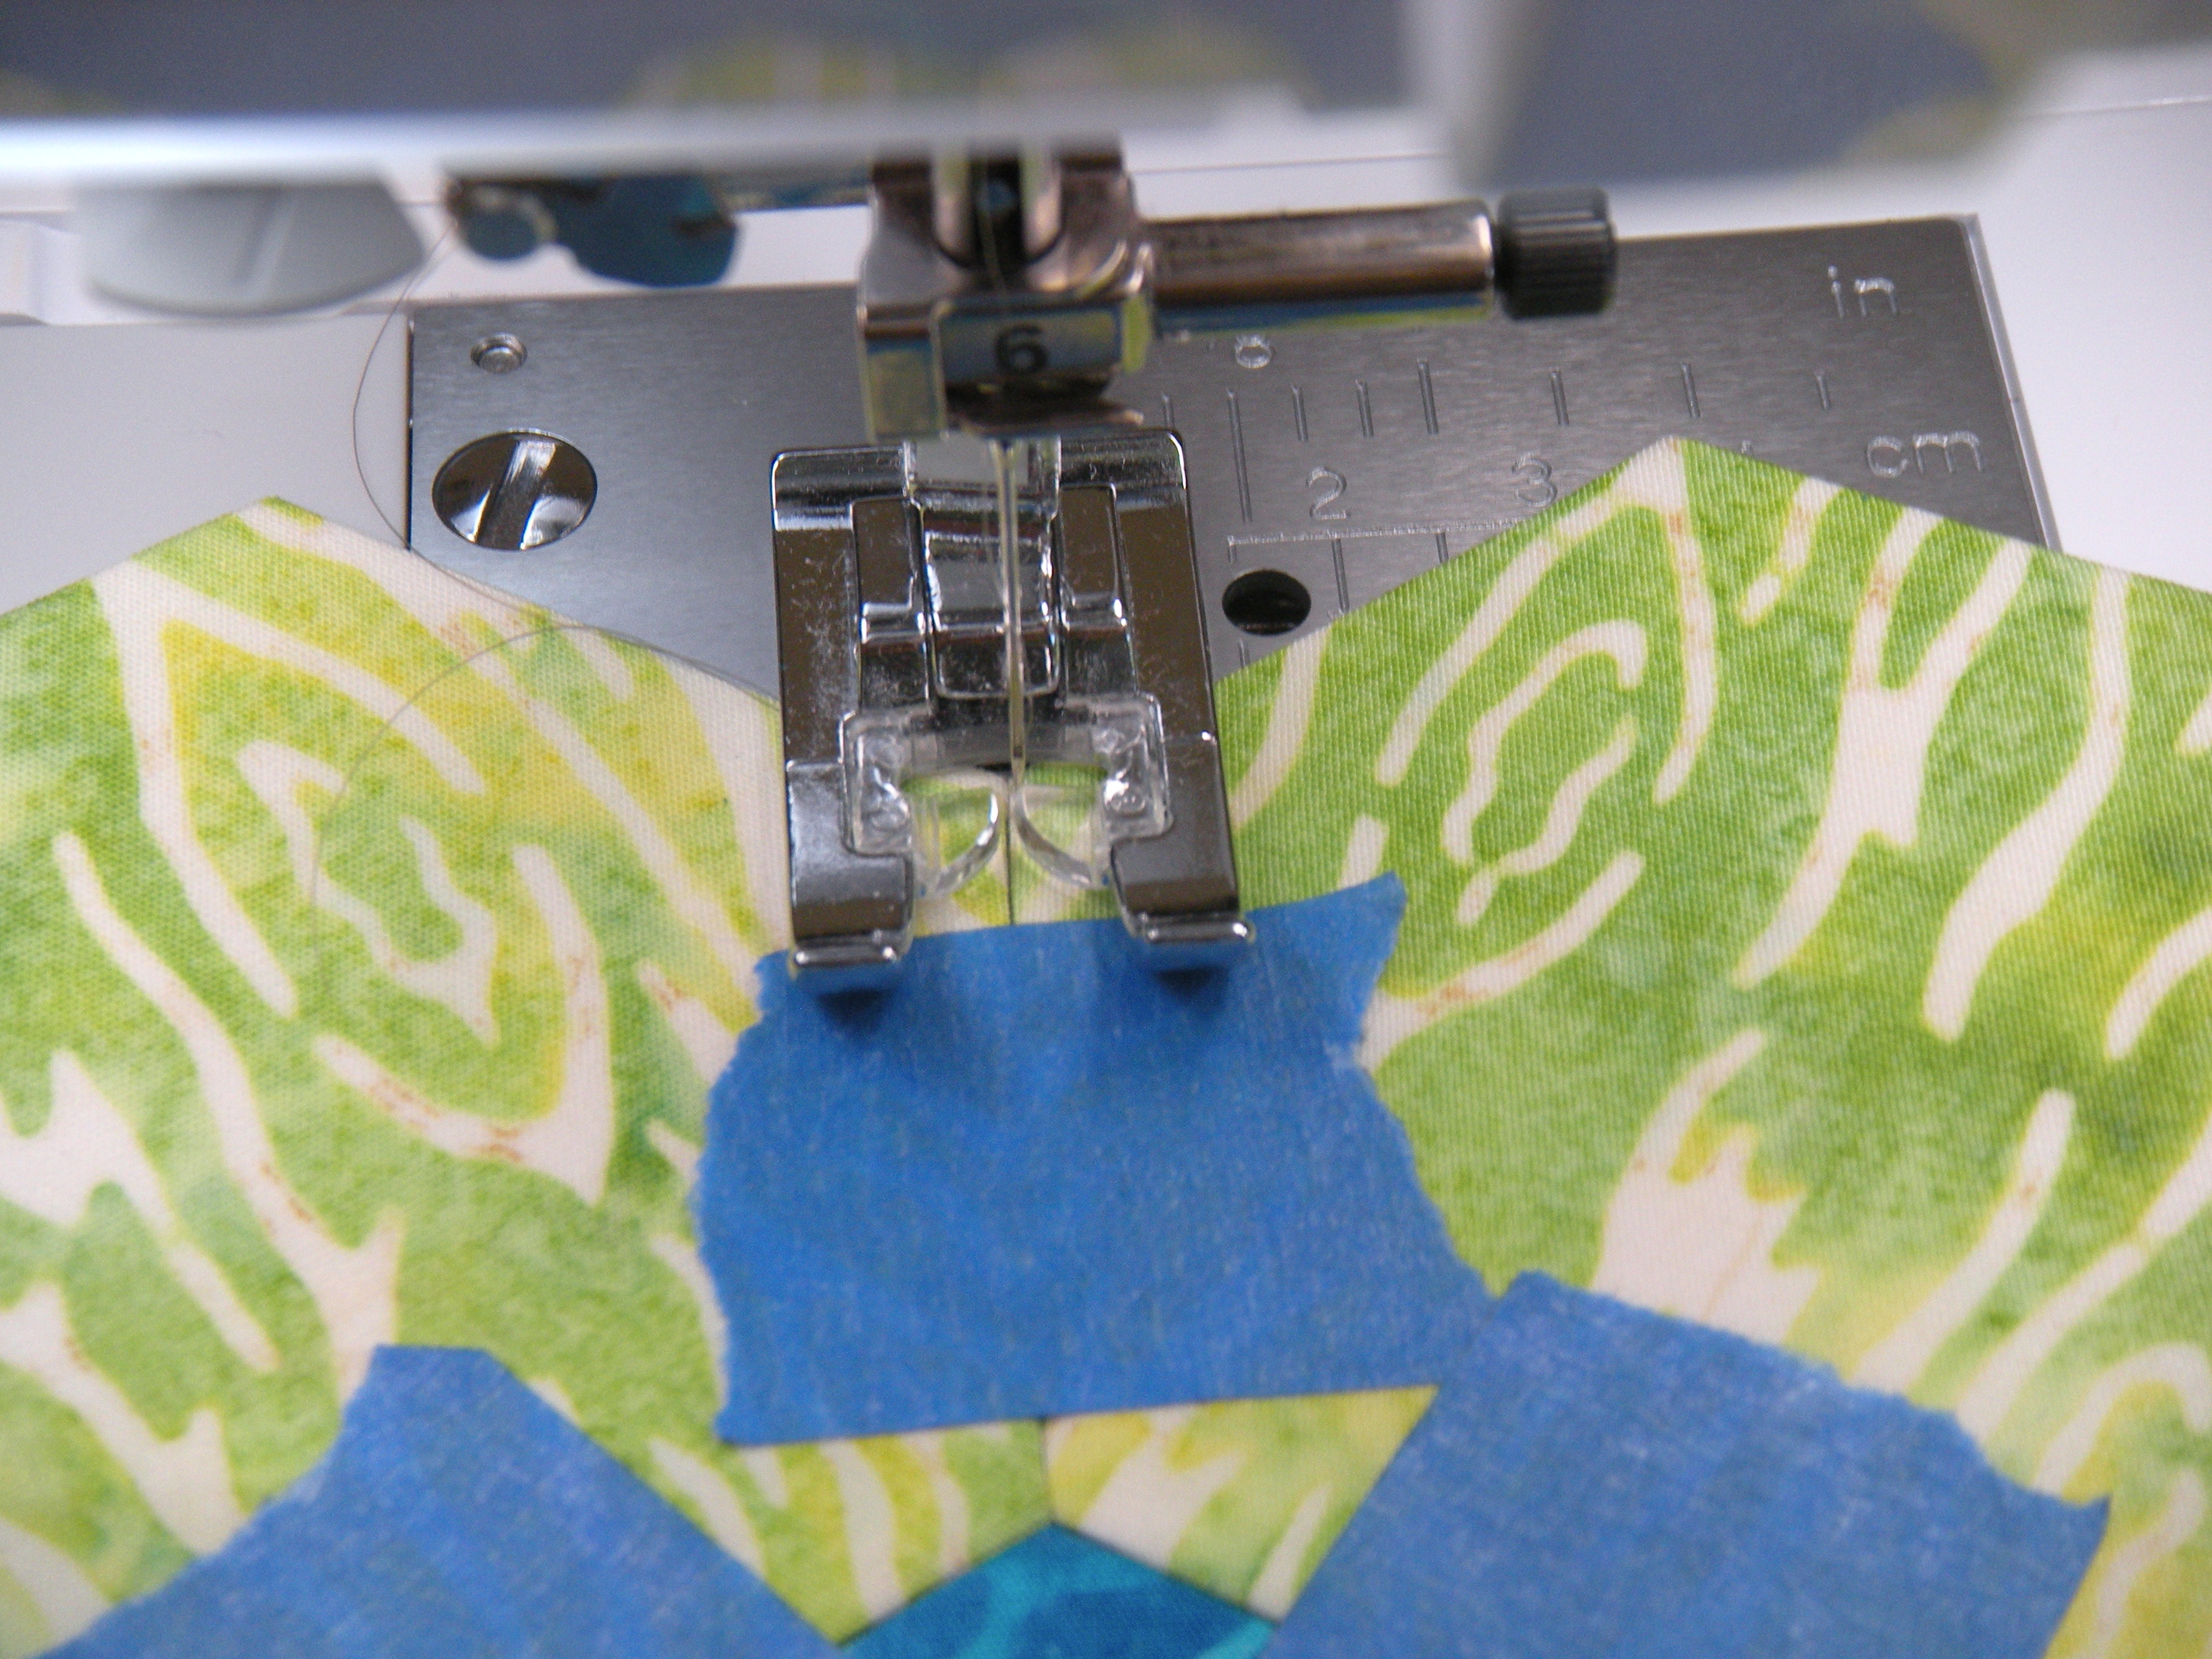
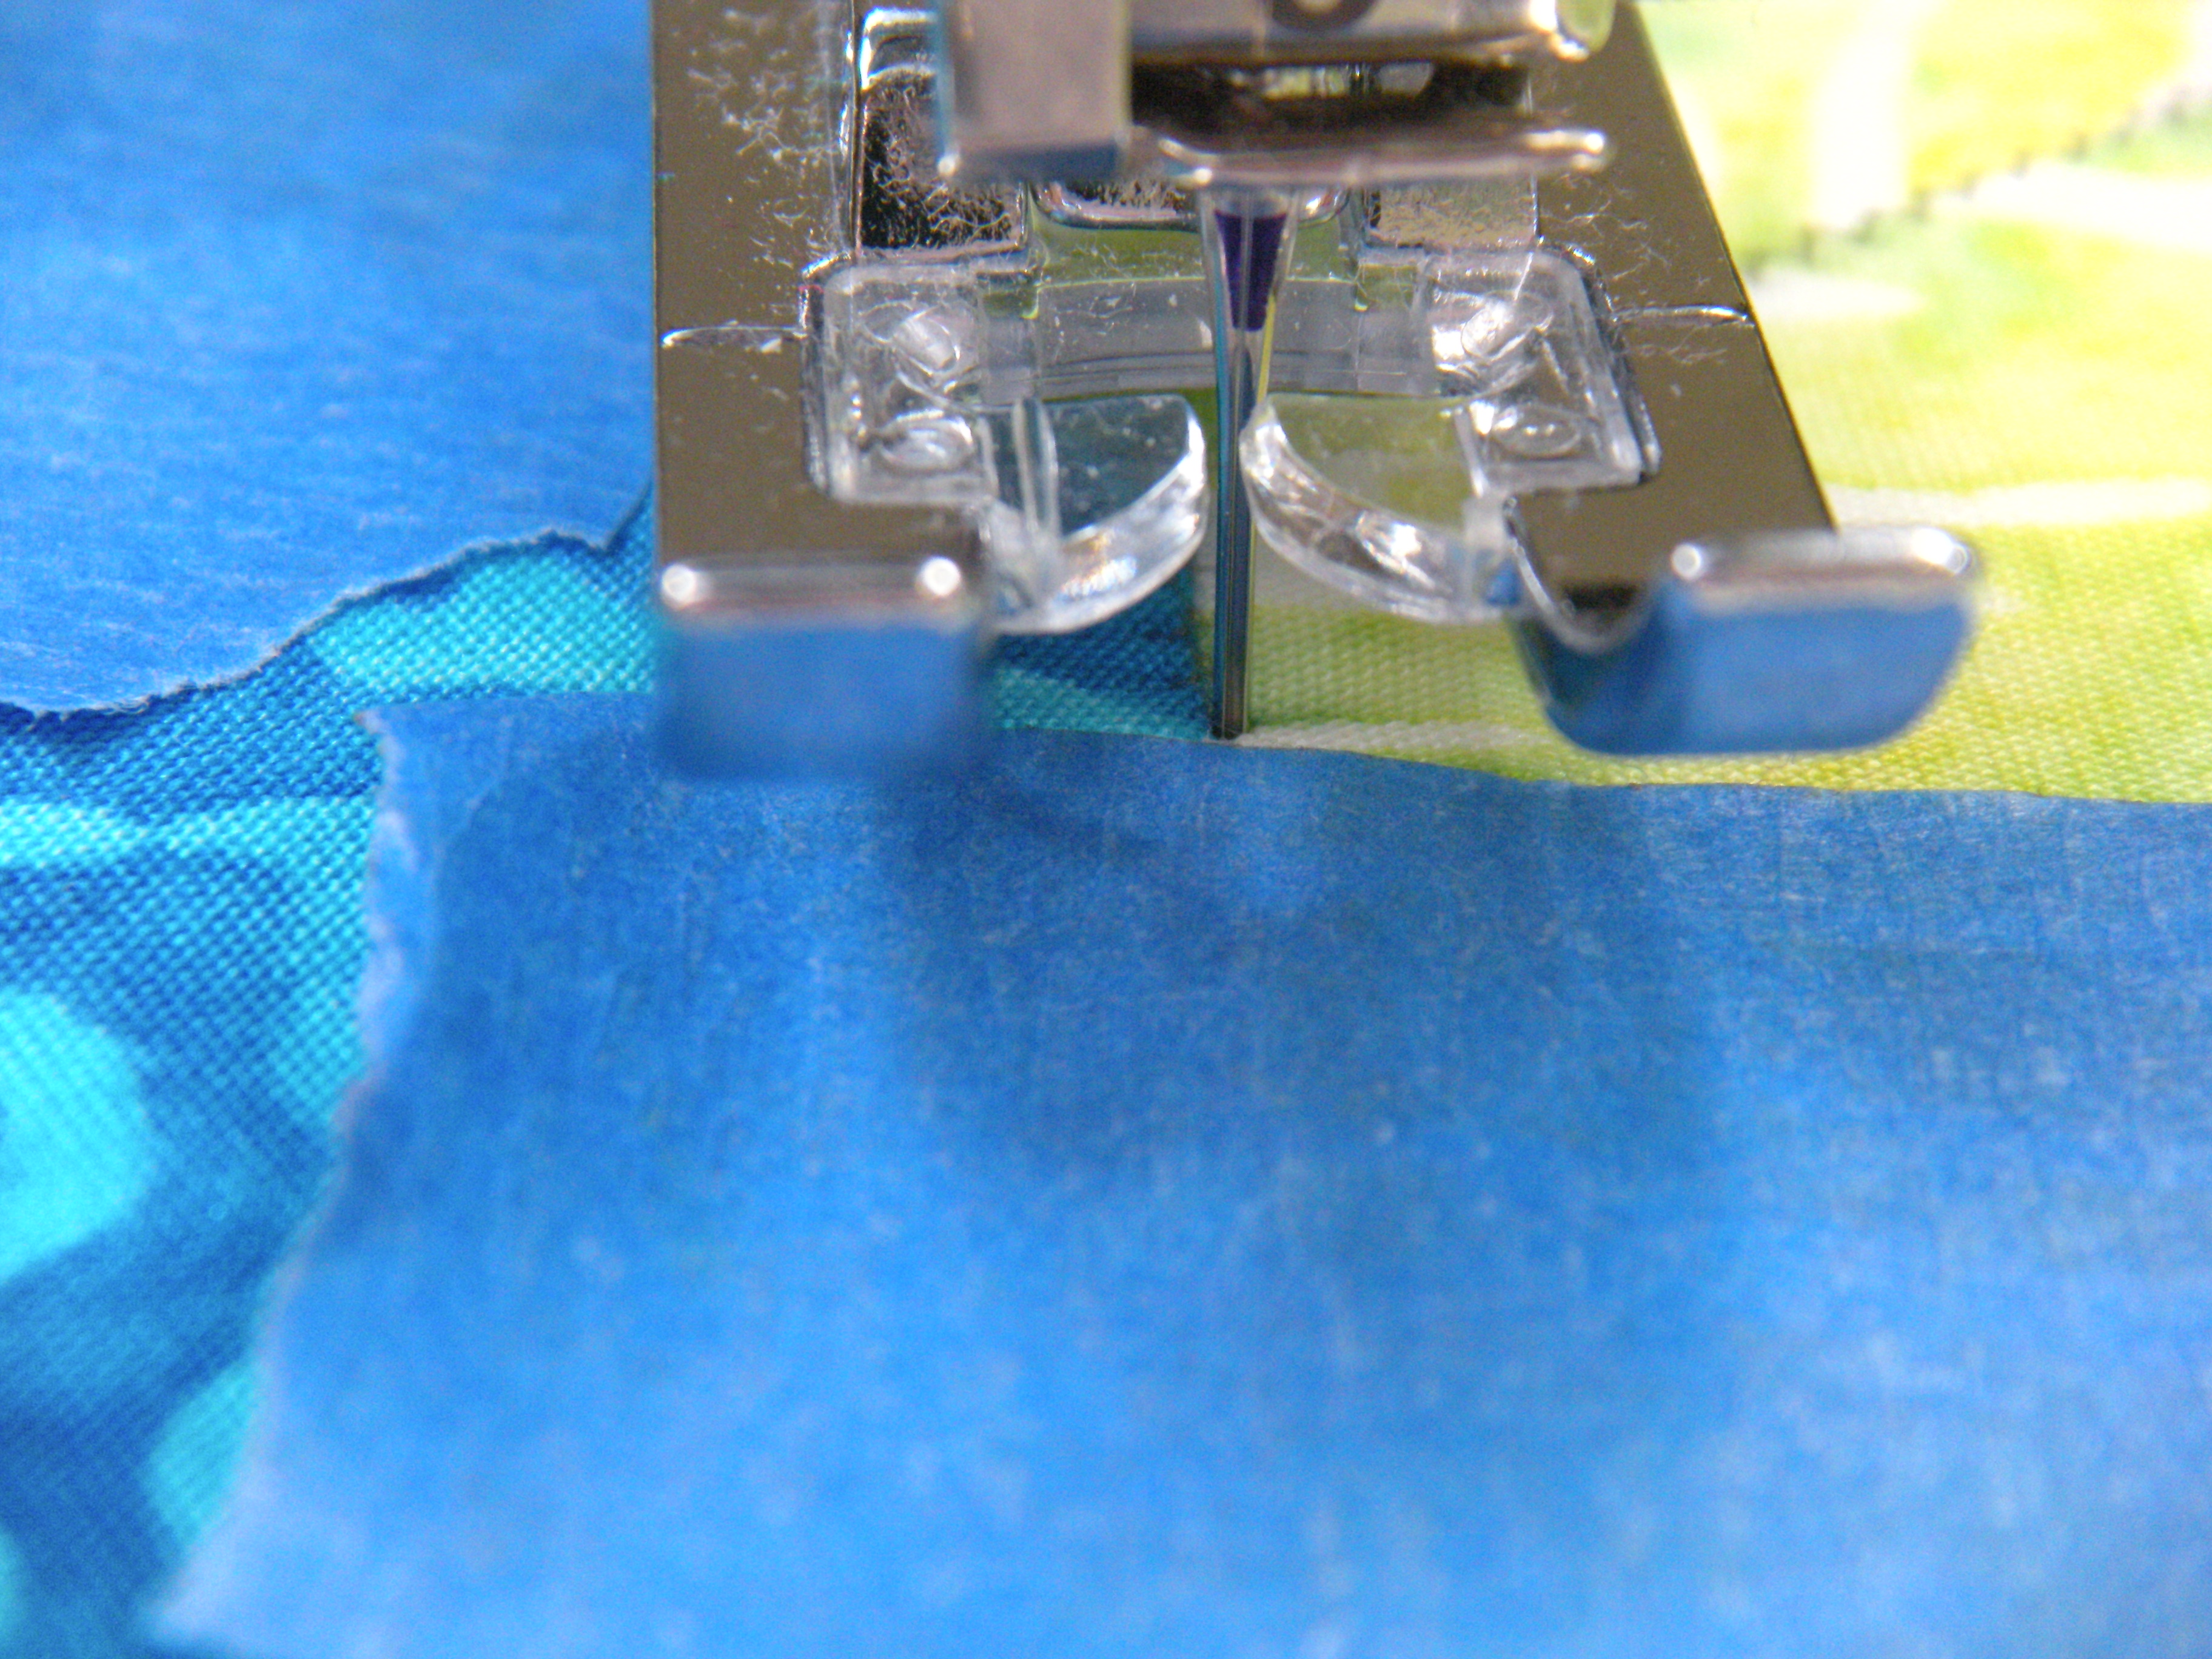
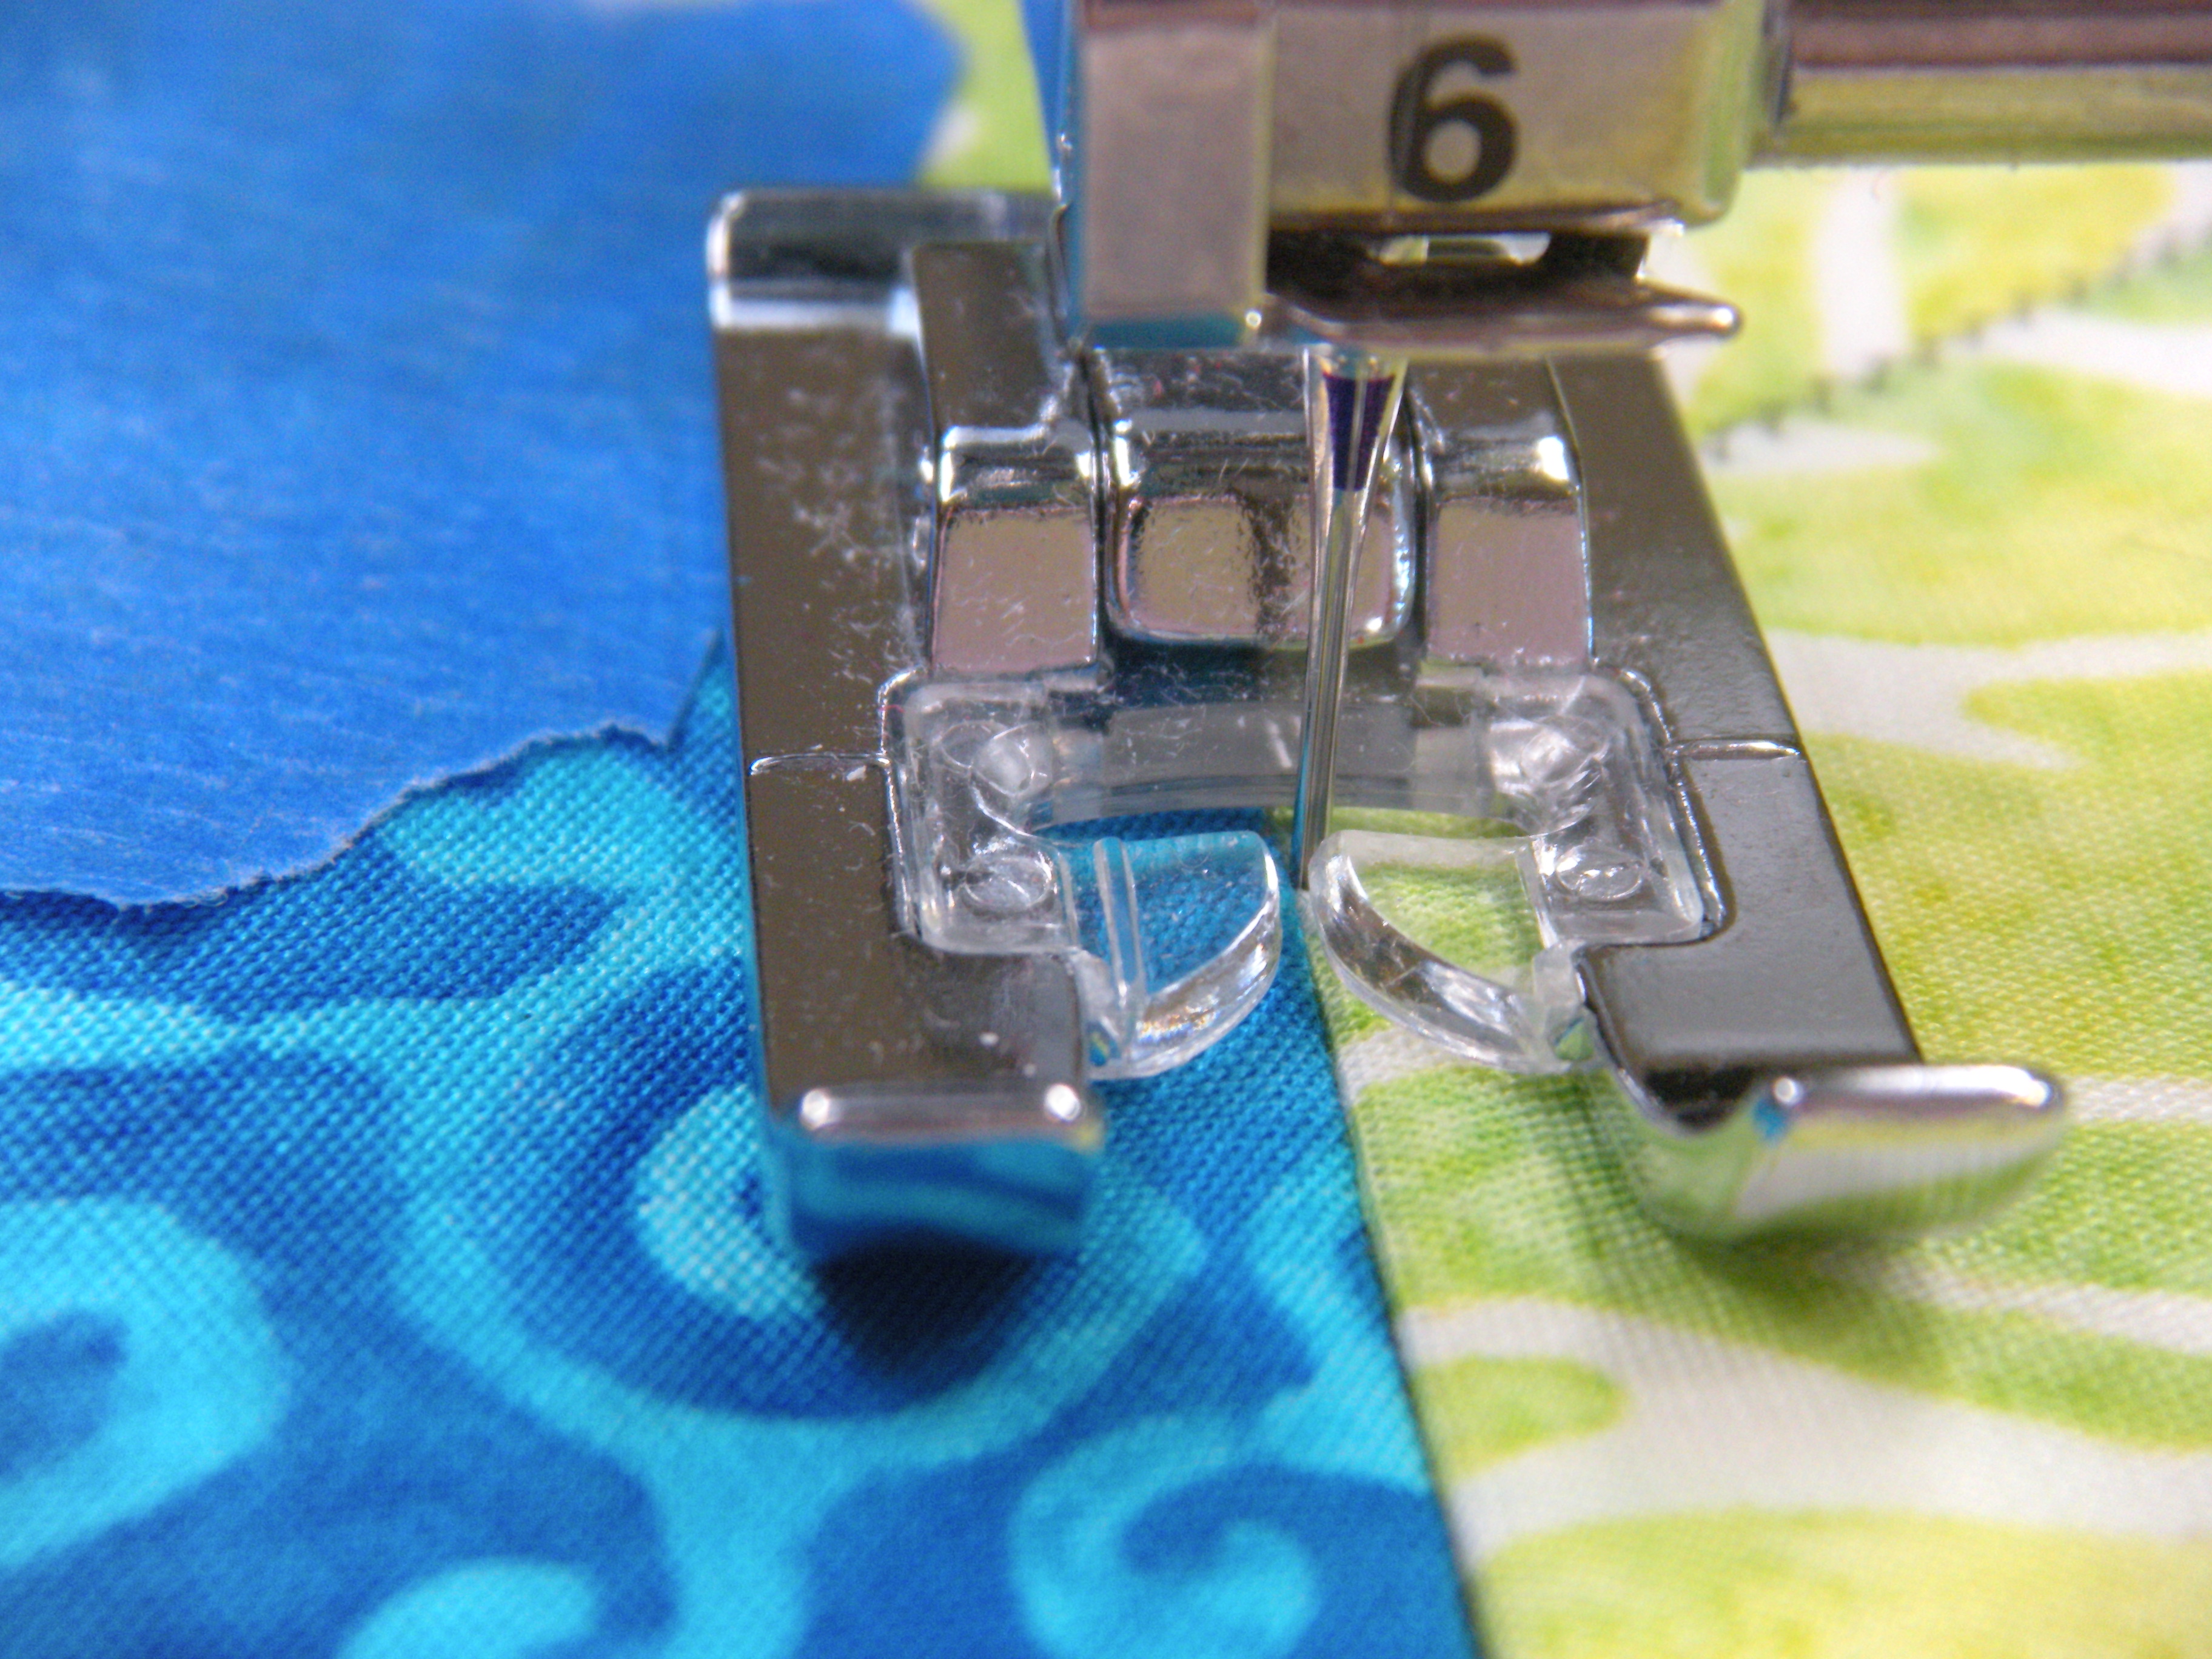
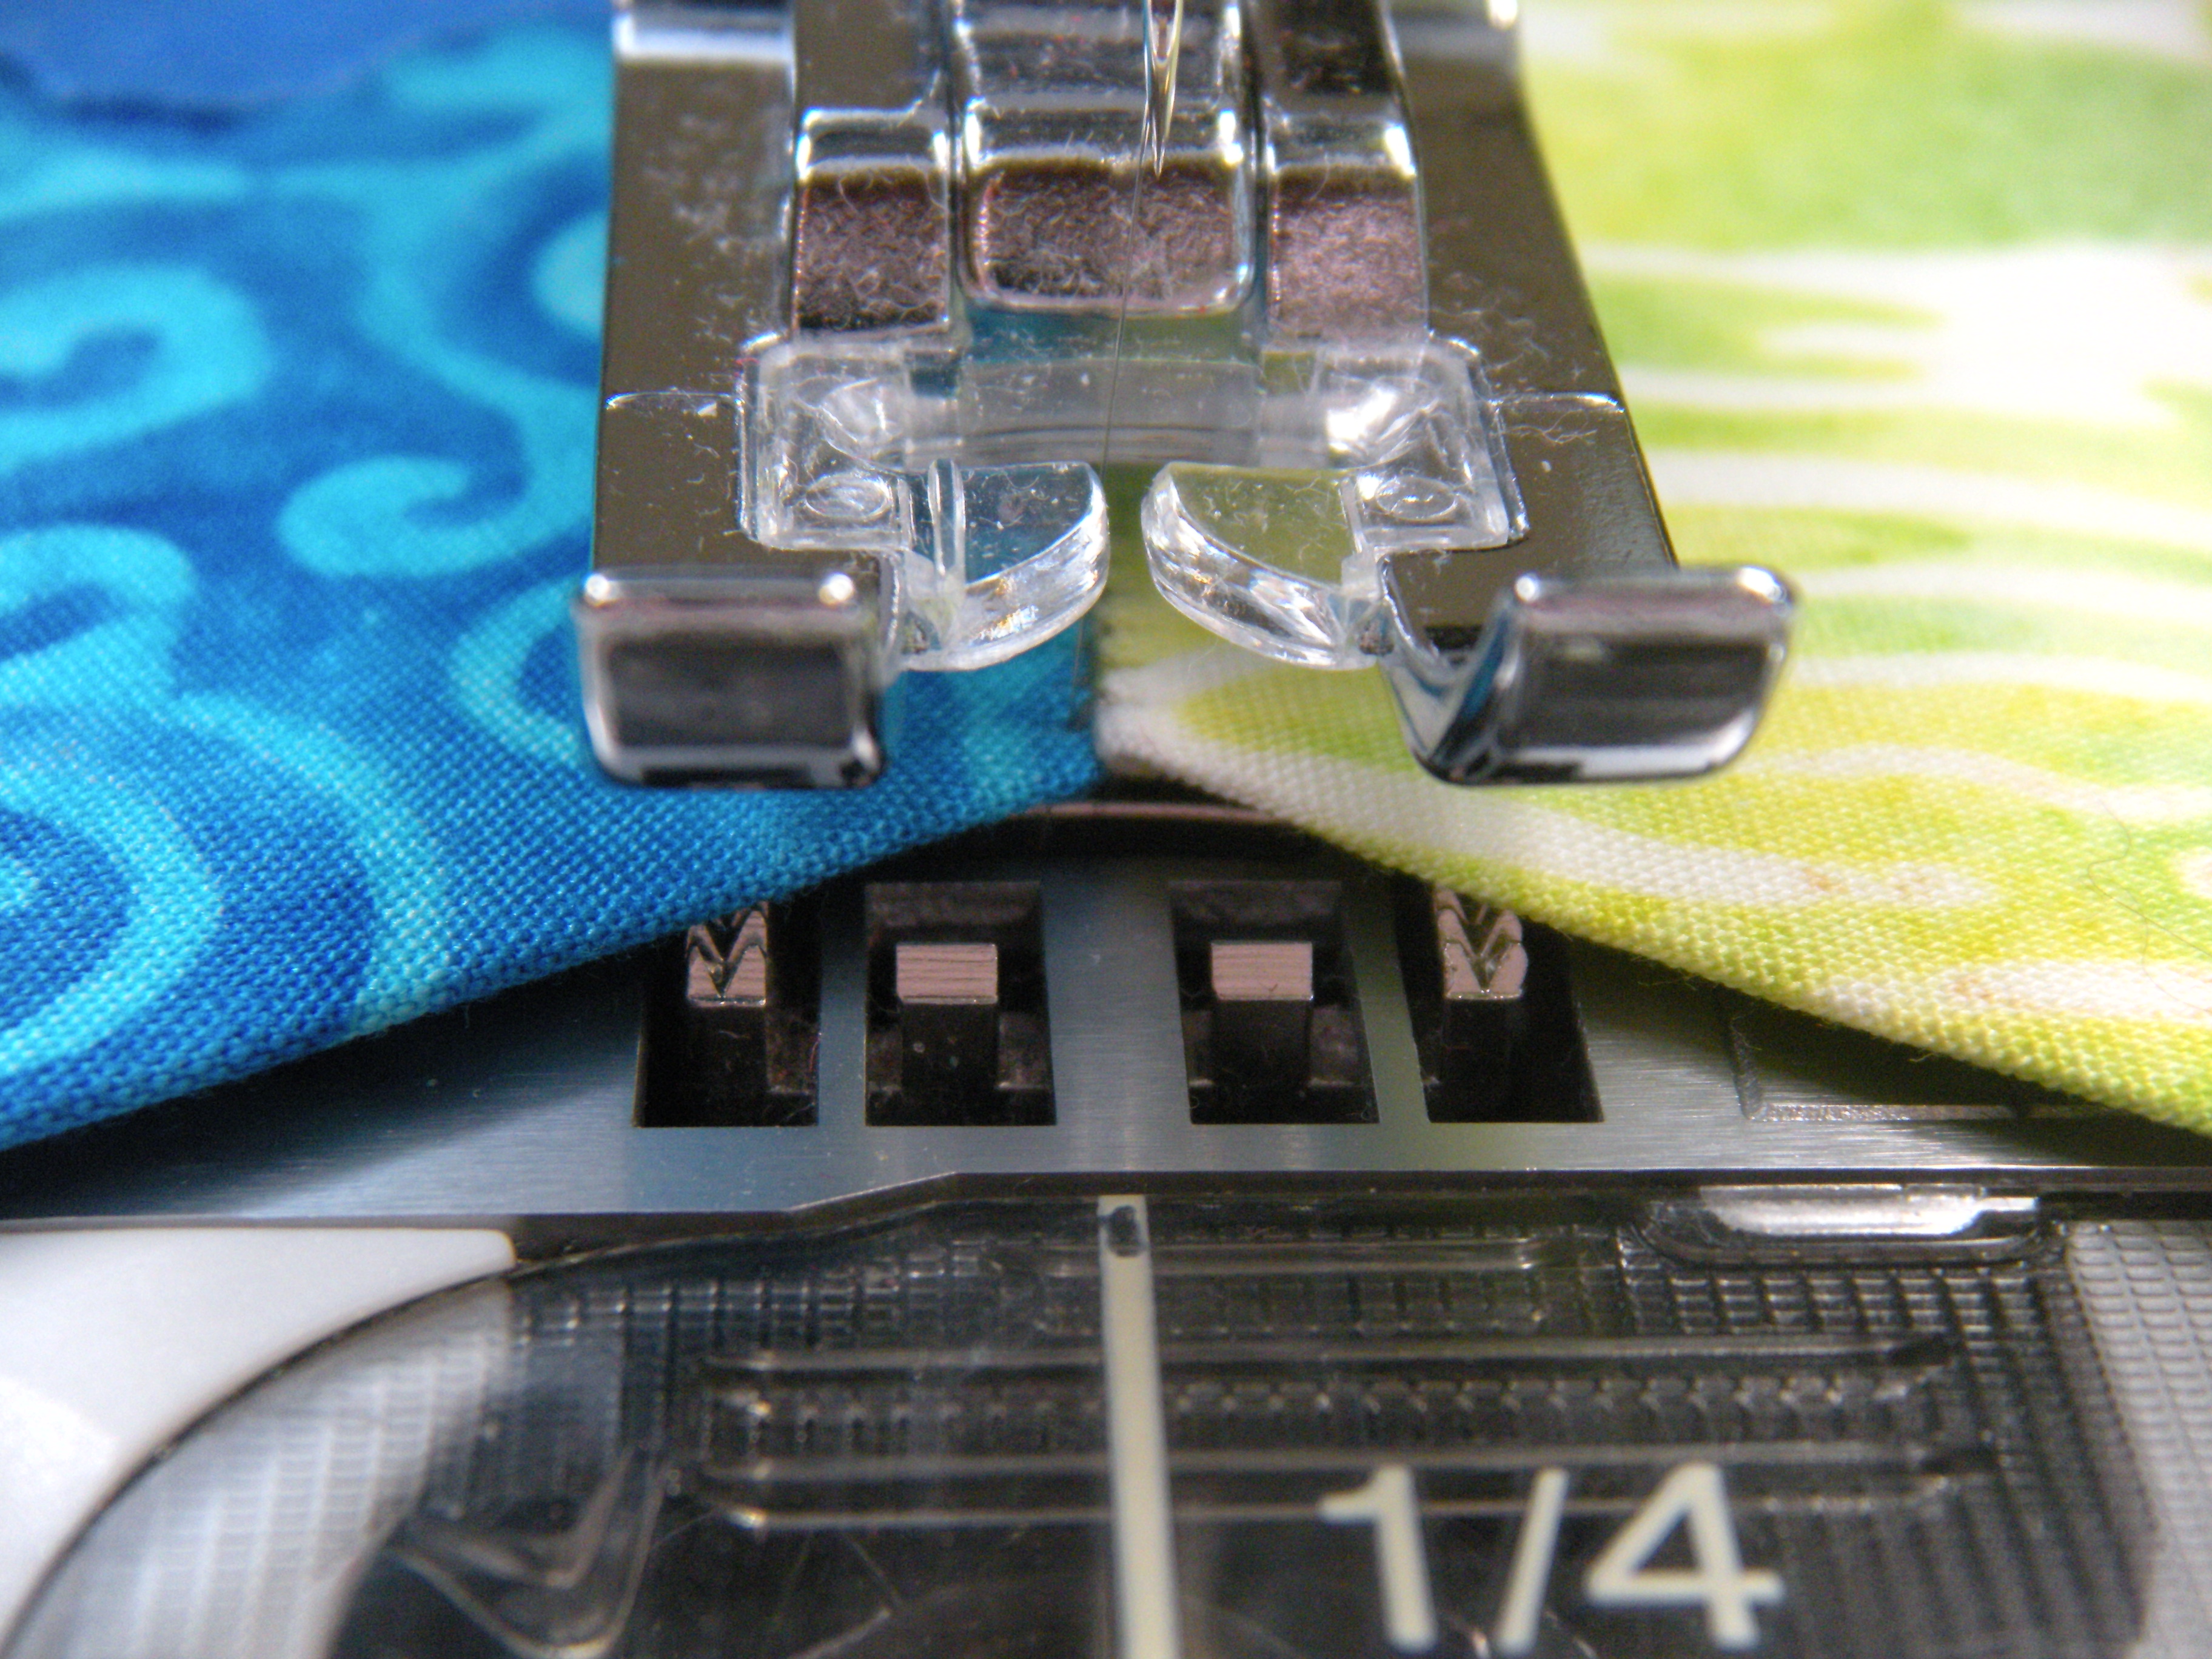
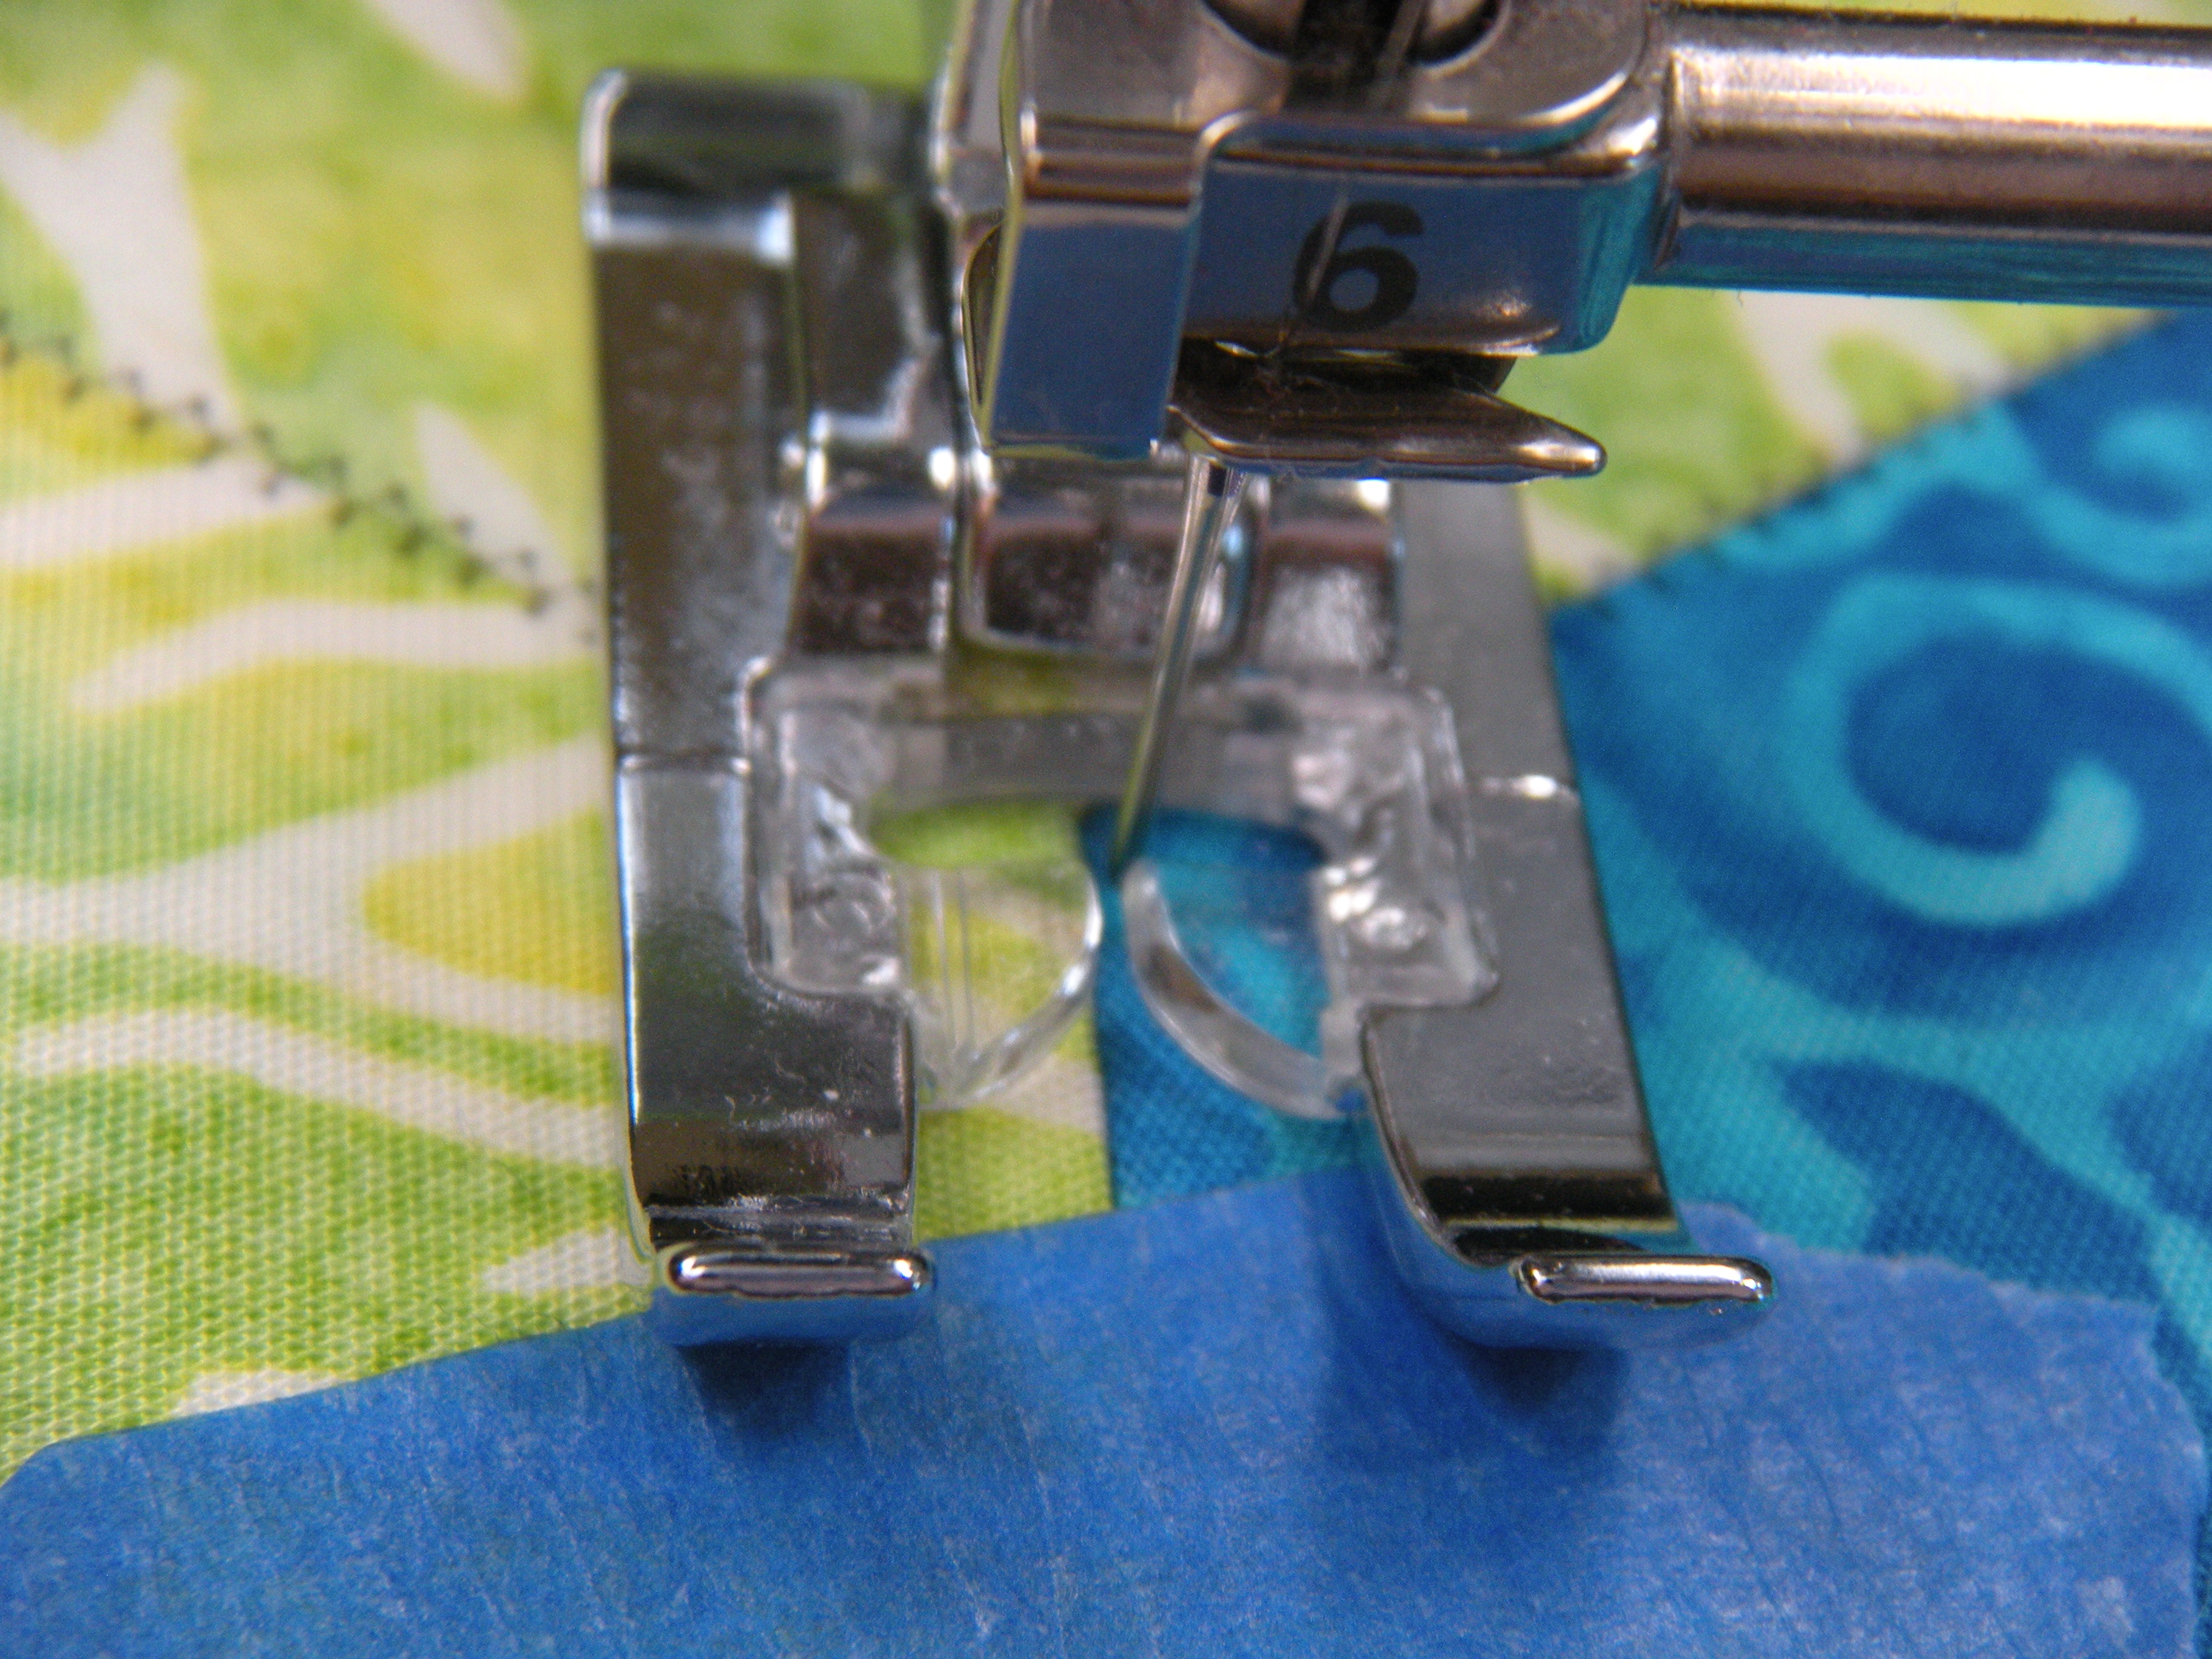
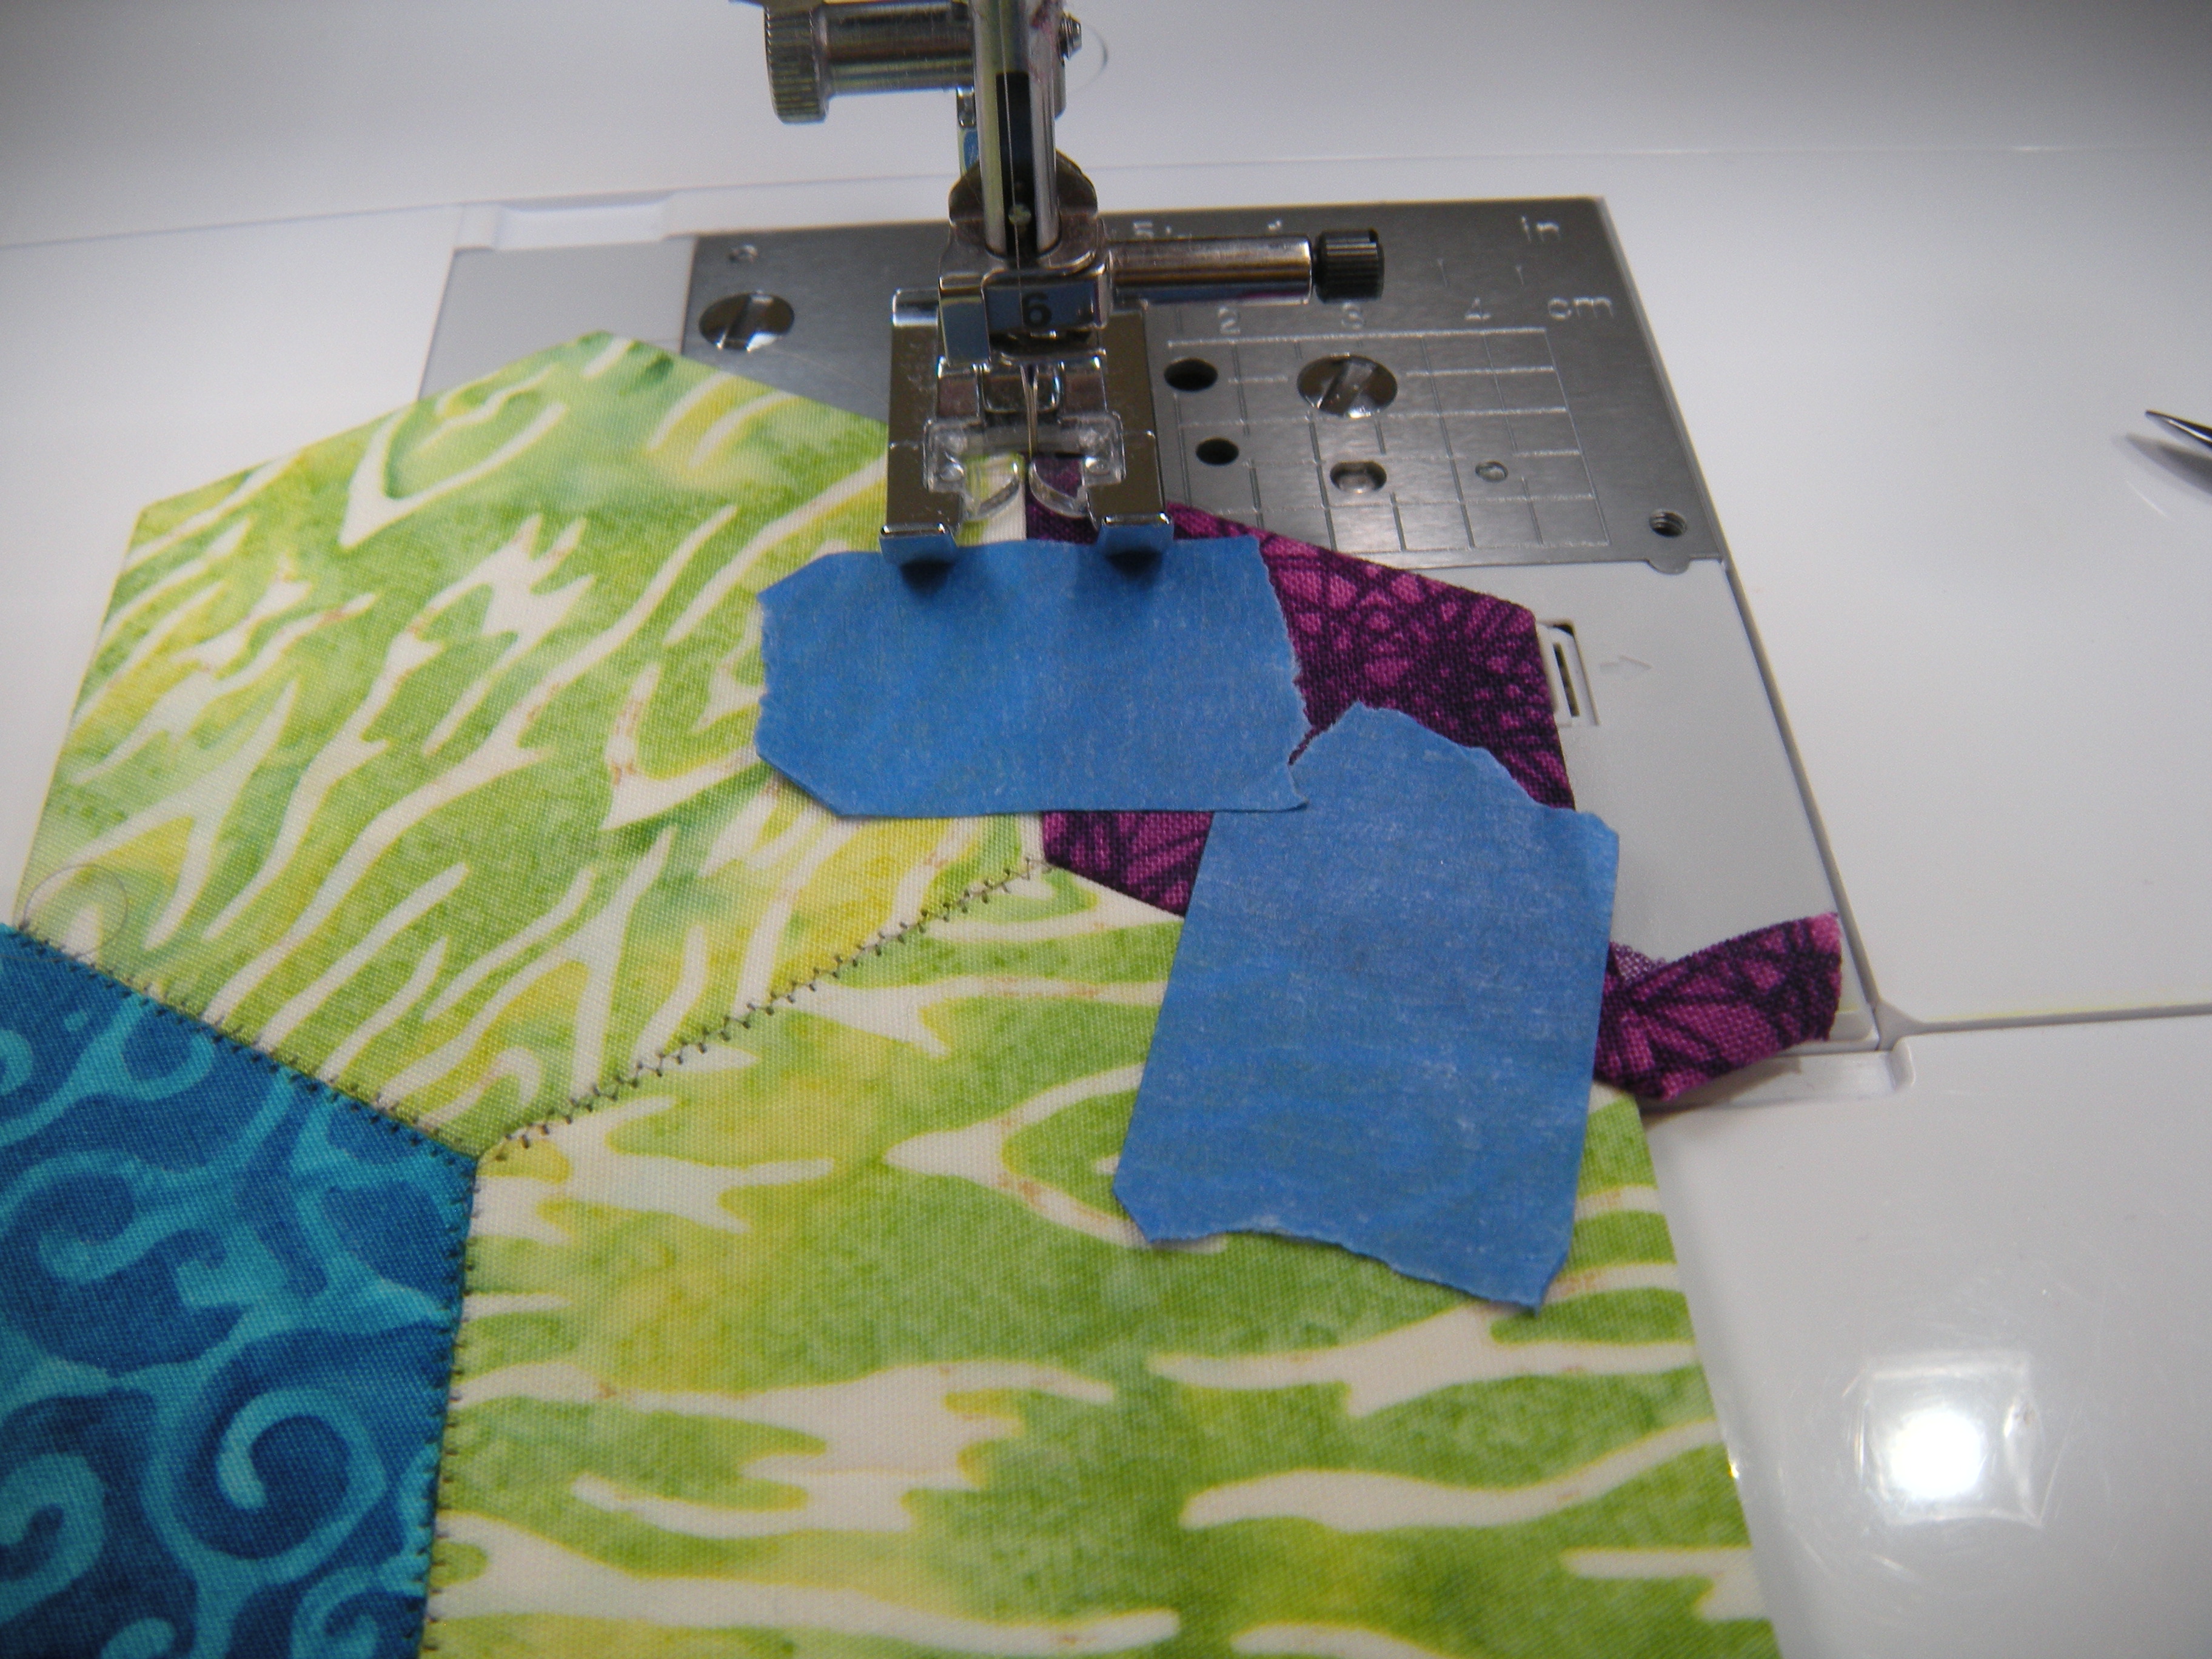
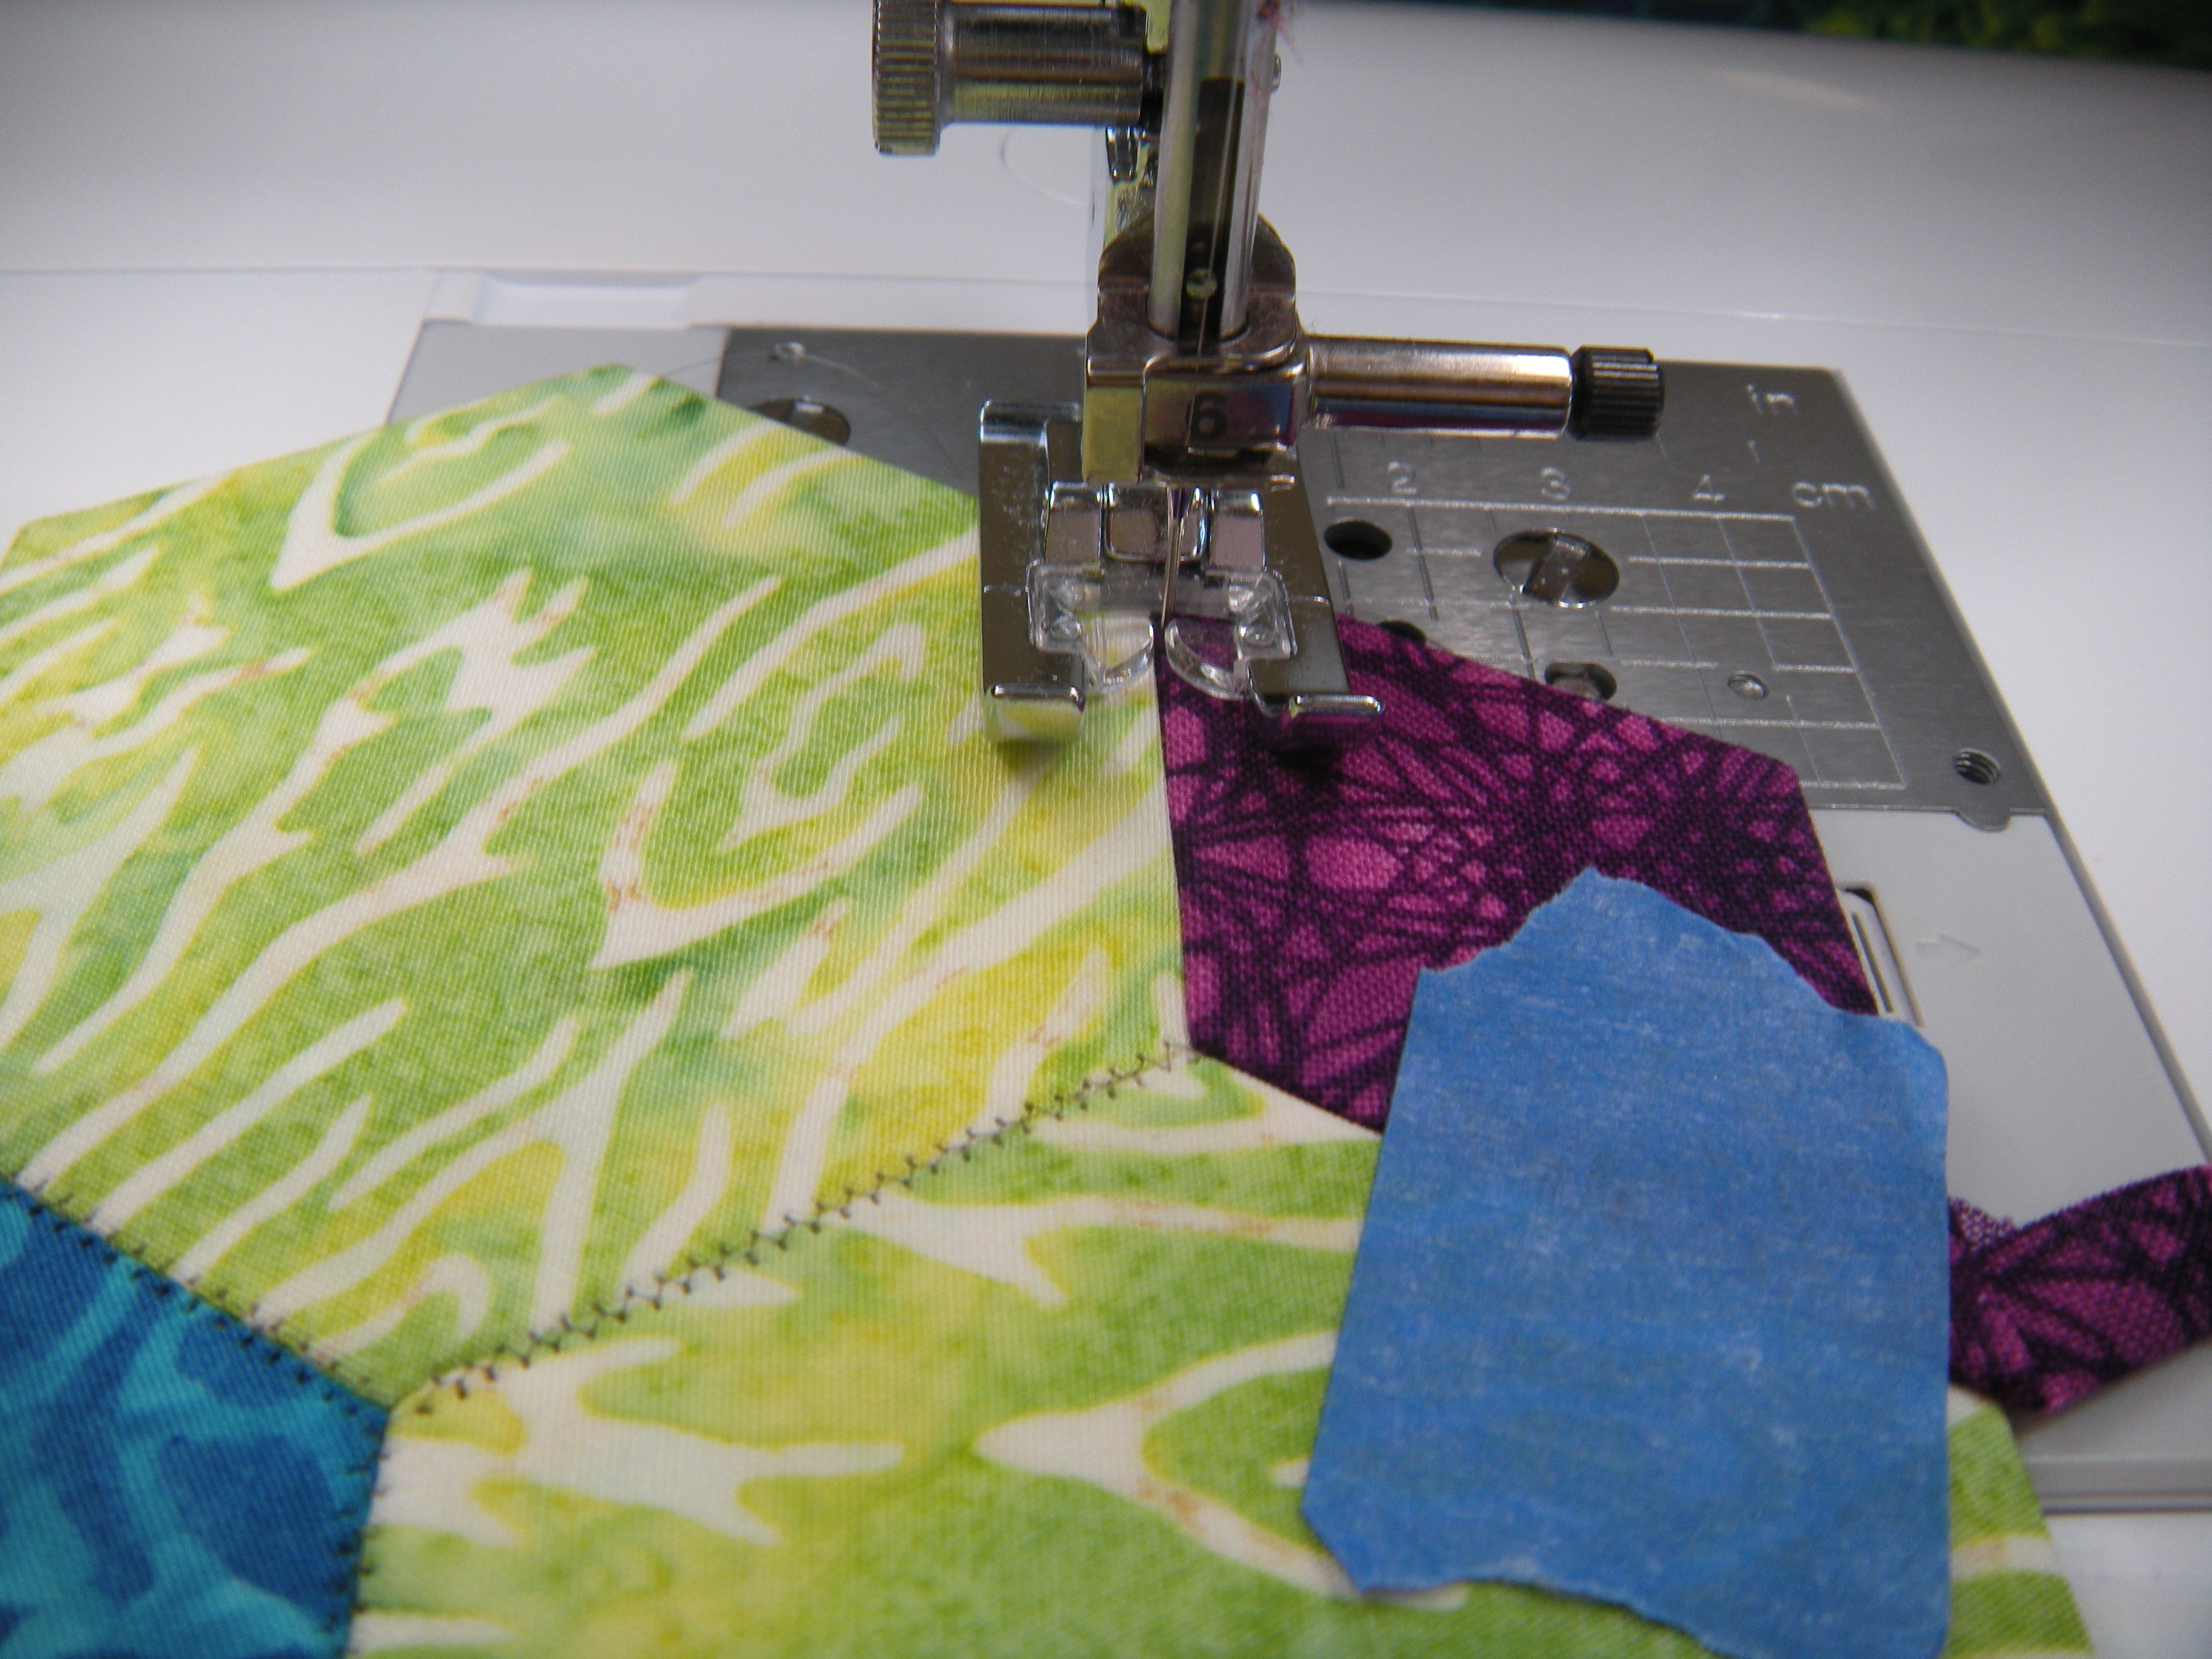
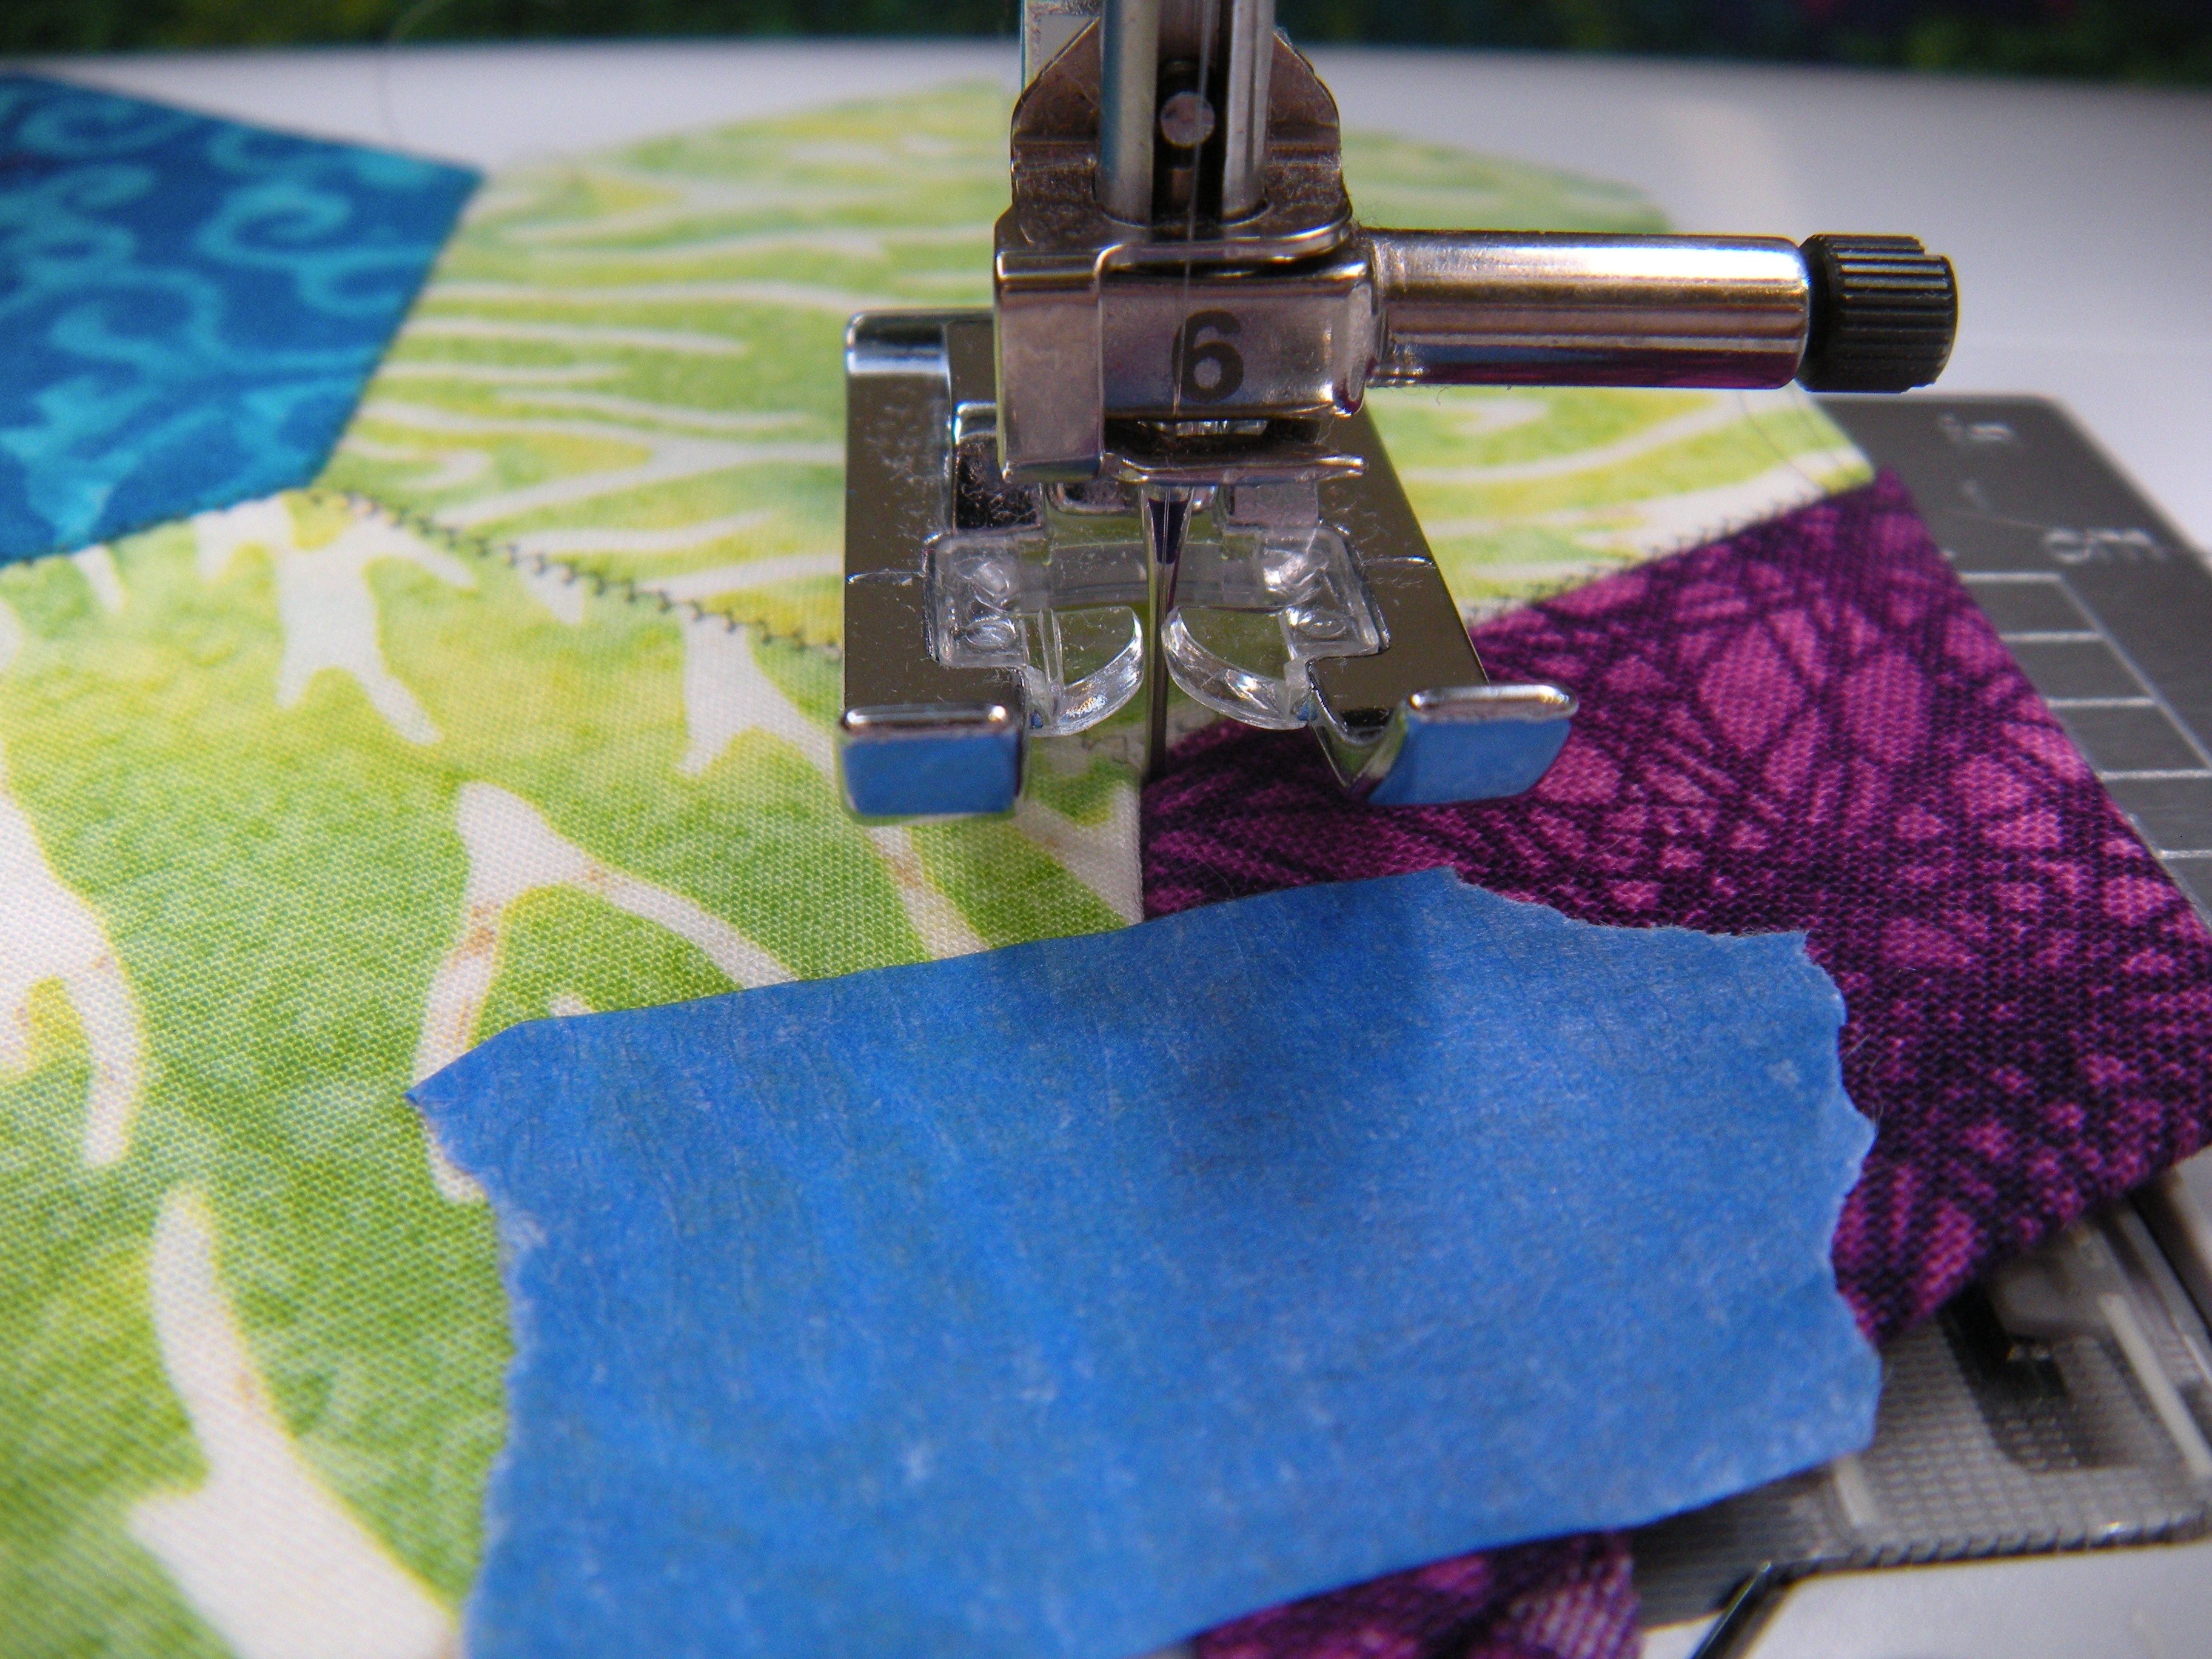
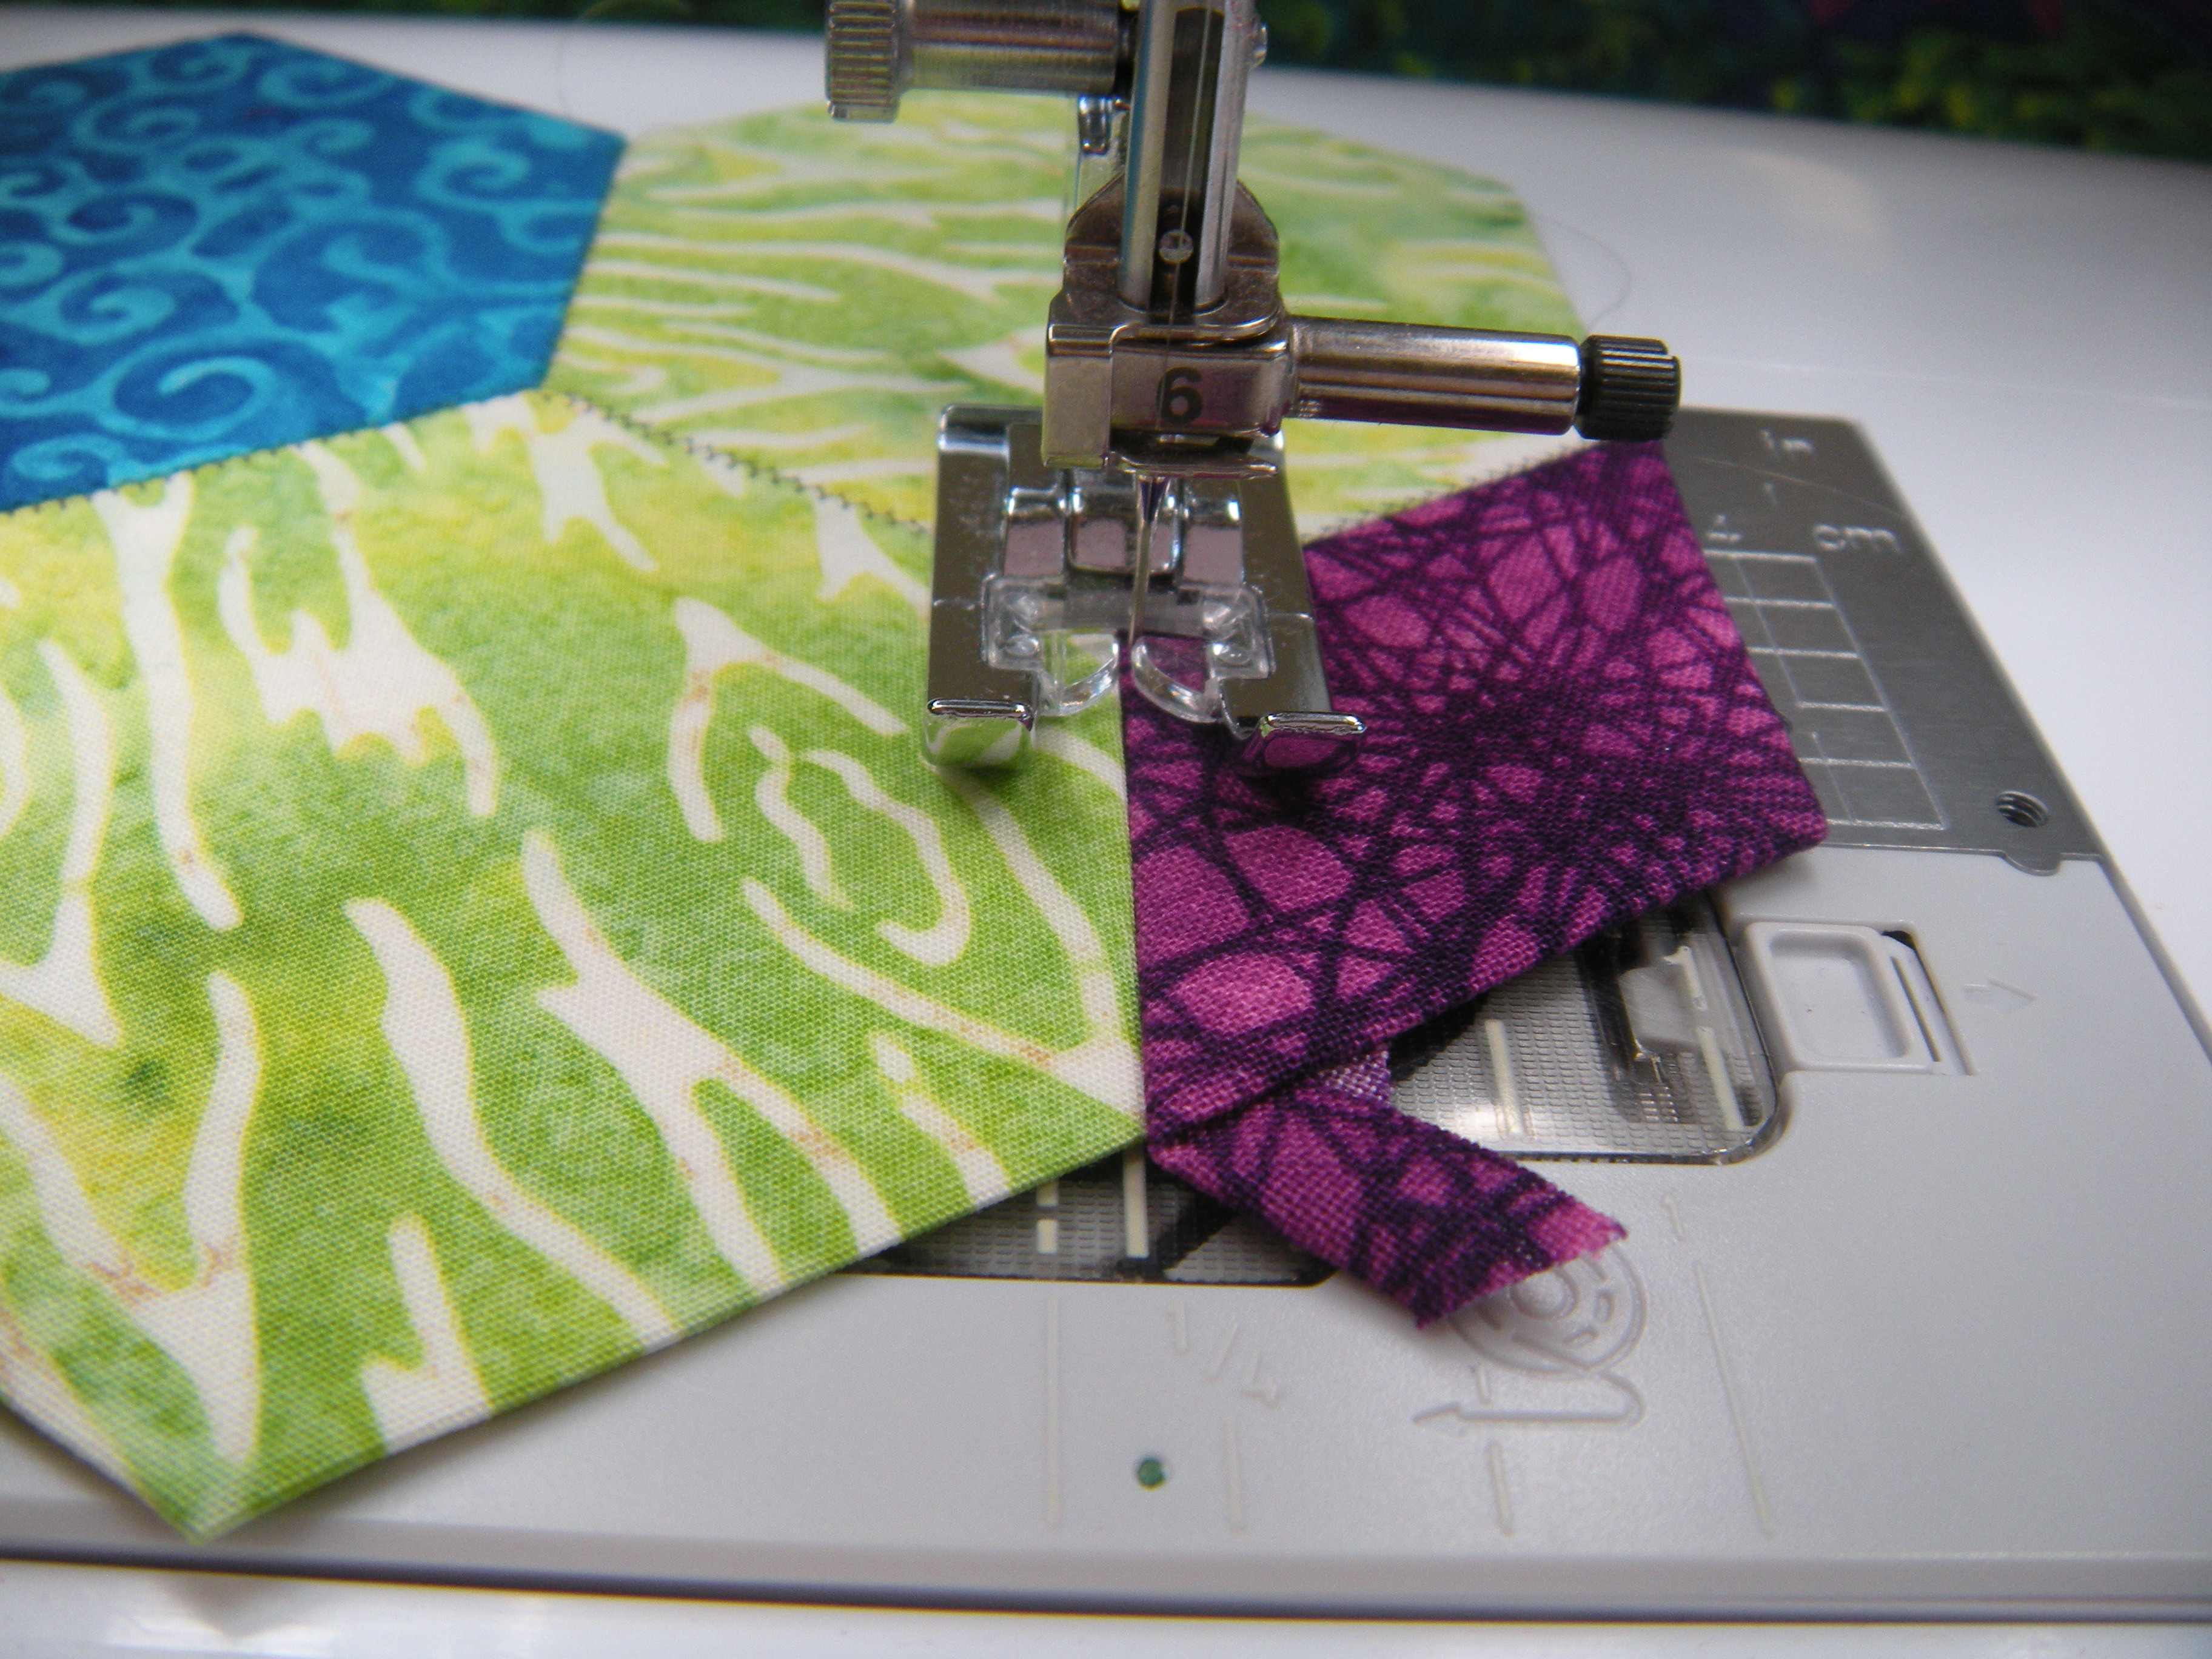
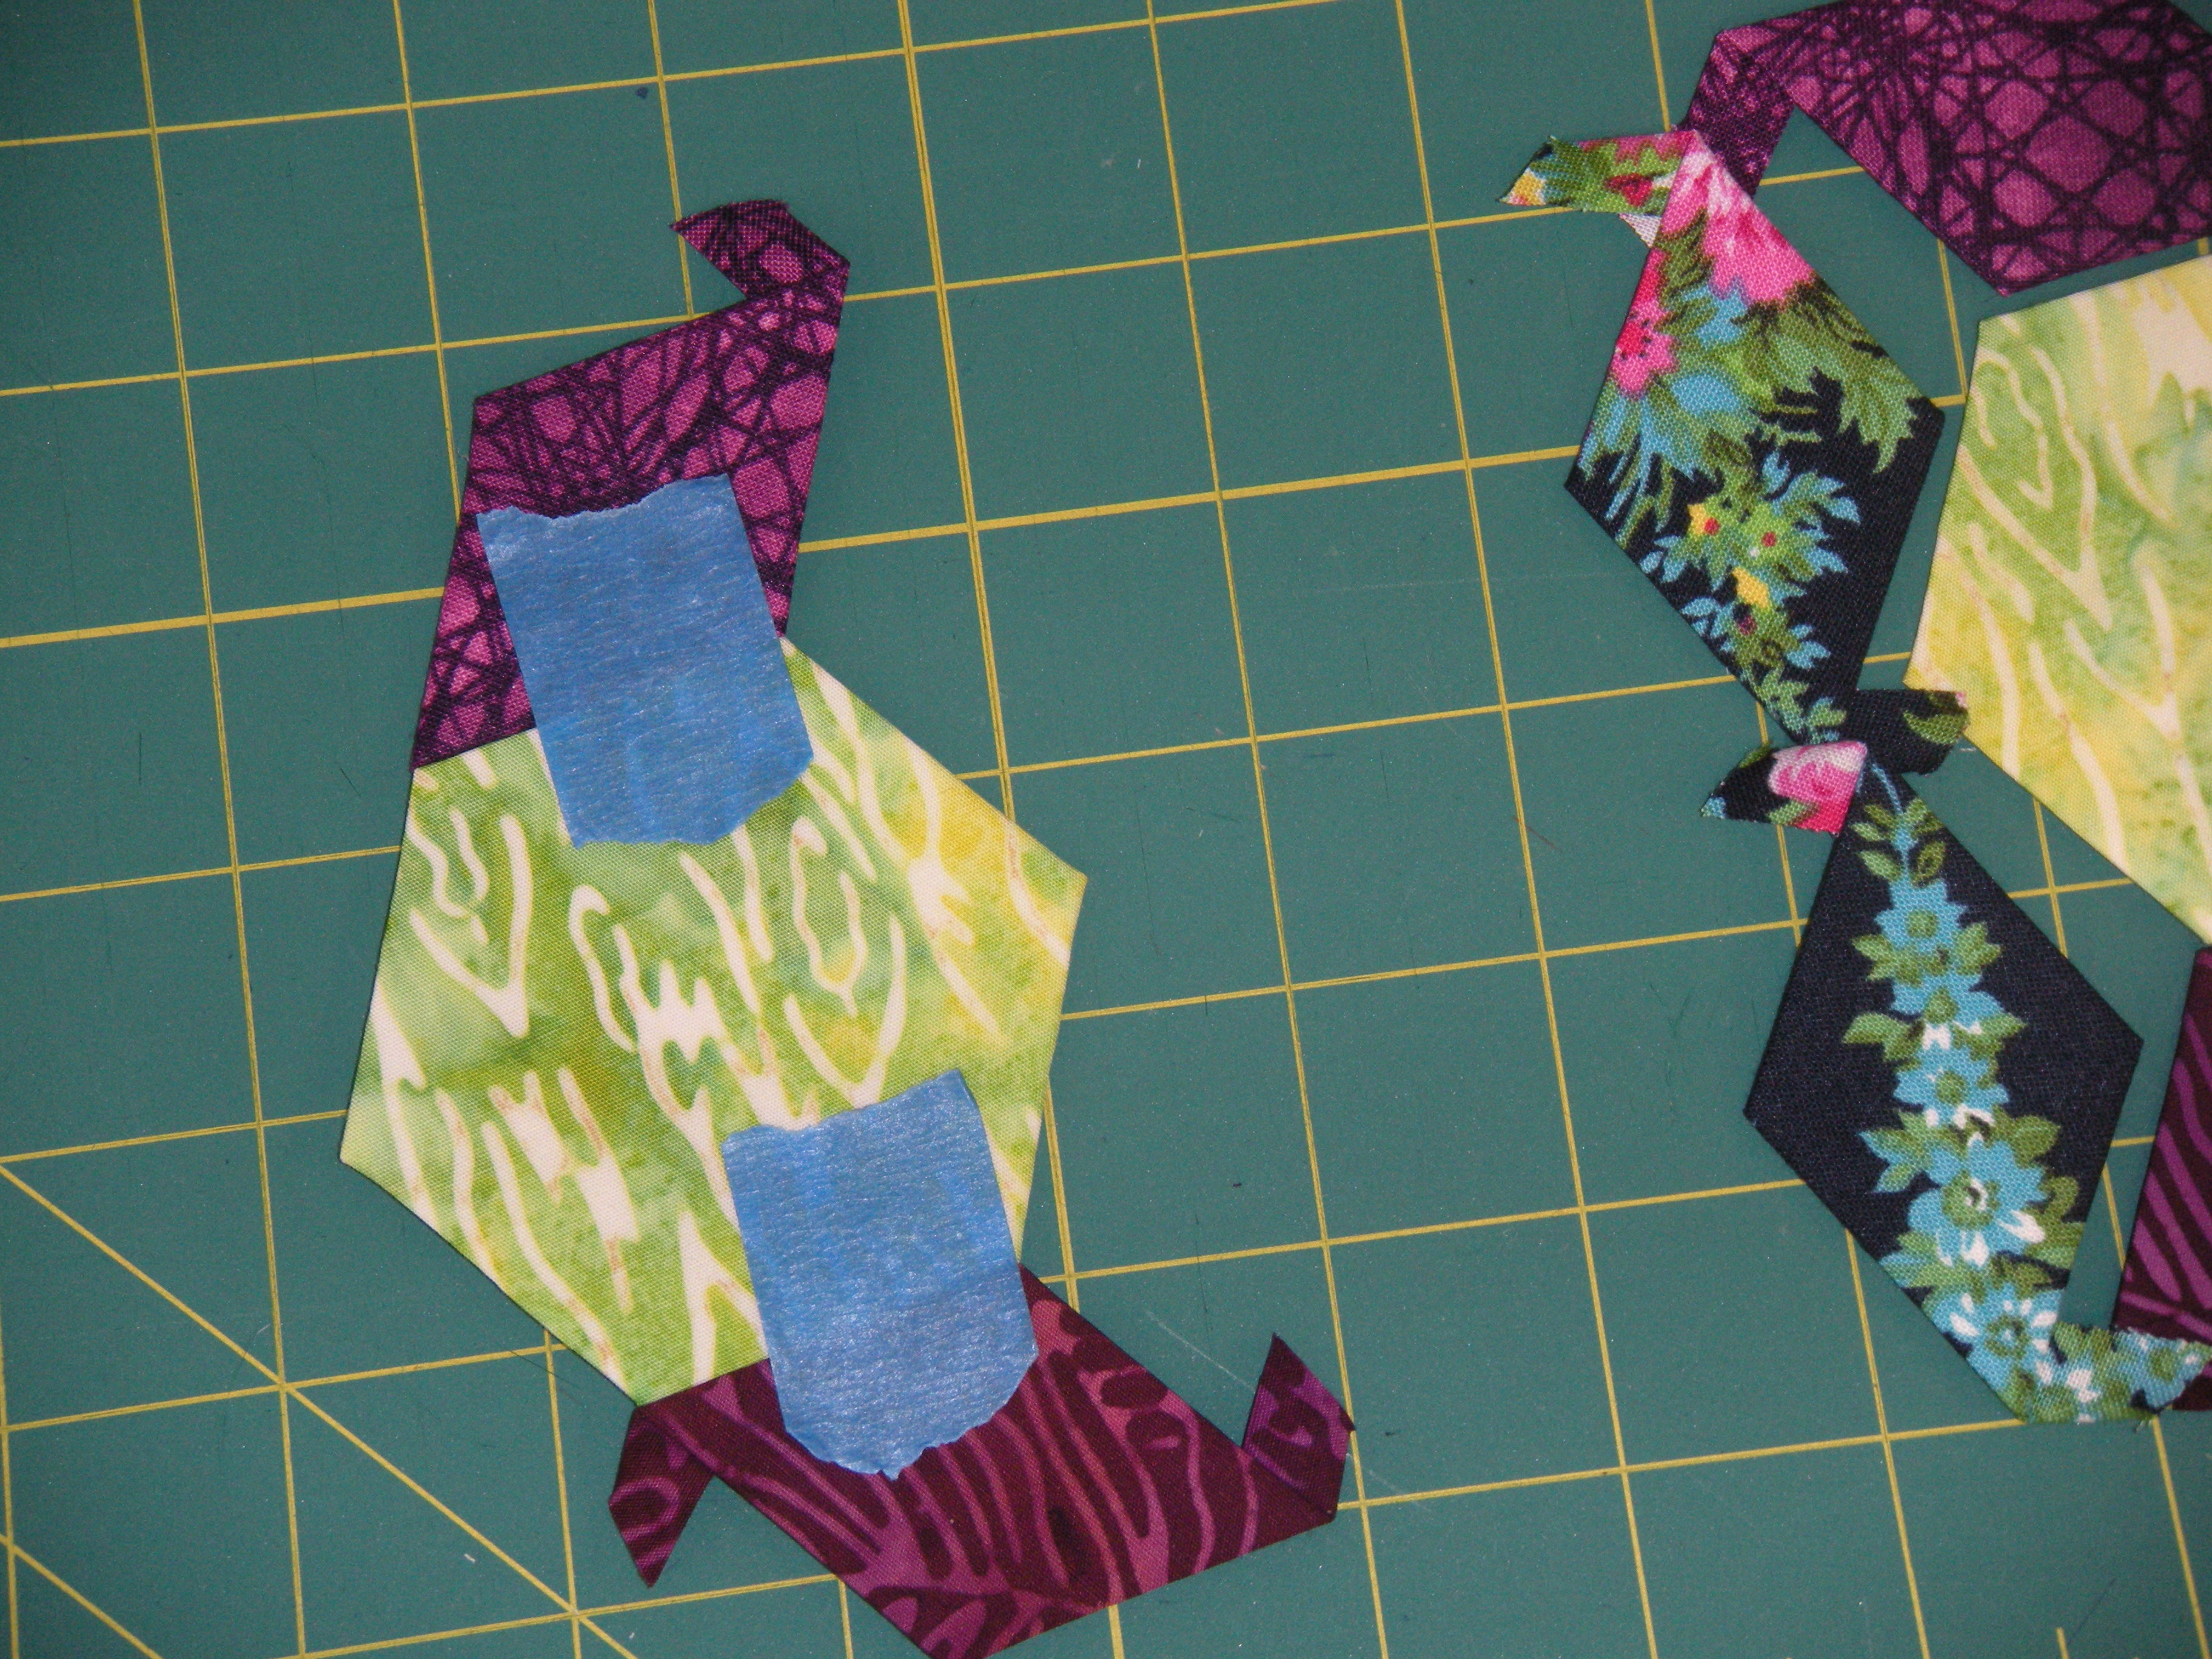
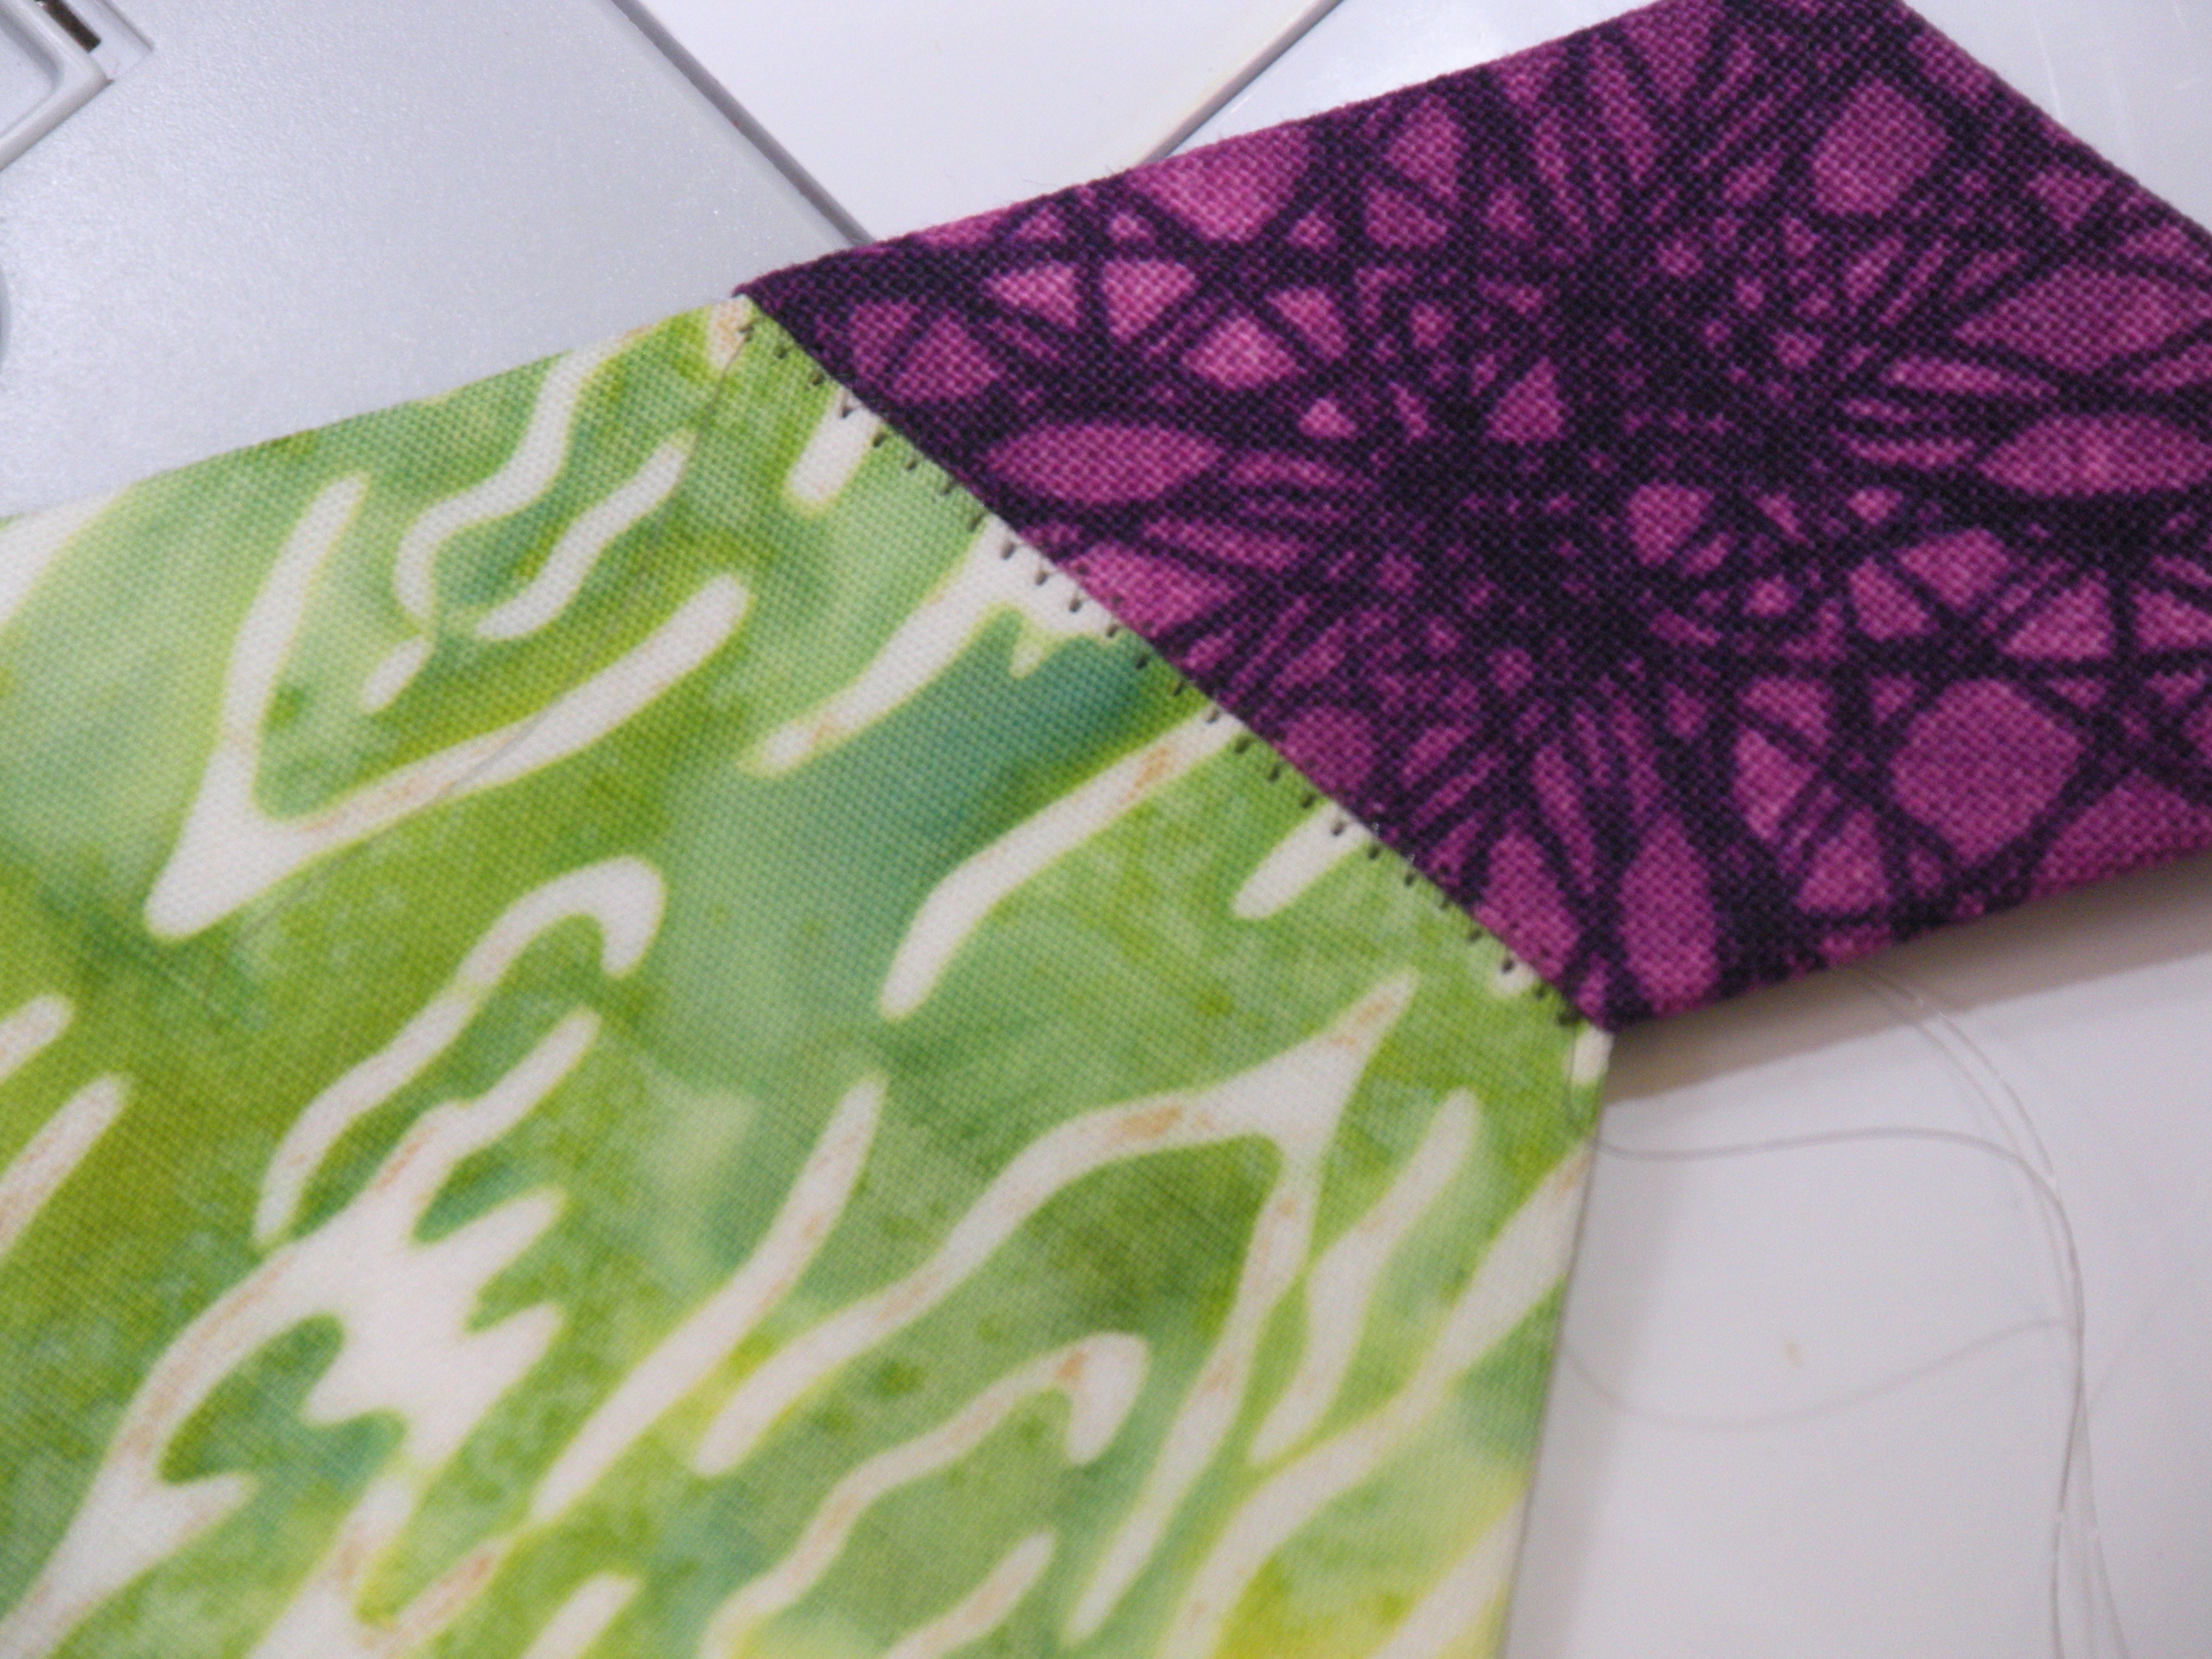
Anyhoo…my little paper pieces are whispering.  They are whispering politely, and I am still interested in what they have to say.  So I got out my glue stick, fired up Netflix, cut myself with my rotary cutter, and got back into the game.  And I followed my own tutorials.  I pieced those puppies with my sewing machine.

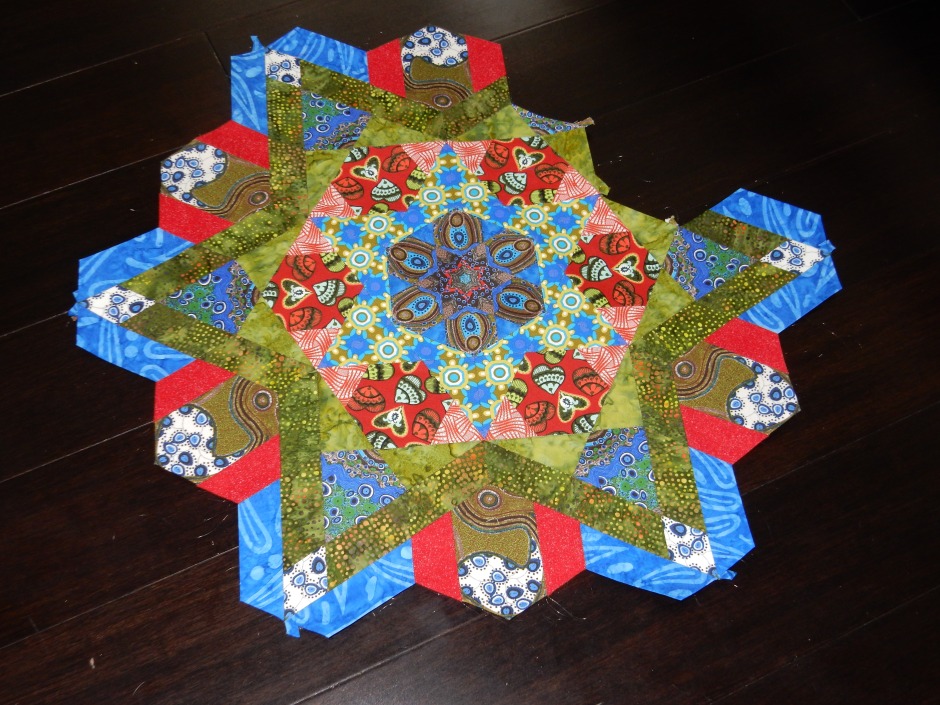
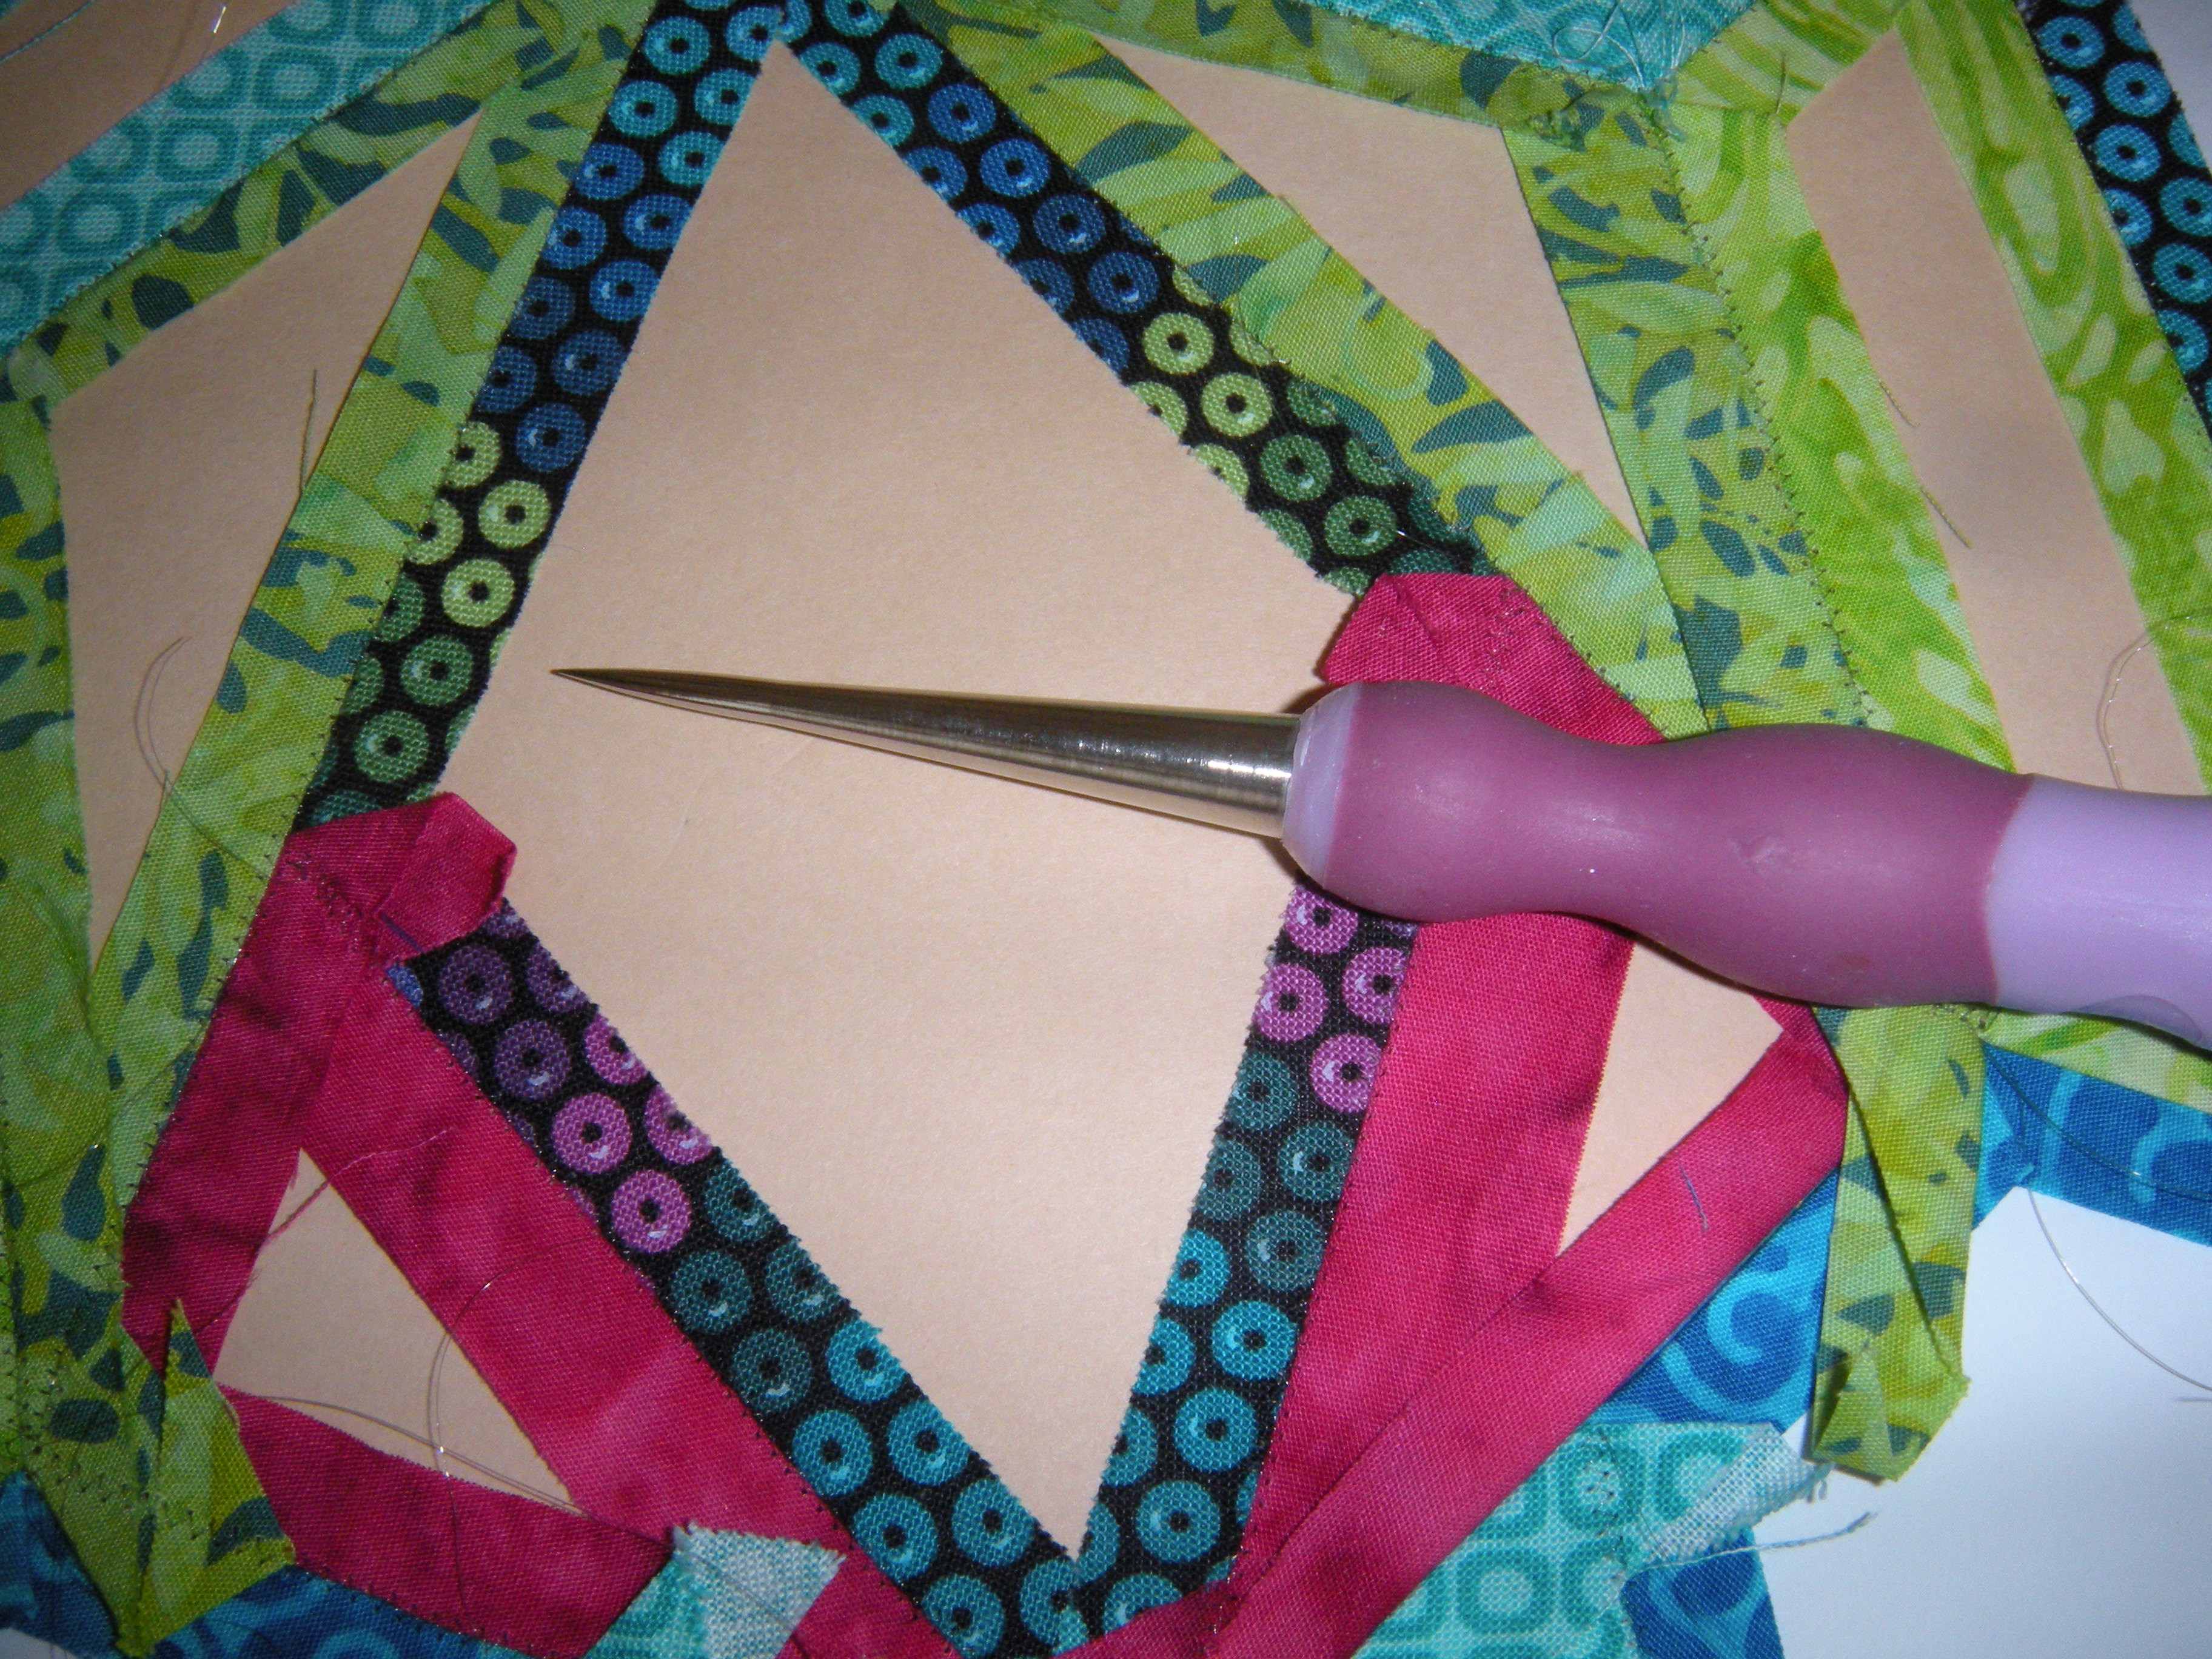
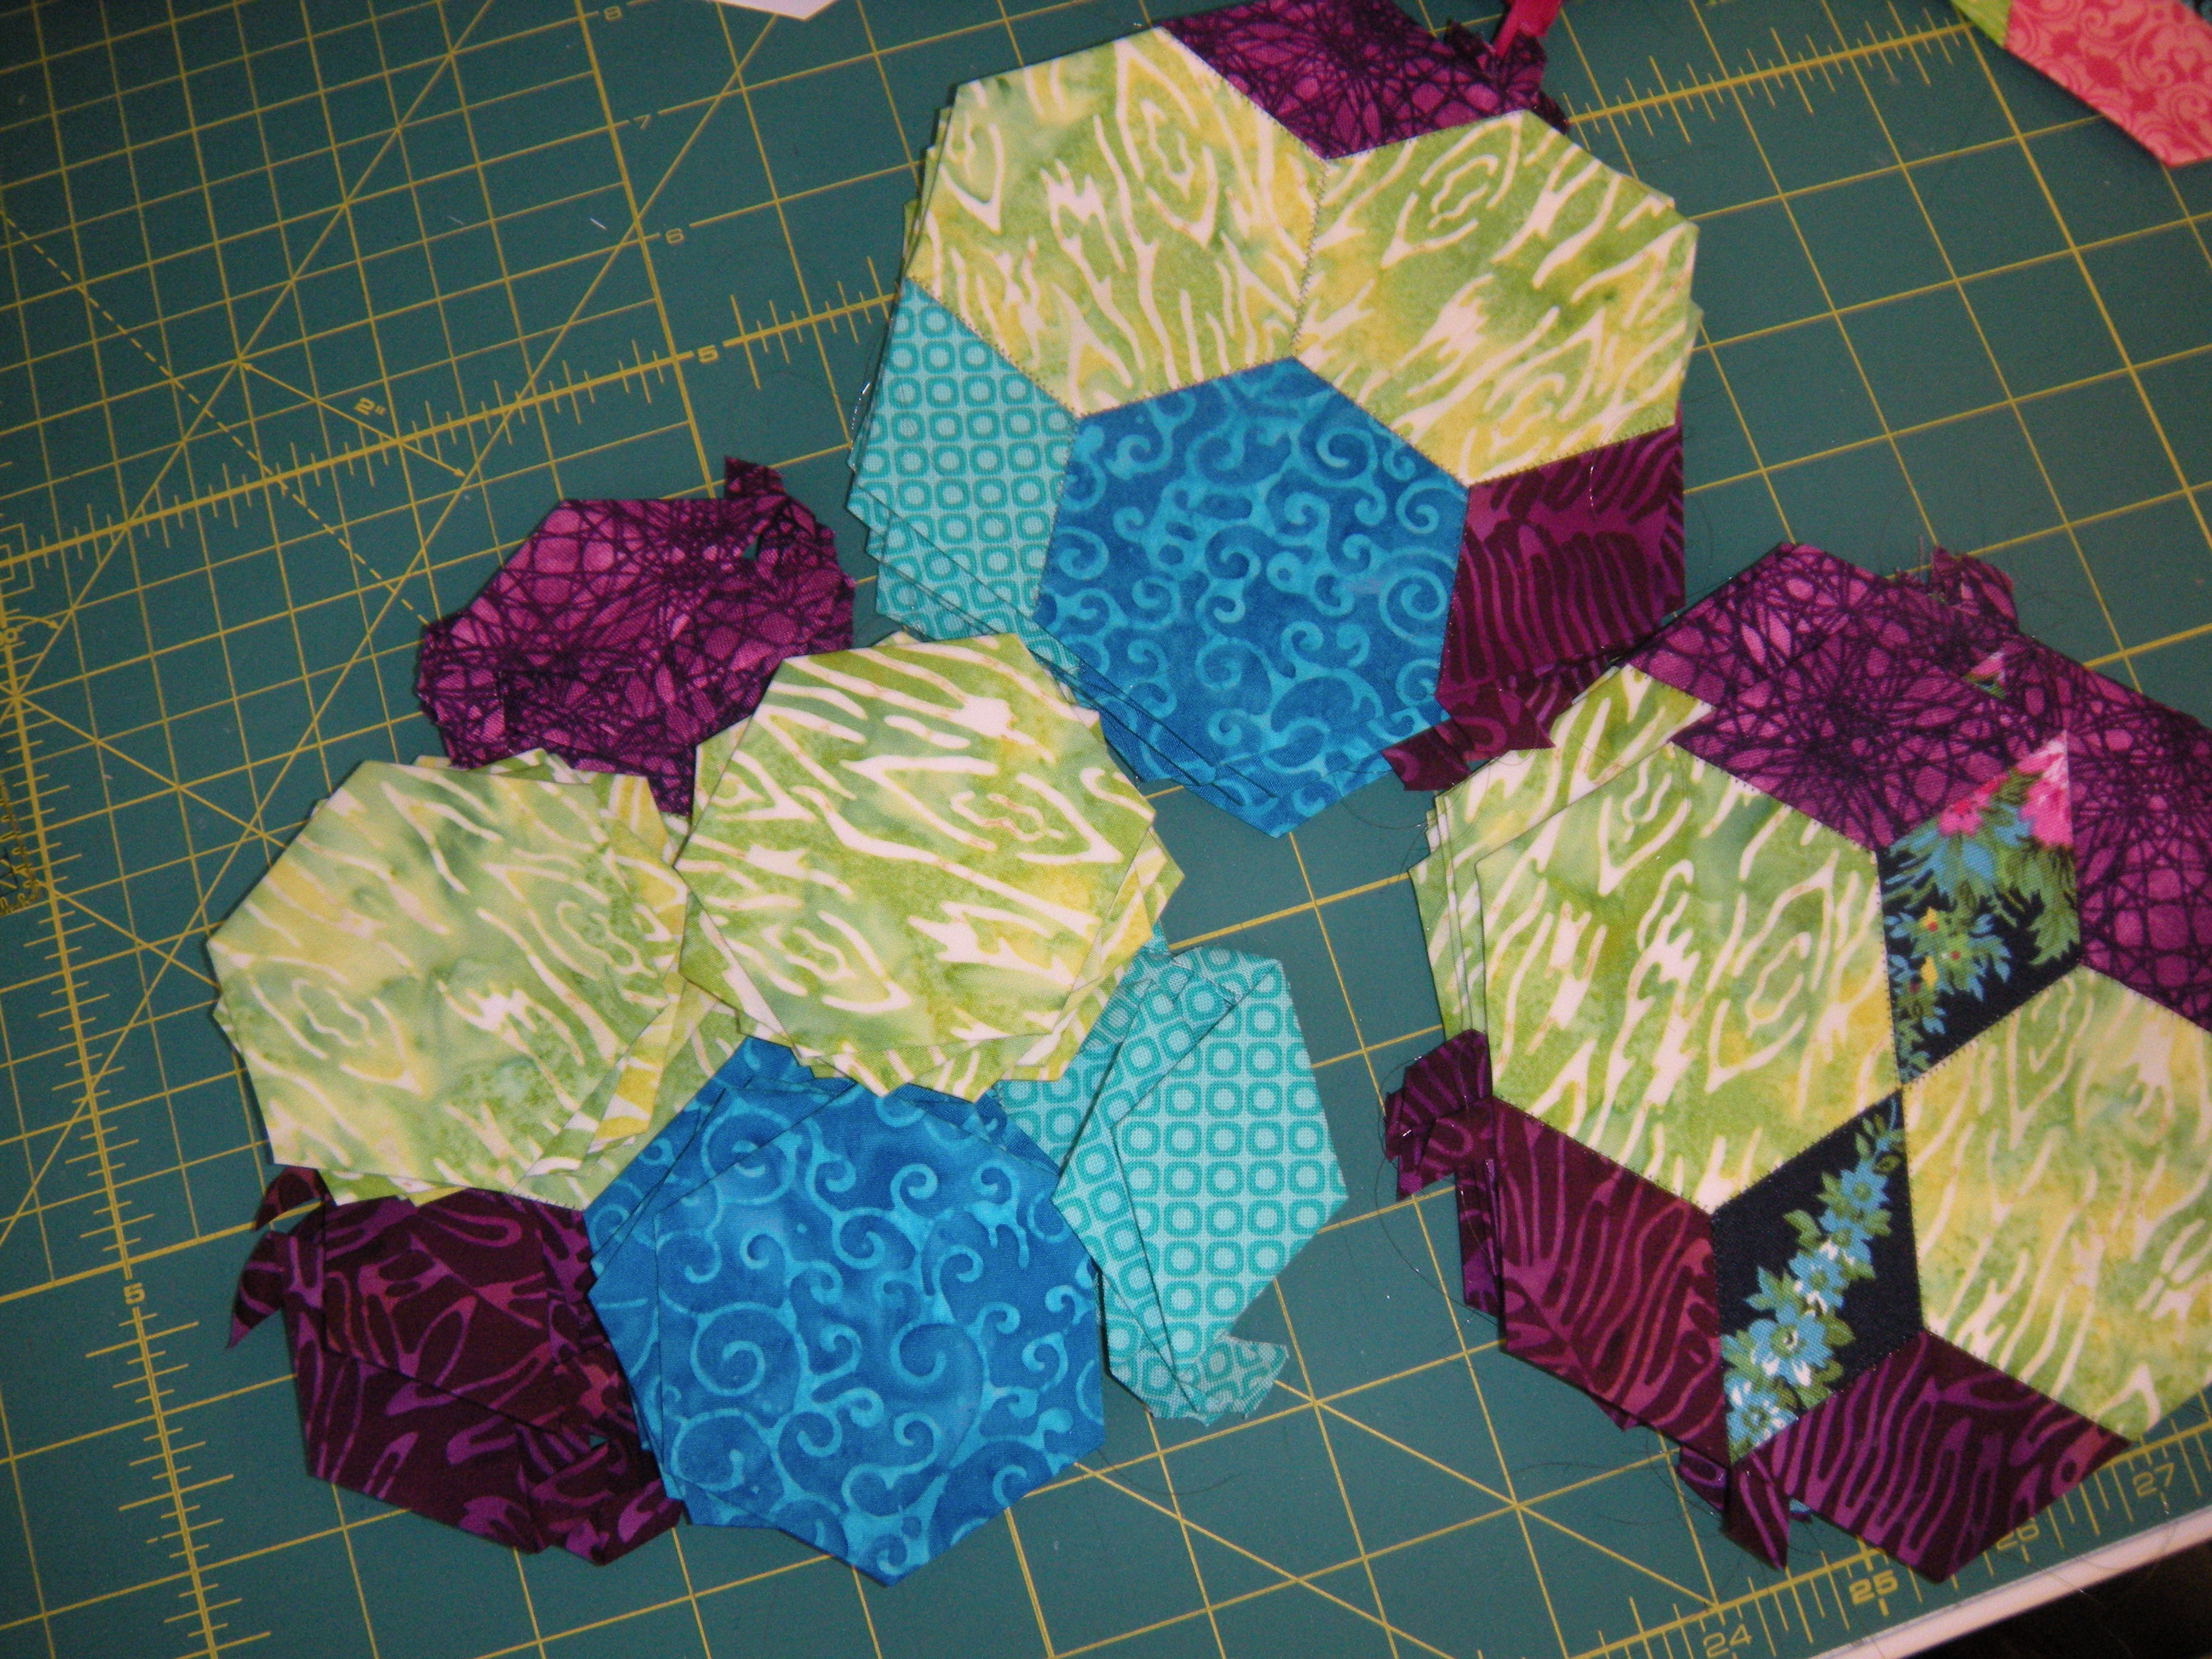
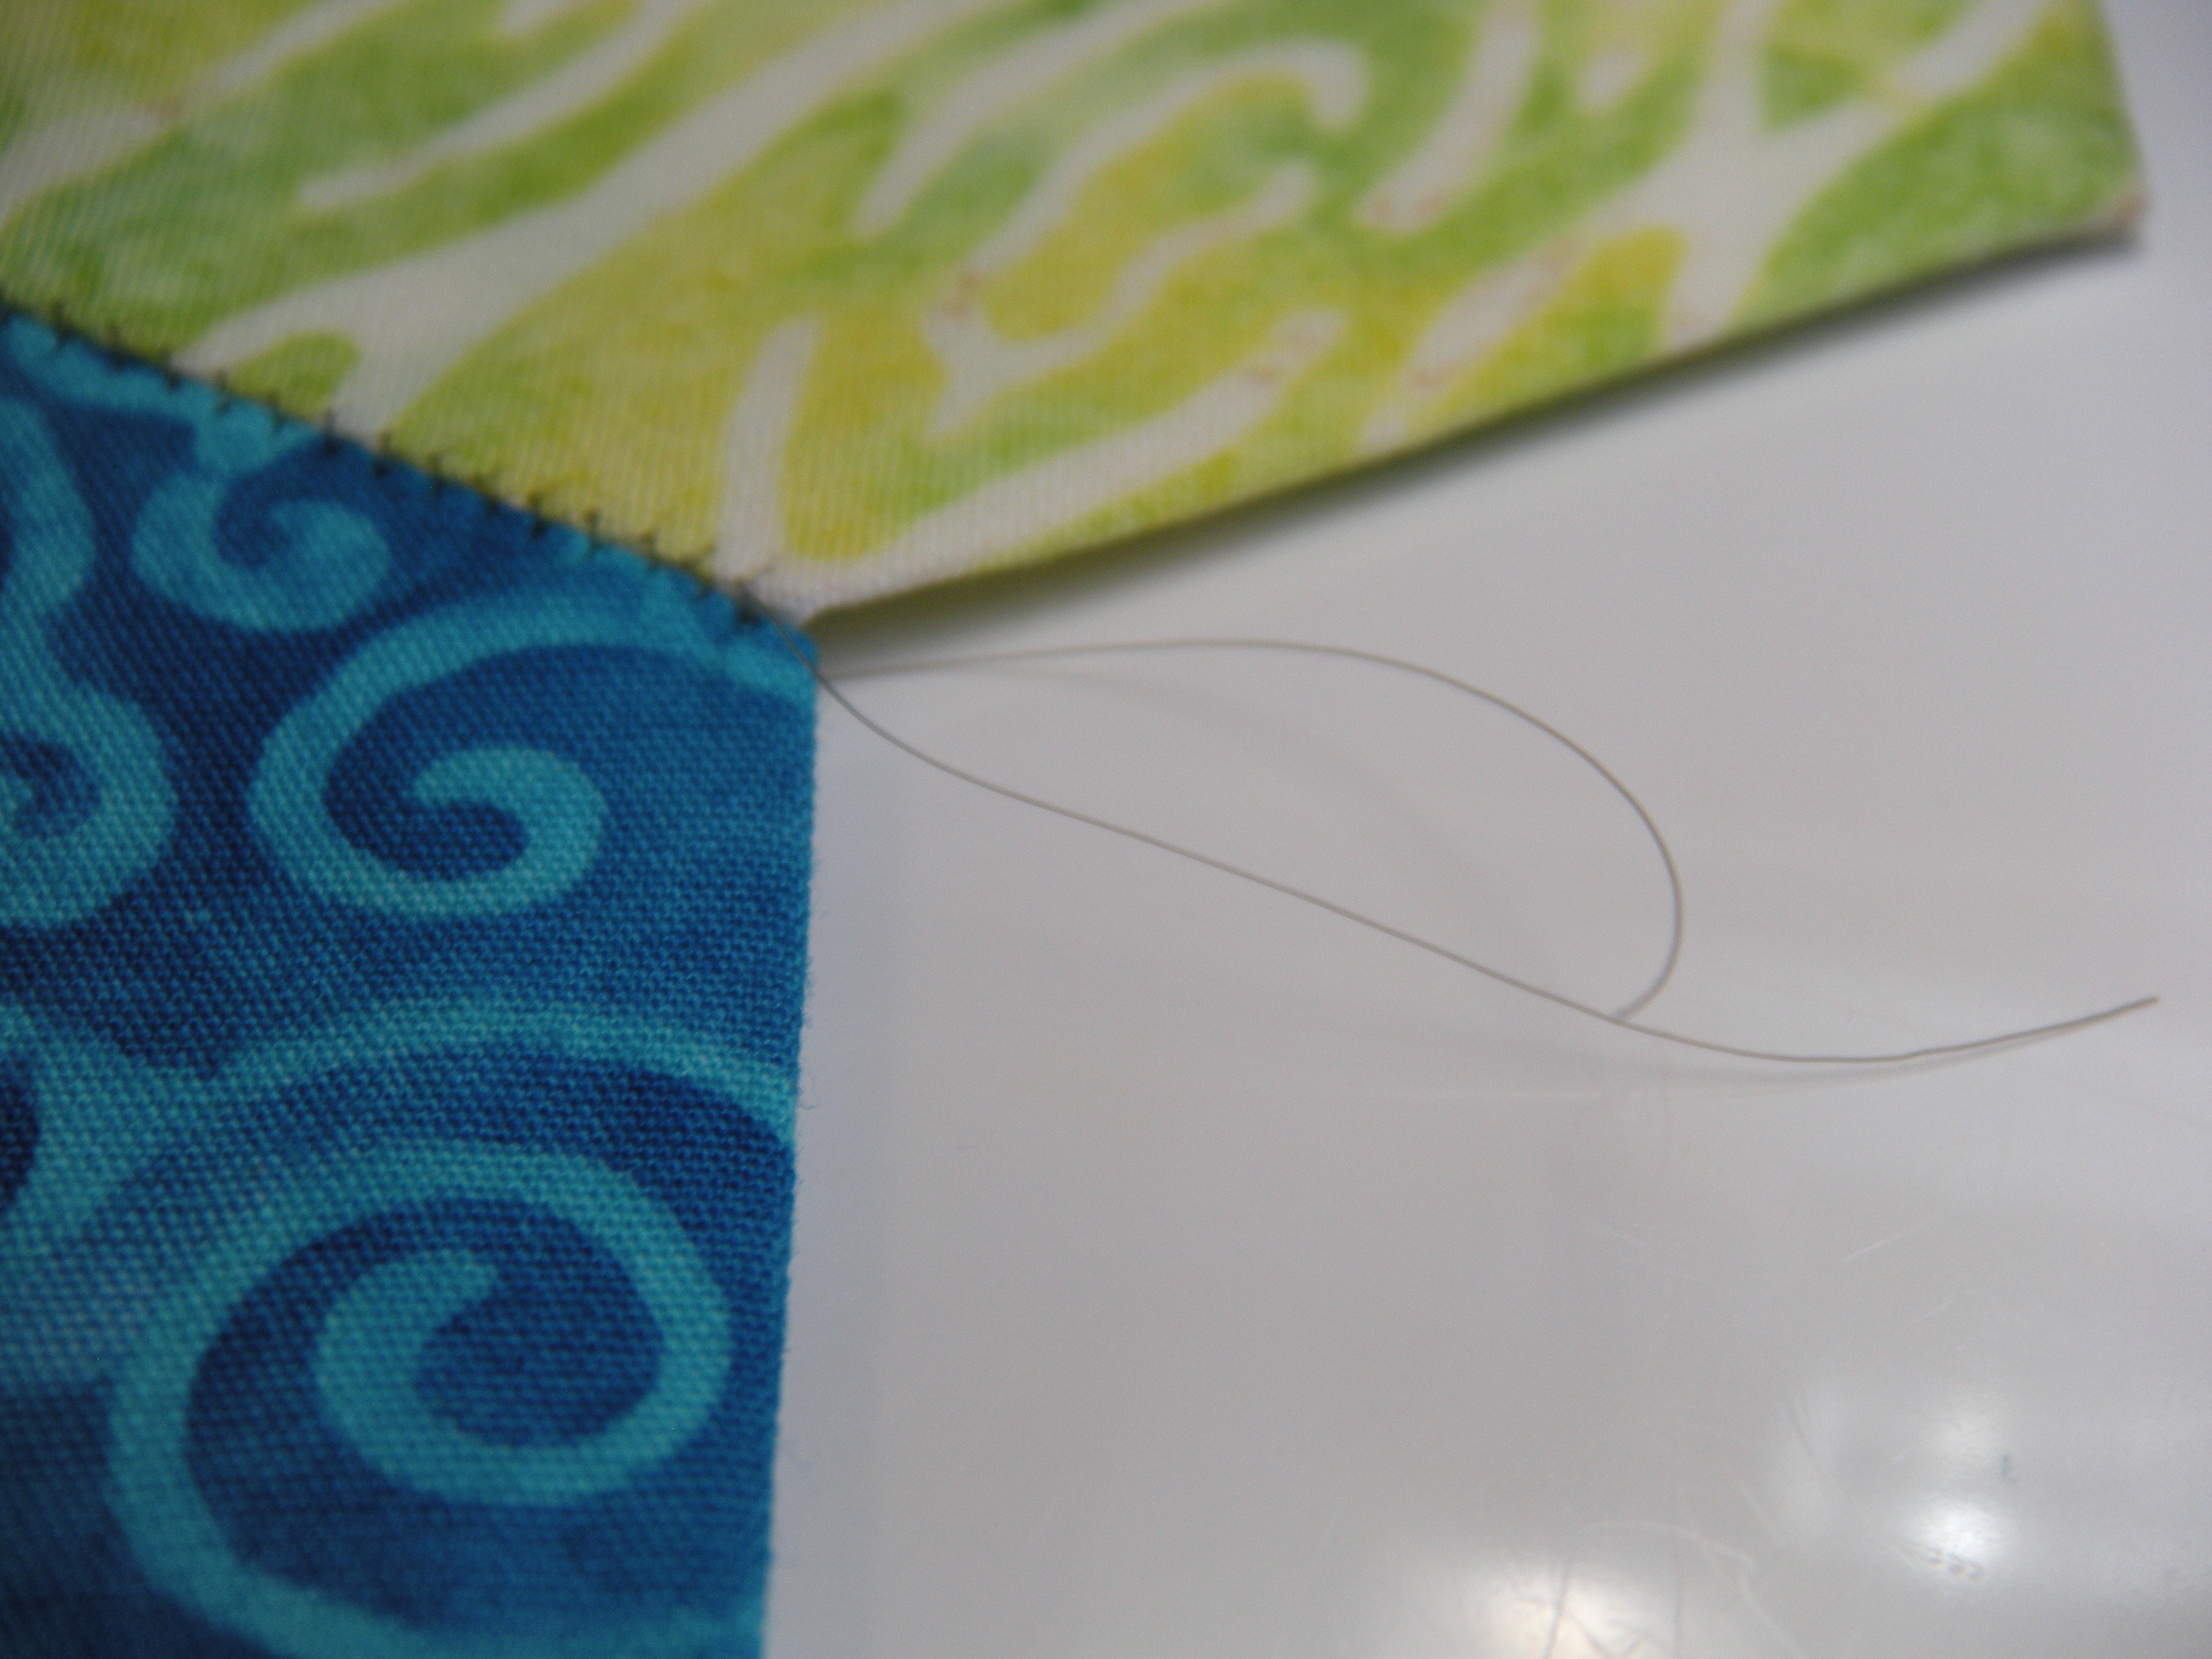
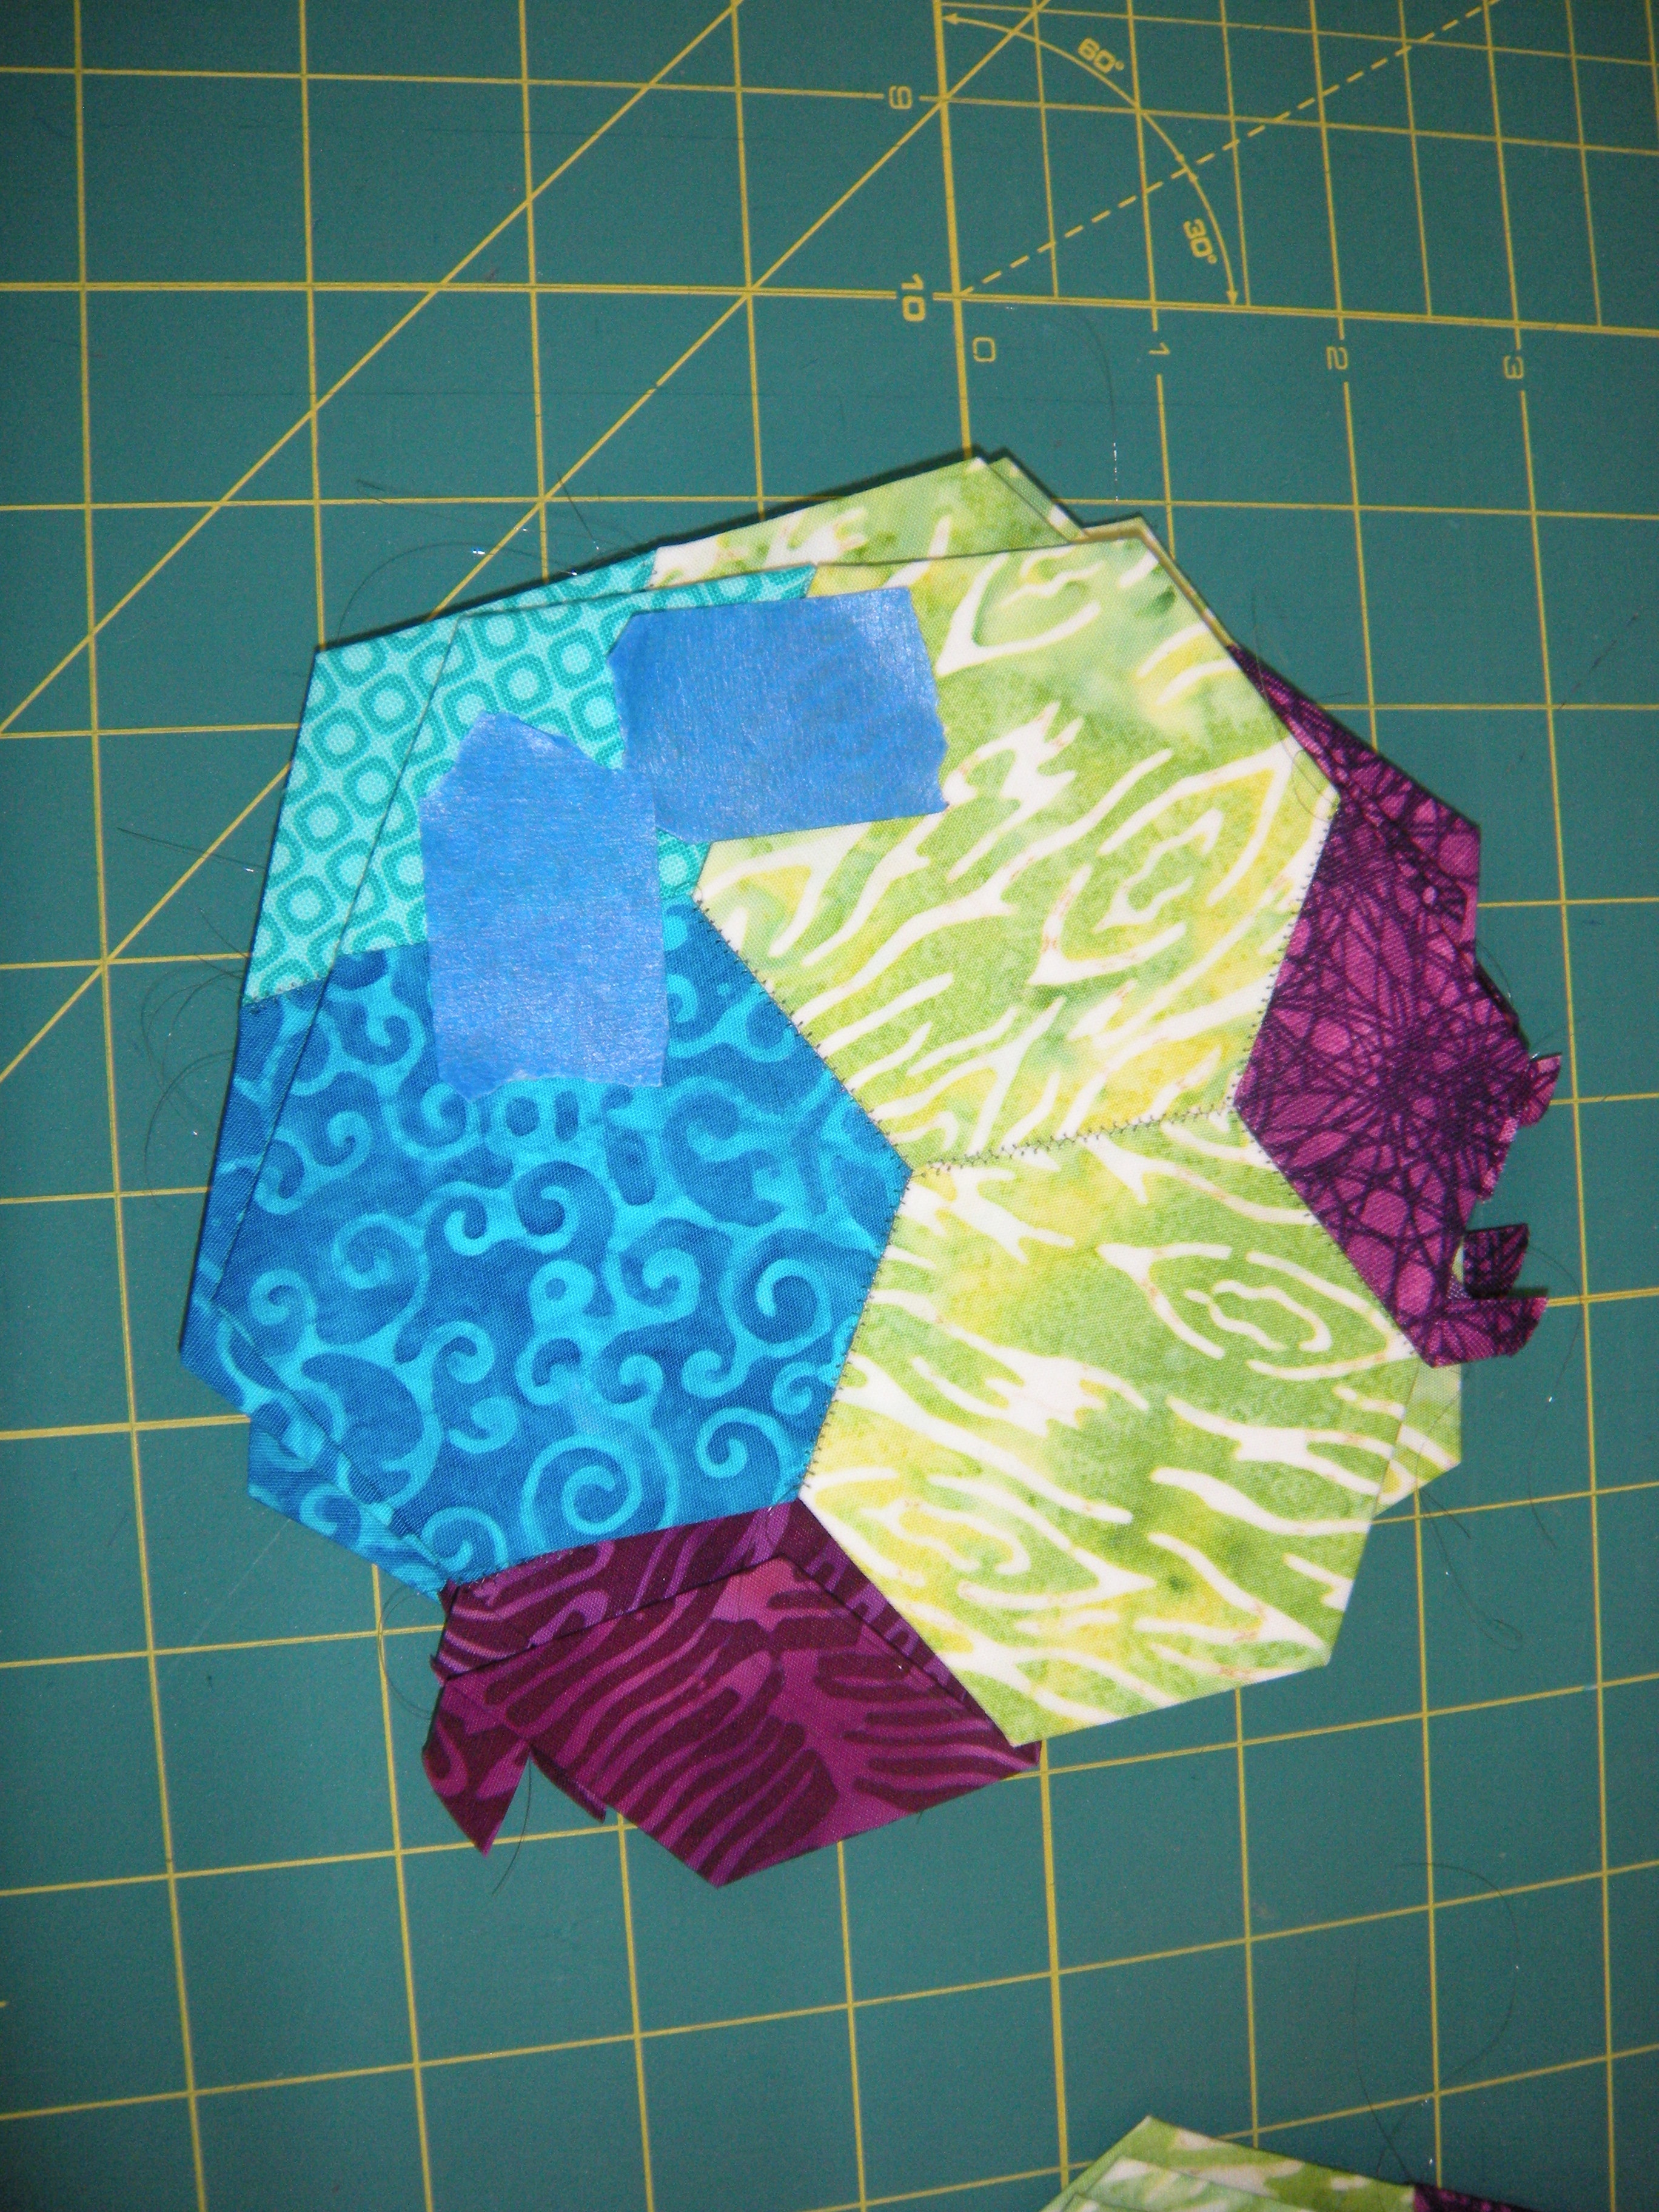
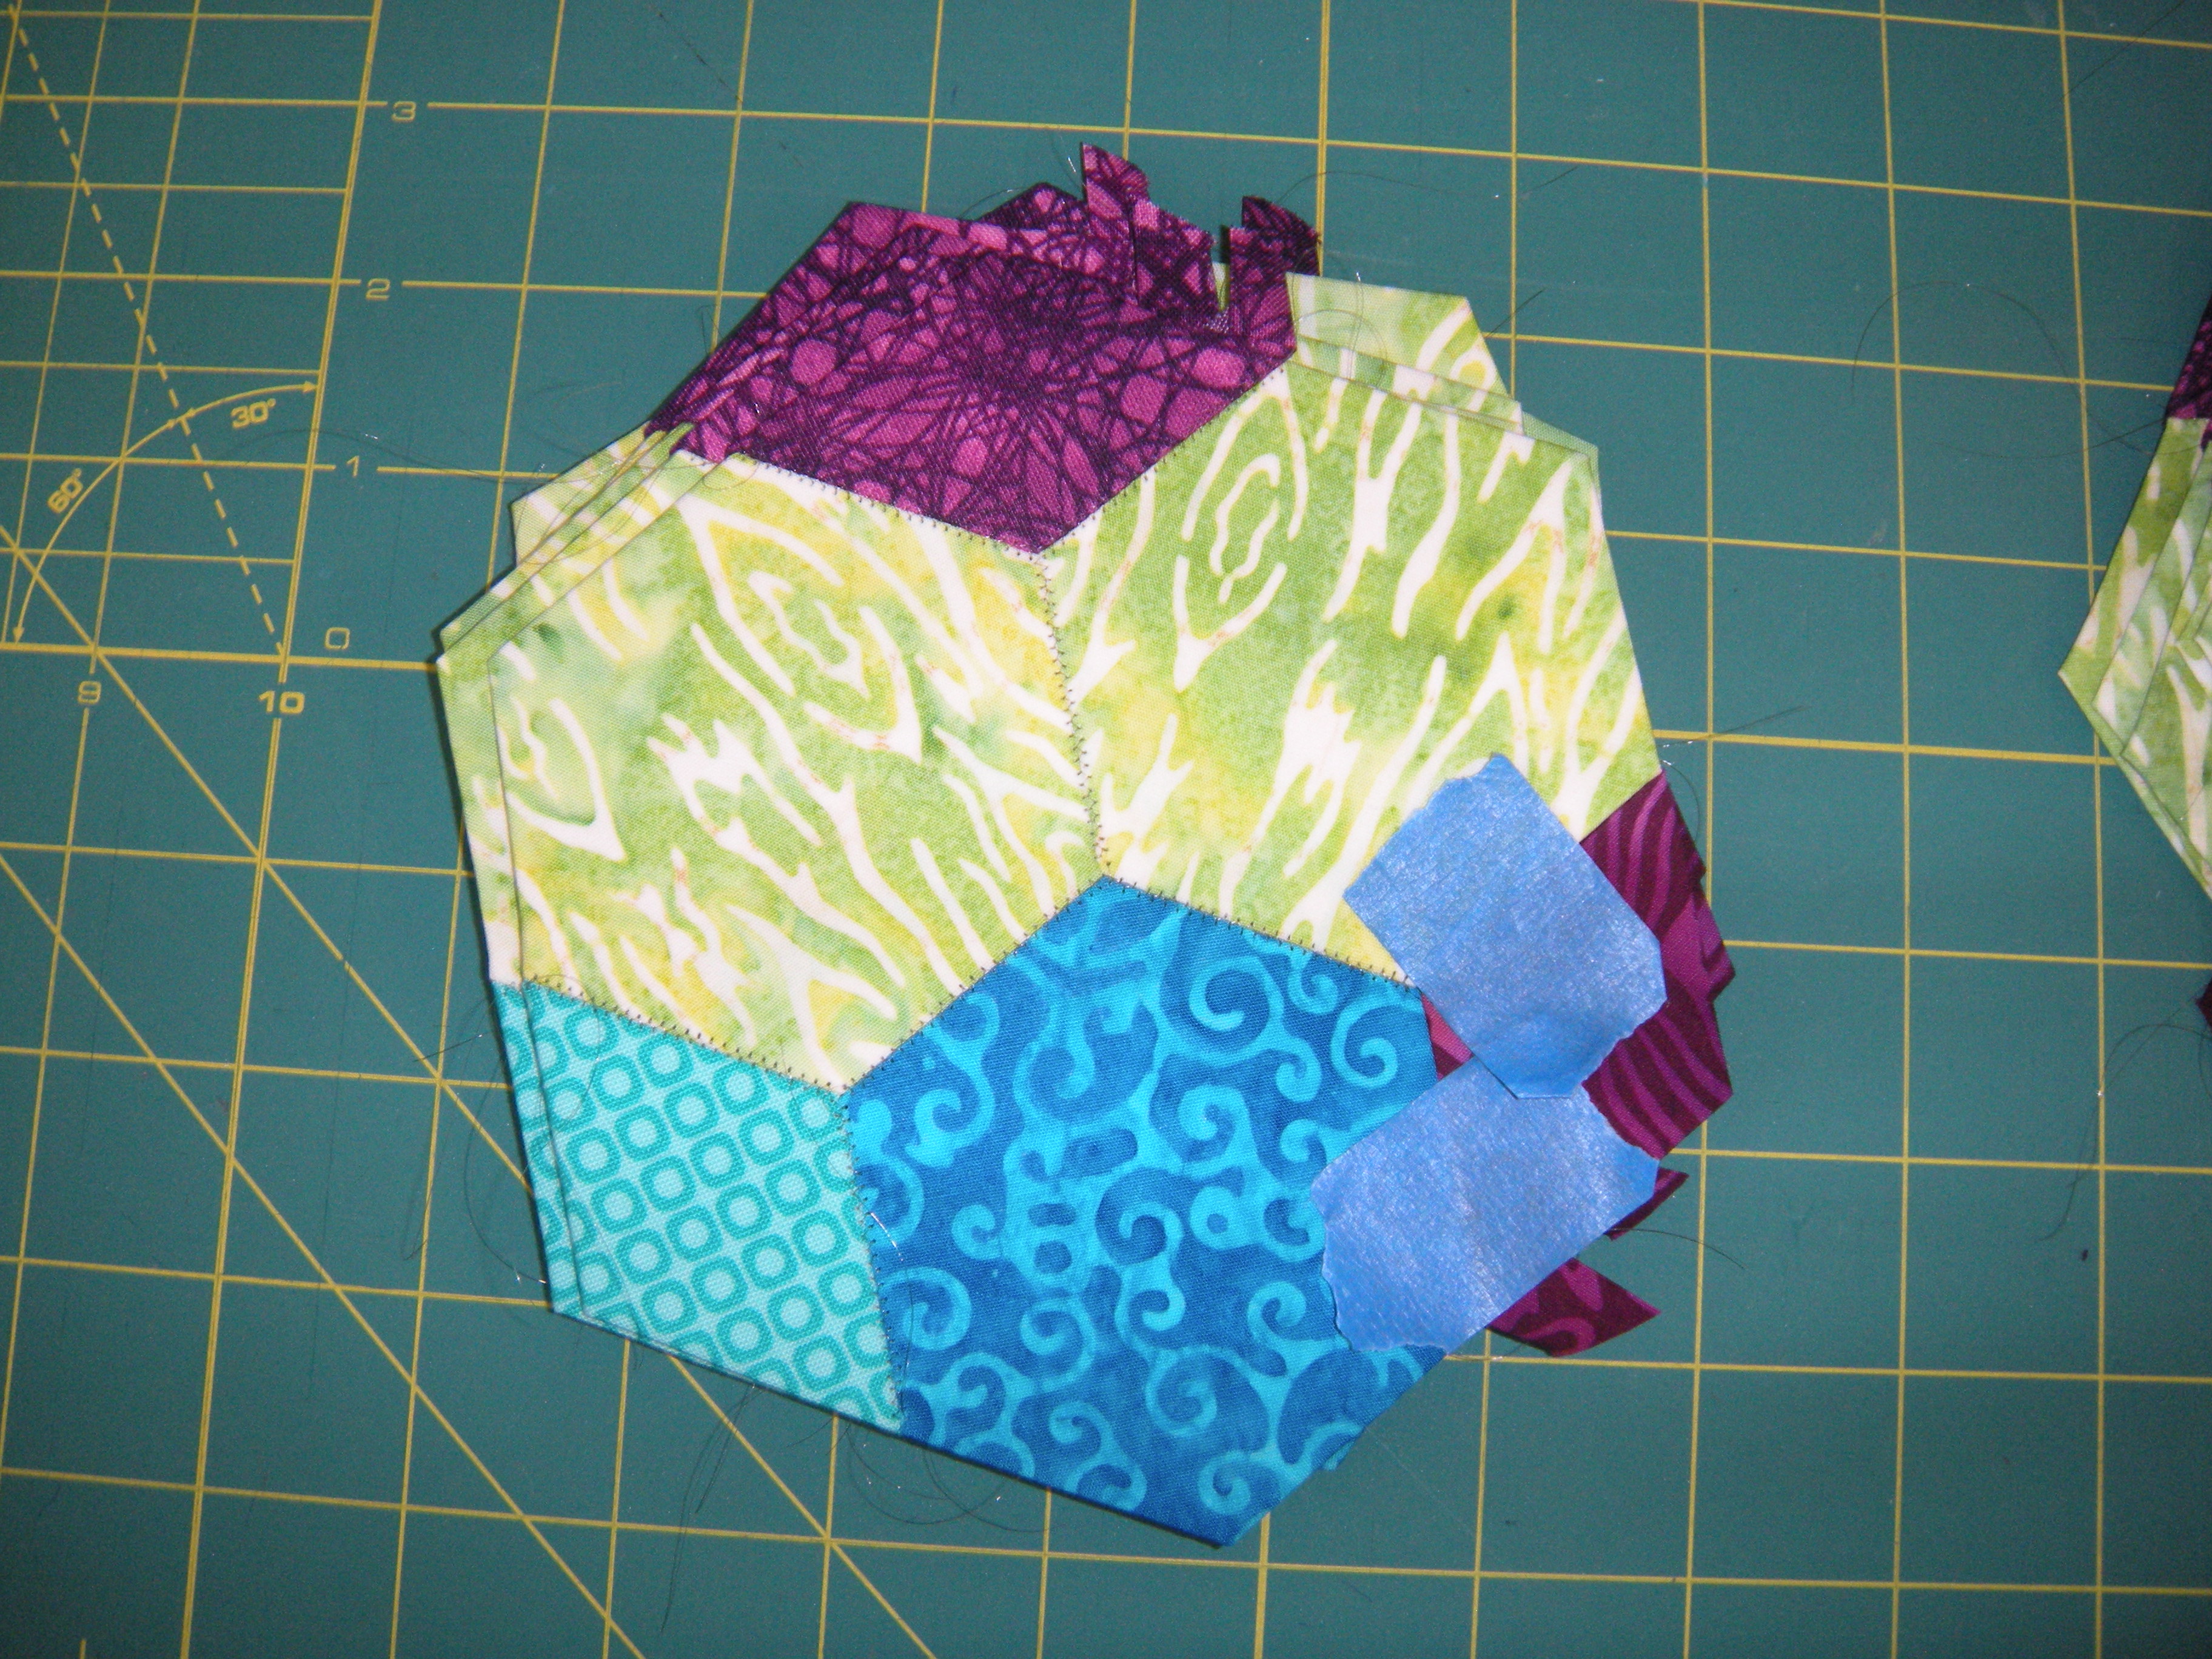
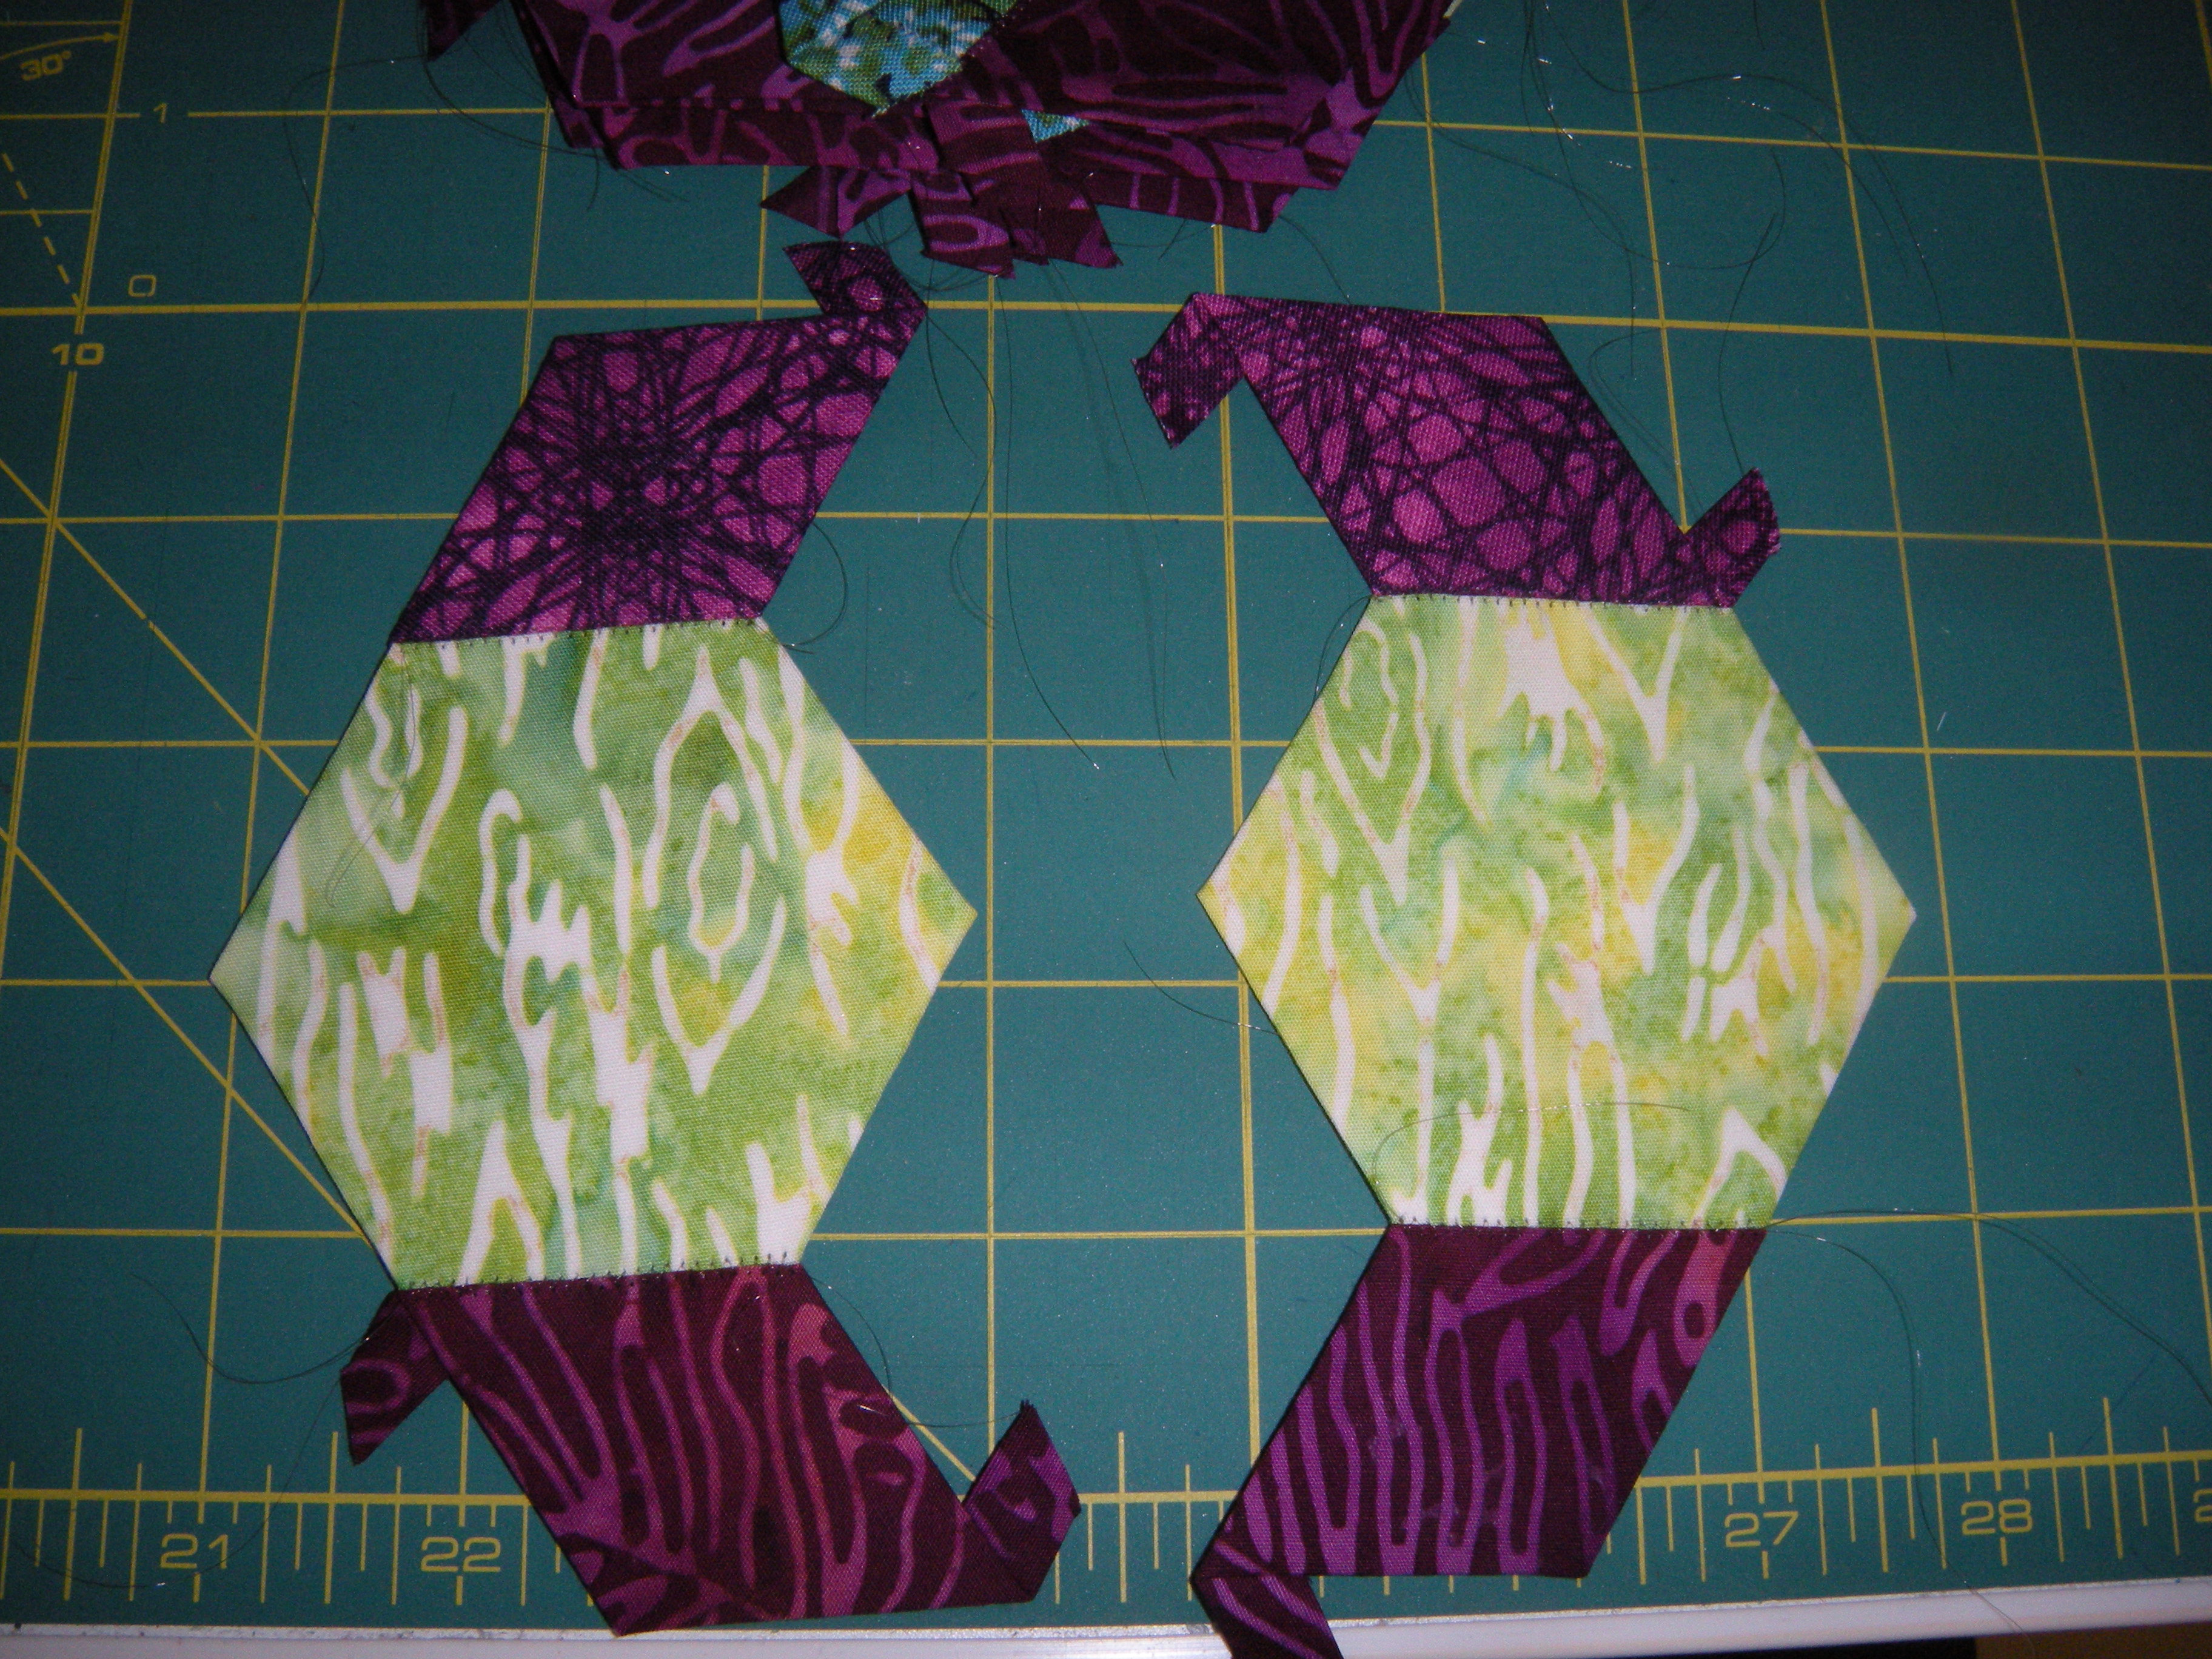
Now, mind you, I had hand stitched the center.  I had cut and glued the first round, and hand stitched three of those hexies.  On Saturday, I cut, glued, and stitched together the rest of the rosette.  That’s six Dolores’ and a shitload of Carols.  And attached them all to each other.  Rosette #2, in the bag.

I didn’t do it because of peer pressure.  I didn’t do it because I thought I might disappoint someone.  I didn’t even do it because  I would disappoint myself.  I did it because I actually wanted to have the rosette finished.  I want to move on to the next one, I want to anticipate number three!

You see, I figured out what I wanted out of this project.  I asked myself if it was the product or the process?  For me, is it all about spending my time hand stitching?  That would be a big no, not for me.  I want the finished quilt.  Since my goal is the product, the finished quilt, I had to figure out how I could make that happen.  And hand stitching the whole thing was taking me down that well-worn path that leads to a dead end.  If I tried to hand stitch the whole thing, this project would end up abandoned.

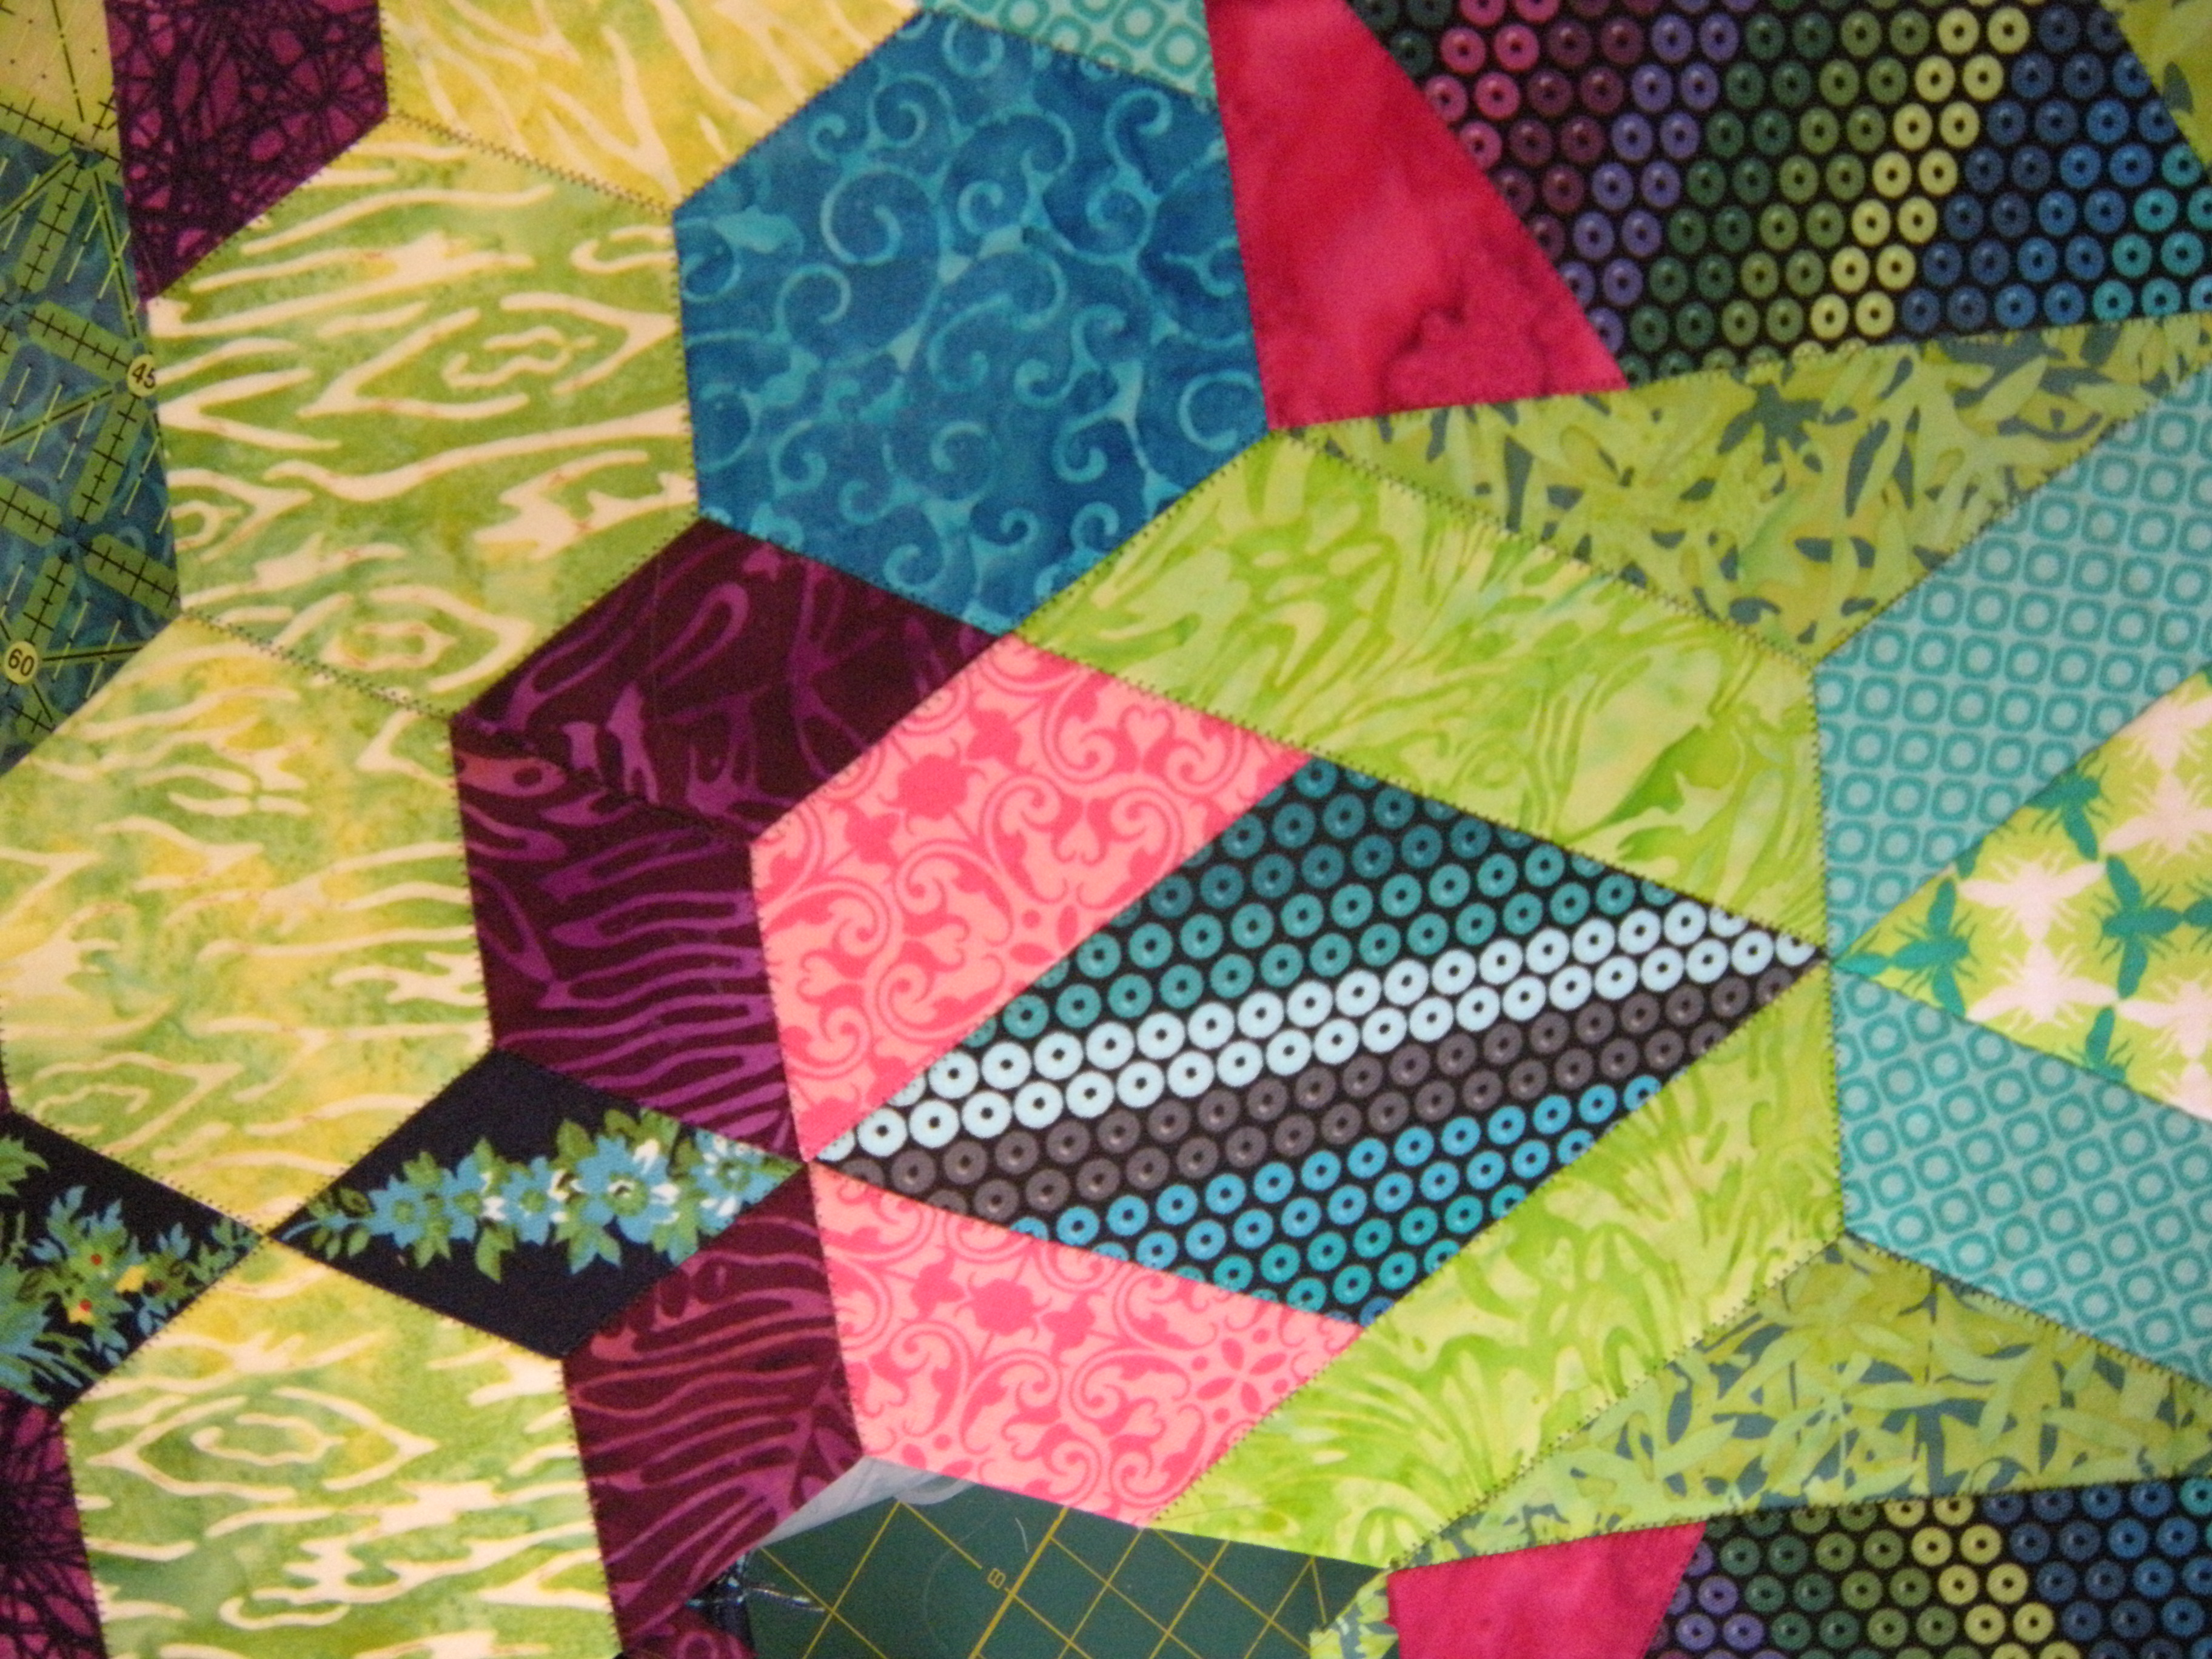
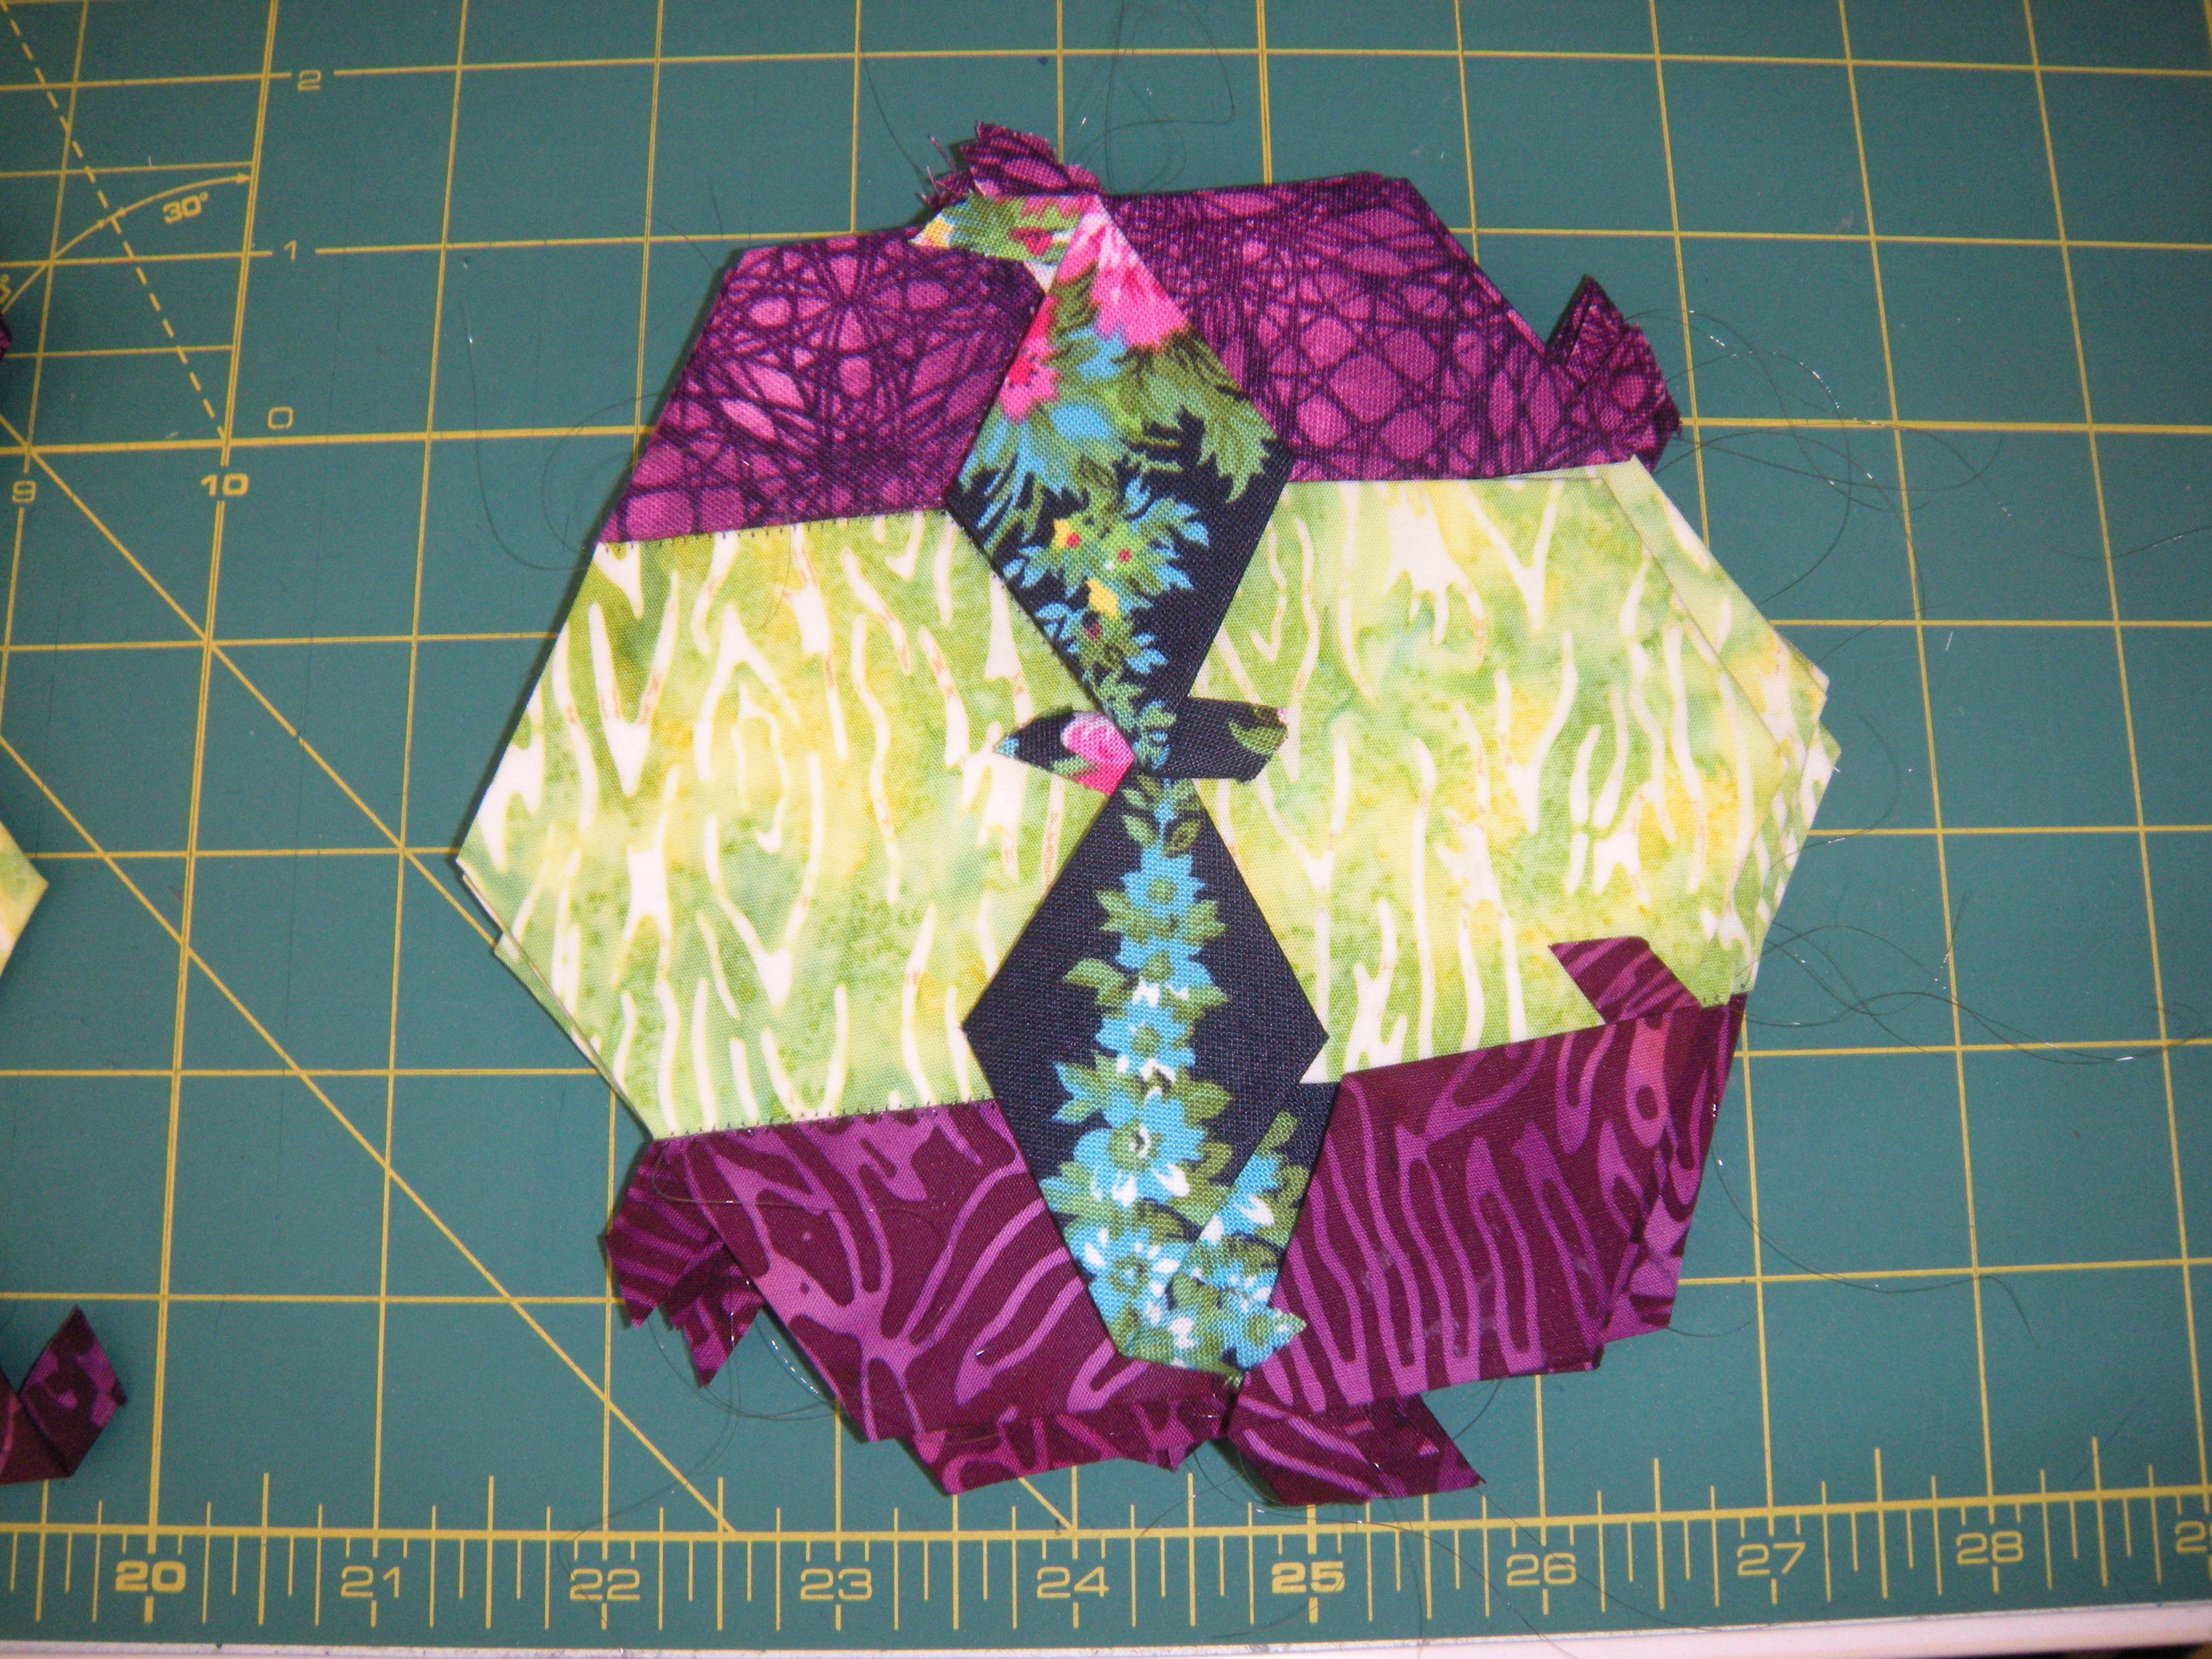
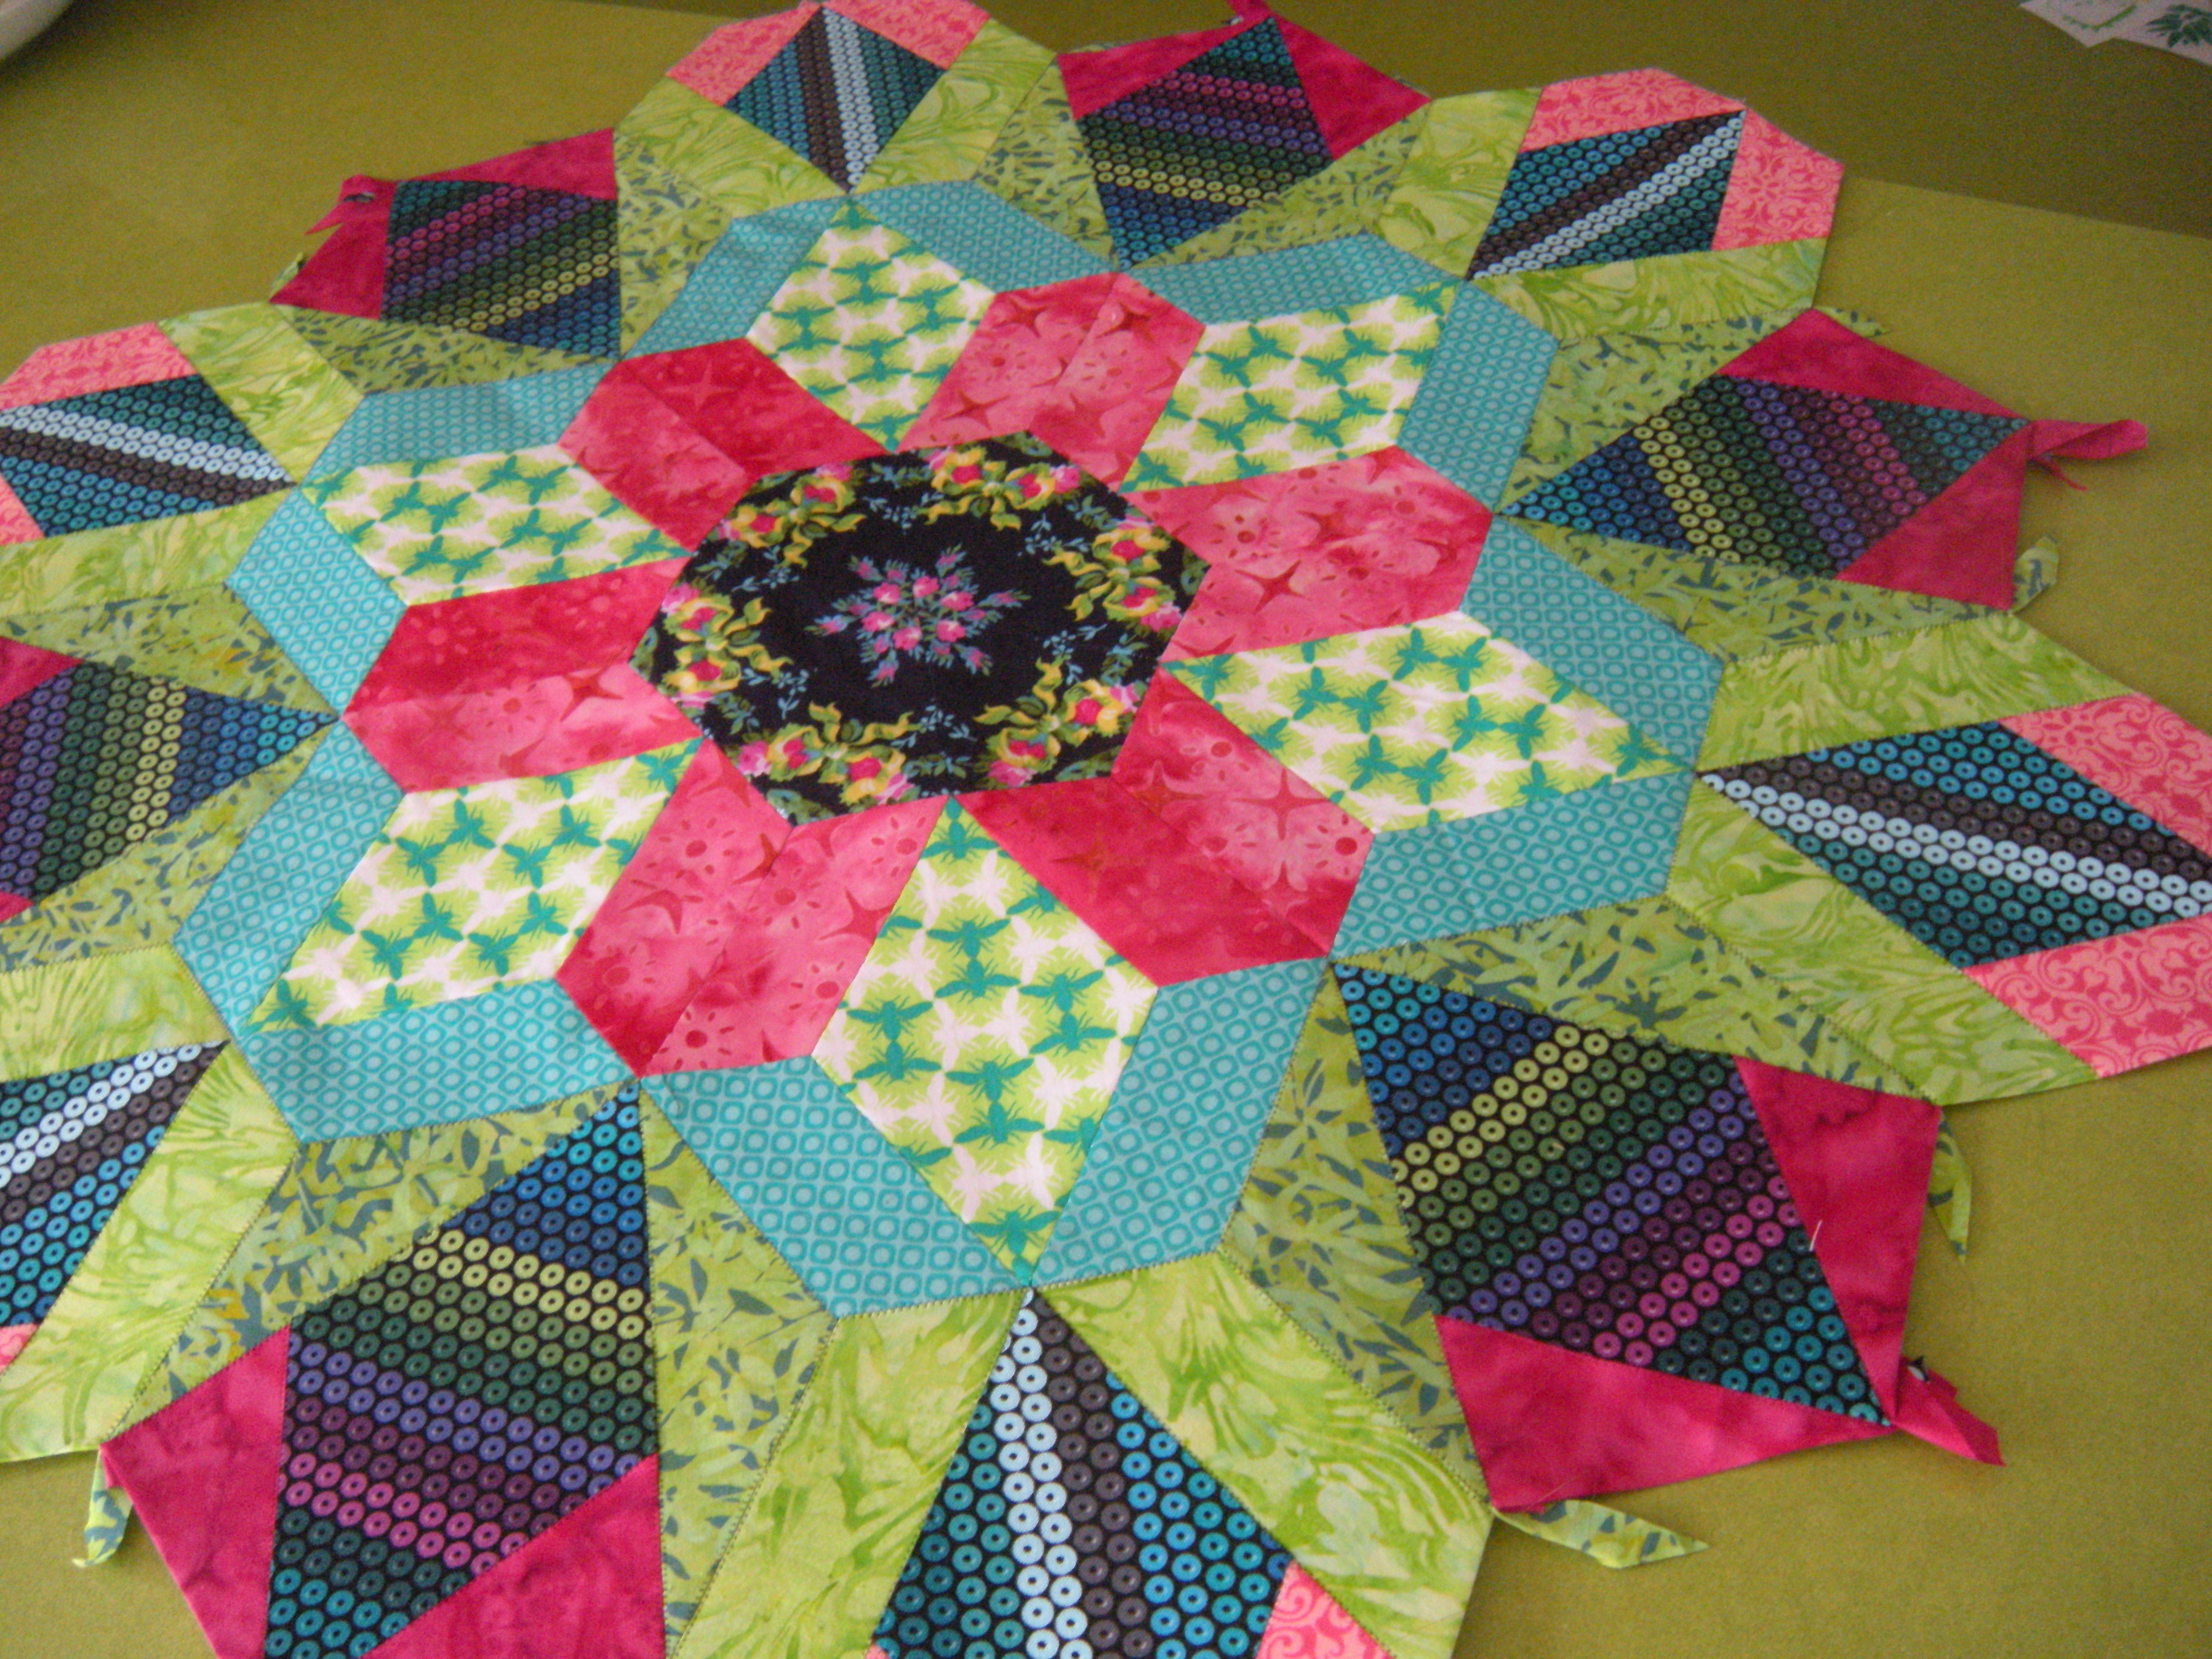
Knowing my limits, I have chosen to do my rosettes in an unconventional manner.  And it works for me.  I am happy with my results.  And, most importantly, I am still excited by this project.  I know that my new friend Katja Marek will be happy for me  too.

DSCN5559

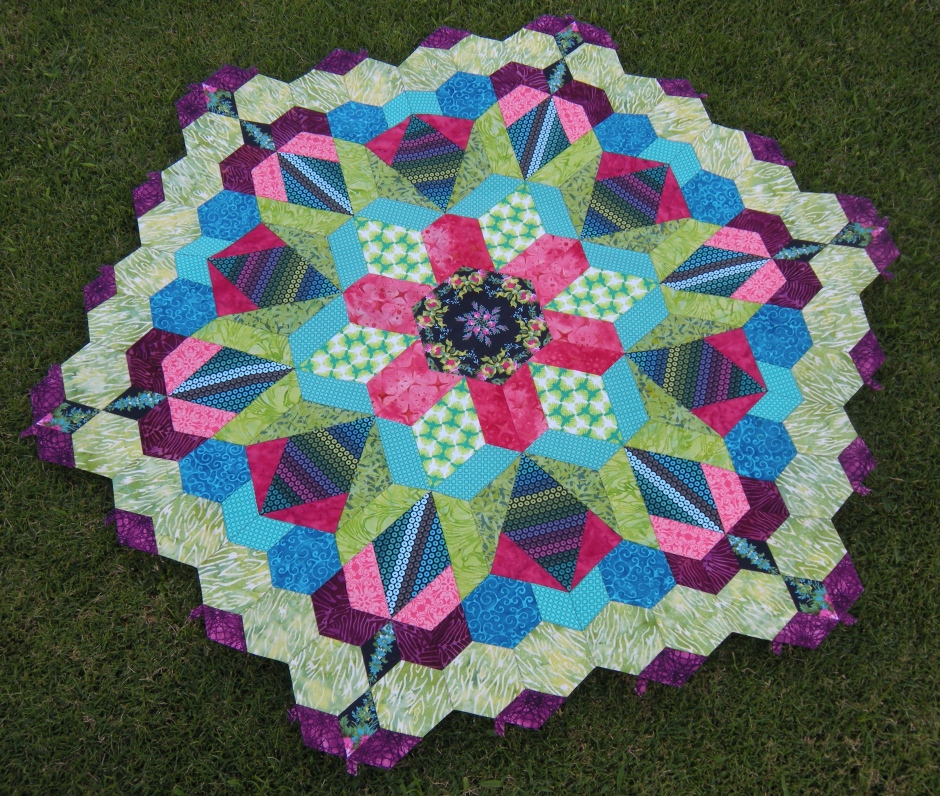
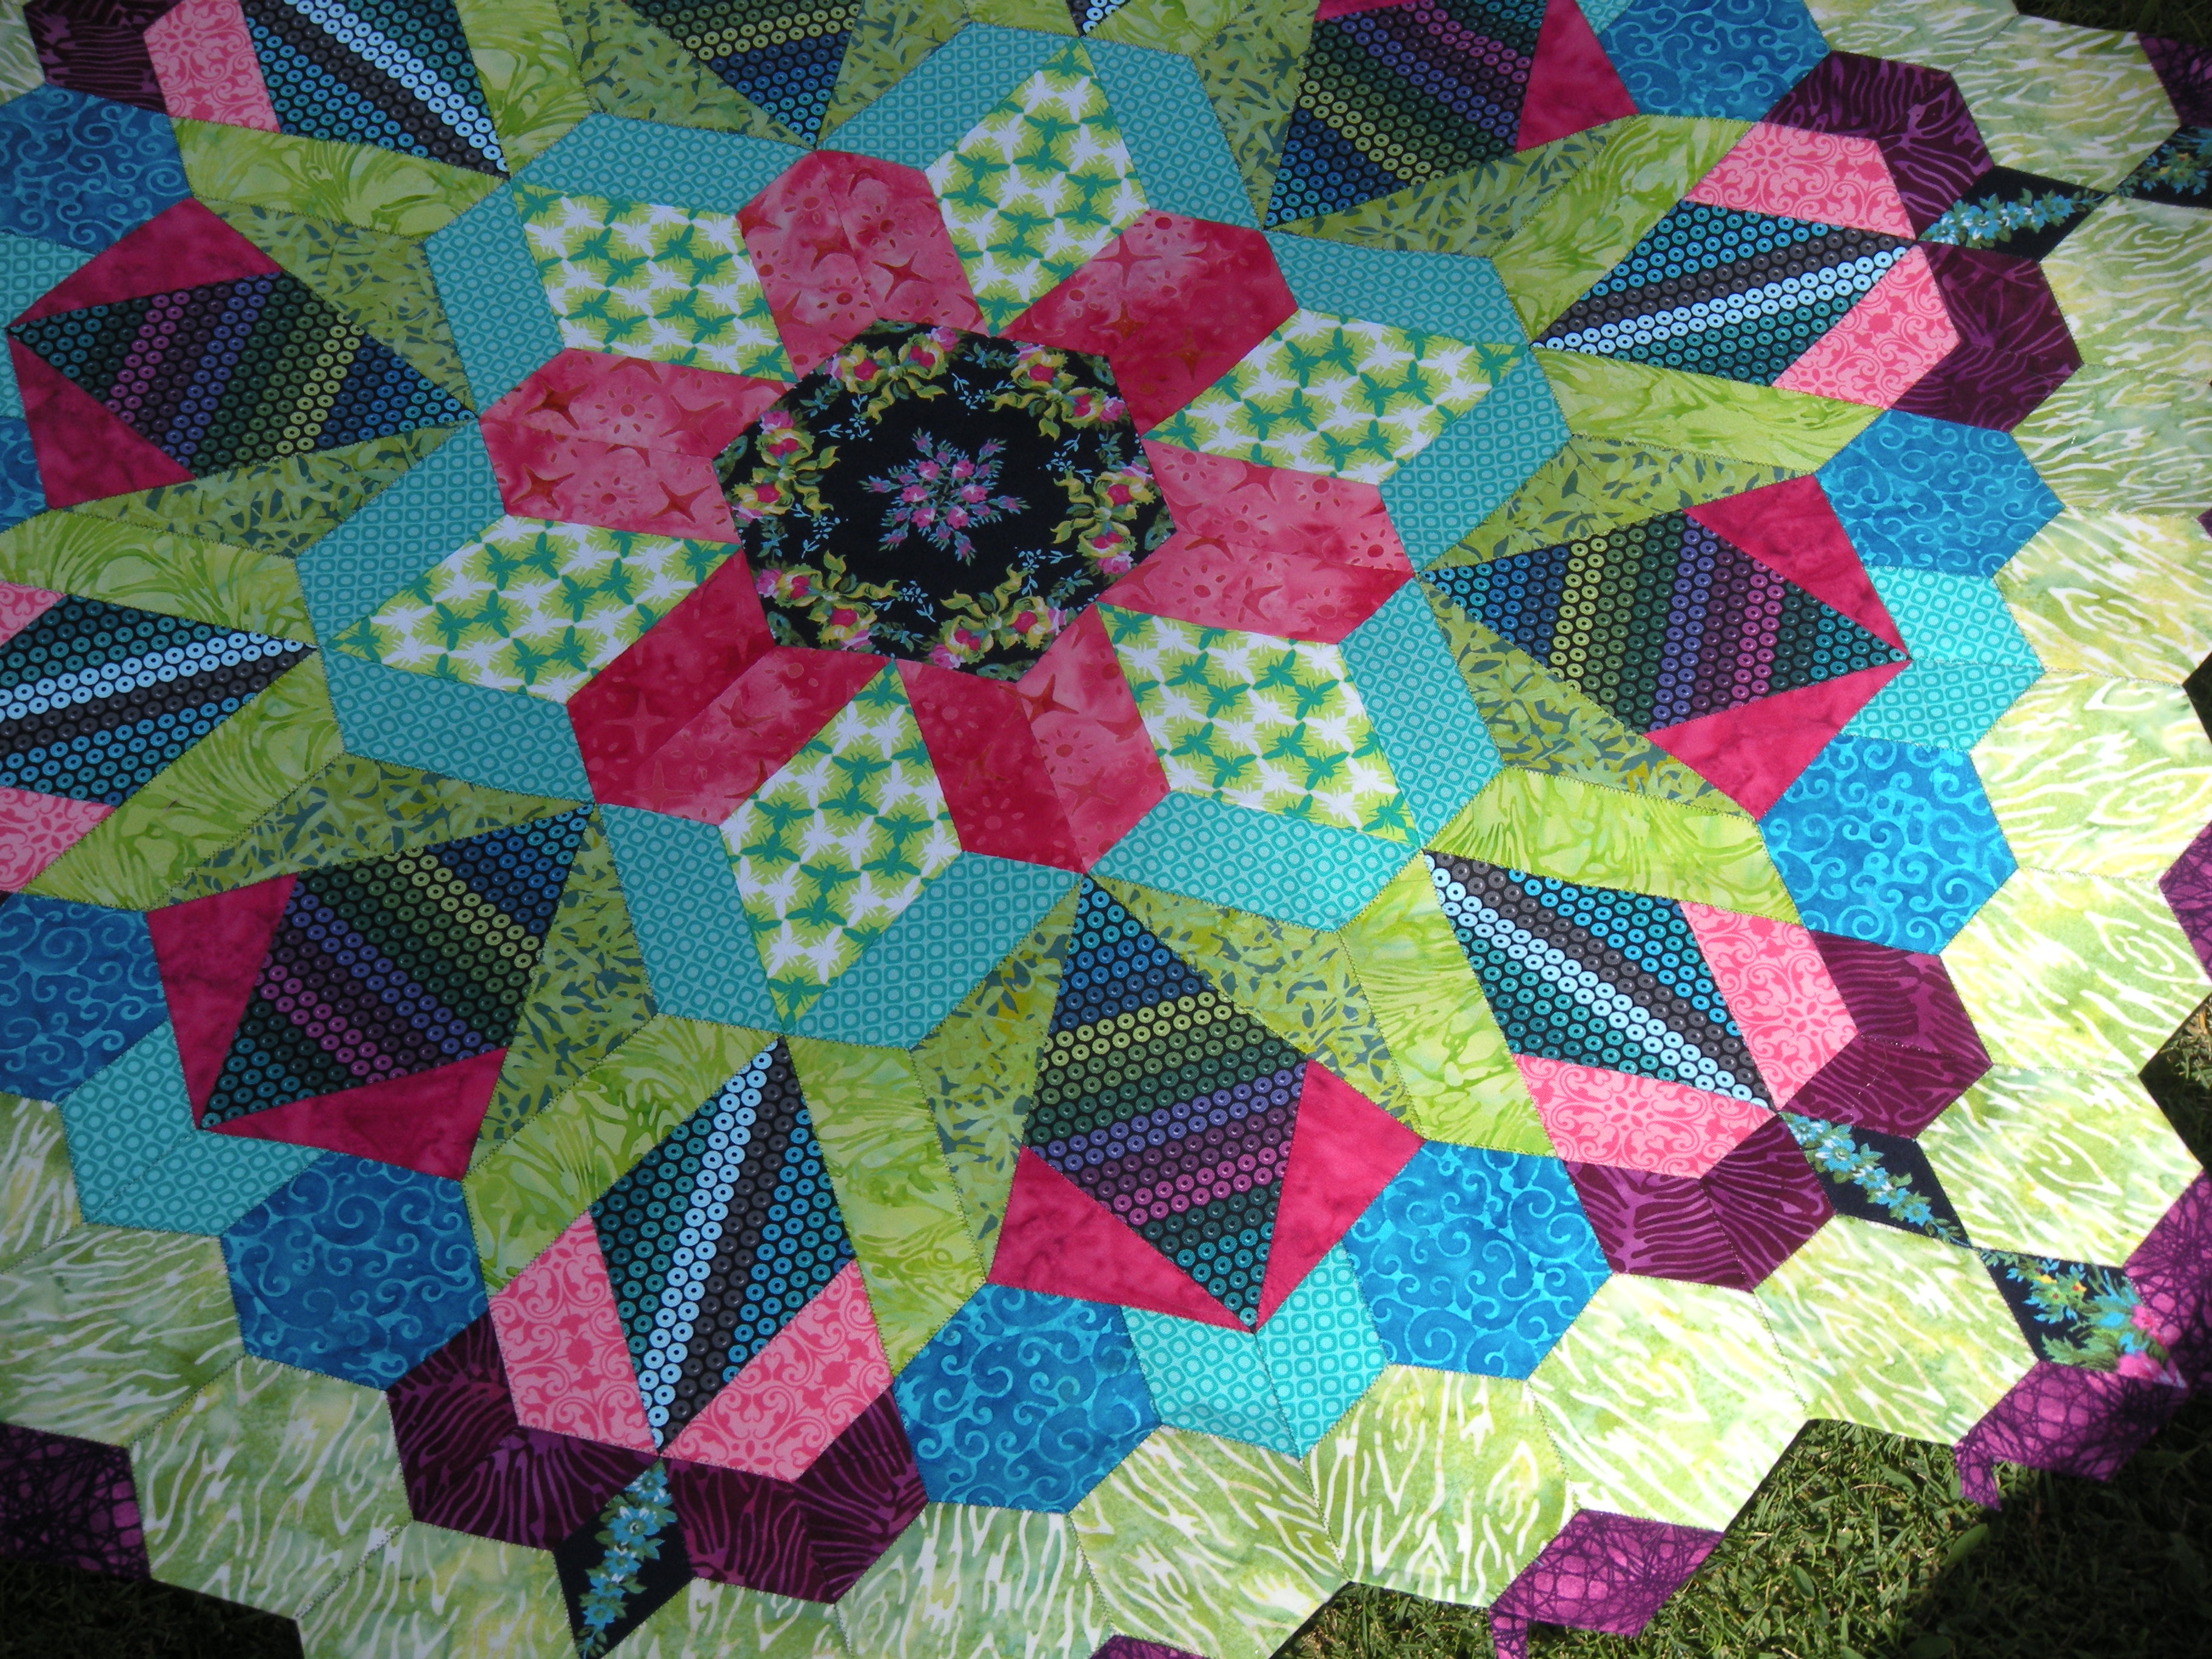
I was not the first to finish this rosette, not by far.  And I know I am far from the last to finish.  But it’s hanging on my wall, next to it’s fellow rosette.  And it looks spectacular, and triumphant, and inspirational.  And I want to make more companions for these two.

Now go out there and make something pretty!  Right NOW!

P.S.  If you want to try machine stitching on your EPP project, here is a link to my three-part tutorial:

https://handmadebycarolecarr.com/2015/01/23/machine-stitching-the-millefiore-quilt-tutorial-part-one-for-those-of-us-who-hand-sew-at-the-speed-of-a-turtle/

https://handmadebycarolecarr.com/2015/01/24/machine-stitching-the-new-hexagon-millefiore-quilt-tutorial-part-two-this-is-where-i-stop-feeling-bad-about-my-hand-sewing-skills/

https://handmadebycarolecarr.com/2015/01/25/machine-stitching-the-new-hexagon-millefiore-quilt-tutorial-part-three-where-i-actually-finish-before-february/

How am I going to tote around all those hexies?

Don’t you just love those ah-ha! moments?  I’ve been working on rosette number two from the New Hexagon Millefiore Quilt-Along.  And I have bits and bobs spread all over the table next to my chair.  Time to rein in my mess.

DSCN5474

This is the Bionic Gear Bag Notions Tote, by RipStitcher.  The pattern is here on Craftsy:  http://www.craftsy.com/pattern/sewing/accessory/winner-bionic-gear-bag-notions-tote/93596

DSCN5466

This has enough zipper compartments to make me do a happy dance!  And I got to install four zippers!  A place for everything, and everything in its’ place.

DSCN5469

Can’t do EPP without my trusty 3M blue painters tape.  And massive spools of gray thread.  Here’s a small preview of some of the fabrics in my second rosette:

DSCN5468

I may start putting this together by machine.  I am very pleased with how my first rosette turned out, using invisible thread and a zig-zag stitch.  If you haven’t checked out my tutorial, you can find all three parts here on my blog.  https://handmadebycarolecarr.com/2015/01/23/machine-stitching-the-millefiore-quilt-tutorial-part-one-for-those-of-us-who-hand-sew-at-the-speed-of-a-turtle/

DSCN5473

For those of you who are loving on my Shaka Hula Fork Chef Dude, here’s a gratuitous picture of his bad self.

My wonderful Destiny is still in the shop.  You will never believe what I ended up doing all day yesterday.  Just try to guess.

Stay crafty, my friends.

Machine stitching the New Hexagon Millefiore quilt, tutorial part three: where I actually finish before February

What is the date today?  I believe it is NOT February.  It’s still in the Januaries.  And my rosette #1 is done.

DSCN5302

I’m not being braggy, I am making a statement that I did not believe would ever be true.  And if I had kept on with my turtle-paced, nay, snail-paced hand sewing, I sure wouldn’t have a finished rosette to show you now.

I have to give a big shout out to all who have sent me the encouragement and positive comments on the first two parts of the tutorial.  Especially Katja Marek.  I am so glad she is using her powers for good and not evil, drawing us in to this project that is making our world a more beautiful (and apparently hexagon-shaped) place.  Go see her at http://www.katjasquiltshoppe.com

Shall we finish up the tutorial now?  Let’s put the final round on the rosette.

There are 18 hexagons in the final row, 6 each of three different configurations.  (If I may point out the obvious, make sure you don’t mix up your mirror-image Maries.)  Using a bunch of of the blue painter’s tape, line up your first two  blocks.

DSCN5280

This shows Brandi and Marie taped to the second round.  We’re going to attach Brandi first; Brandi is the block with the two floral diamonds in it.   (The second block needs to be taped in place because Brandi is joined to it in the first seam.

DSCN5281DSCN5282

DSCN5283DSCN5284

DSCN5285

Same procedure as before, removing tape, pivoting, and lock stitching.  This is the same was each of the subsequent blocks will be joined, so tape on your next Marie and go for it!

DSCN5286

The stitching to join this block starts at the place where we pivoted sewing our first seam.  In other words, at the place where Brandi and Marie both meet the row below.  Sorry I don’t have a picture of the start of this seam.  The first photo below shows the pivot after the first part of the seam is shown.  Notice that this seam will have two pivot points.

DSCN5287 DSCN5288

Time to lather, rinse and repeat my friends.  I’ll wait here for you.

DSCN4670 photo 2

That was intermission.

To get the papers out of the back, just follow Katja’s instructions in the book.  I am always looking for a reason to use fun tools, so I love an excuse to get out my pointy little awl.

DSCN5290 DSCN5291DSCN5292

Think of this like paper dolls, the kind that punch out.  I always loved those as a kid.  The papers have been stitched in around the edges, but they are now perforated.  Gently pull on them, and if they don’t release right away, punch them out!

DSCN5293

What more would it take to convince you to try this?  Go buy that book.  Dig through your collection.  You know you want to.

Now go make something pretty!

DSCN5309

DSCN5312 DSCN5308 DSCN5307 DSCN5296

Machine stitching the New Hexagon Millefiore quilt, tutorial part two: this is where I stop feeling bad about my hand sewing skills

This process rocks!  I hope some of you have had a chance to try it!  I am still amazed and pleased with the results.  First, a re-cap of part one and some questions that have come up.  Then, on to part two, sure to have your project speeding along.

DSCN5239 DSCN5242

Short and narrow zig-zag stitch.  Got your thin, sharp needle loaded?  And the smoke-colored invisible thread?  There’s a reason I’m using the smoke-colored instead of the clear invisible thread.  Smoke blends right into the fabric, the clear stuff looks shiny.  Always use a lockstitch (stitch 2 or 3 times in the same hole) at the beginning and end of each seam.  Don’t cut the threads short – I leave mine 2 or 3 inches.  We don’t want scratchy whiskers on the rosettes!

And if you have somehow made it this far, yet don’t know what we are talking about, head over to Katja’s  website and learn more about the New Hexagon Millefiore Quilt-Along.   http://www.katjasquiltshoppe.com  And definitely check out the FB page The New Hexagon – Millefiore Quilt-Along.

Here we go!

DSCN5278

DSCN5236 DSCN5237

This is block one from the outer row of rosette one.  Six pieces in the hexagon, I decided that the best way to start was to join the three hexies in the center together first.  I used my painter’s tape to hold the three together.

DSCN5243 DSCN5244

Lockstitch and zigzag, stopping with the needle down before hitting the tape.  Don’t stitch through the tape – you can’t see where you’re going, and it will gum up your needle.

DSCN5245 DSCN5246

Lift the presser foot.  Lose the tape, stitch to the intersection.  Pivot and continue.

DSCN5248DSCN5249

You’ll notice that the tape behind the presser foot in the last photo above remains in place.  Keep it there so the blue hexie does not wiggle away from it’s position.

DSCN5250 DSCN5251 DSCN5252 DSCN5253 DSCN5254

Start the seam, remove the tape, finish the seam, lockstitch.  Lather, rinse and repeat.

DSCN5255 DSCN5256

Look at those hairy little threads just dangling.  Now we’re going to do the seam joining this blue hexie to the other green/yellow hexie.

DSCN5258 DSCN5259 DSCN5260 DSCN5261 DSCN5262 DSCN5263

This is the first time we have to deal with a thread sticking out of the middle of a hexie.

DSCN5264

Flip that baby over, and use a pin or a needle to coax that thread end through to the wrong side.  Then just leave it flopping around on the wrong side.

Now we’re going to add the next piece, a purple diamond.  Notice that I have kept the pieces stacked the same way they are to be constructed.  Just lay the stitched section on top of the stack, lining it up with it’s kin, and it’s easy to see what gets attached and where.  I tuck in the thread ends that are sticking out where the two green/yellow hexies meet.  Tape them to the backside if they are misbehaving.  And then do it!

DSCN5267 DSCN5268 DSCN5269 DSCN5270 DSCN5271 DSCN5272 DSCN5273 DSCN5274 DSCN5275

Tuh duh!  Now keep on keepin’ on.

DSCN5276 DSCN5277

Now you must stand back and admire this stack of yumminess!

DSCN5279

Tomorrow is the third (and final) part of the tutorial, where everything joins together to finish rosette one!  Just in time to start rosette 2.  Tomorrow I’ll also talk about popping out the papers.   My fingers are getting tired of talking today.

Now stop reading and go make something pretty!

Machine stitching the New Hexagon Millefiore quilt, tutorial part one: for those of us who hand sew at the speed of a turtle

You can’t help but drool over all the eye candy that is happening in the New Hexagon Millefiore Quilt-Along.  The Facebook group has more than 1600 people!  Holy cows!  And if you’ve been under a rock, head over to Katja Marek’s website, then meet the rest of us right back here.  We’ll wait.  http://www.katjasquiltshoppe.com

DSCN5233

Ooh, here’s an idea…how to make this project happen without spending every waking moment hand stitching.  Because, frankly, I’ve spent a good part of my life trying to avoid hand sewing.  I know I’m not the only one out here that wants to do this project, but NOT by hand!

DSCN5233 - Version 2

First, get all your pieces prepped.  Just follow Katja’s directions in the book.  She’s got this part on lock and load.  Count how many you need of each shape, each fabric.  Make them into little piles.

DSCN5204

Now lay out the hexagons.  This is block 12 from the book.  Just stack up all the sets you need, in this case, 6 of block 12, laid out just like they need to be joined.

DSCN5206DSCN5210

The next step is to determine your logical sewing sequence, which seams to join first to minimize the number of starts and stops.  In this case, joining each green hexagon to the purple diamonds above and below it.  Use blue painter’s tape to hold together the pieces to be joined.  Comes off without a gooey mess.

DSCN5209

The thread I am using is a smoke colored invisible thread, top and bobbin.  I set the machine on zig-zag, 1.5mm width, .8mm length.  Use a thin, sharp needle.  I’m using a size 10 Microtex needle.

DSCN5215

Use a foot that allows good visibility to the needle.  Anchor the thread with a lockstitch at each end, catching each side with the  zig-zag  stitch.

DSCN5219

Don’t trim the thread ends.  Think about the thread like little whiskers…if you cut them short they feel all pokey.  Leave them long and tuck them to the inside as you join more pieces together.

DSCN5220 DSCN5221

Two sides, ready for the middle.  Tape both of the center diamonds in place, double-checking your directional prints.  This part will be sewn in one big figure-8 shaped seam, pivoting at corners and ends.  Pivot with the needle down in the fabric as shown in the second photo below.  In this case, I am pivoting towards the navy fabric, so the needle is down in the navy fabric when I pivot.

DSCN5228DSCN5229DSCN5230DSCN5231

The third photo shows the stitching continuing down to the second diamond,  and then pivoting at the little pink point, the bottom of the figure-8, to return up the other side to finish.  Make sure you lock the stitching at the beginning and end of the eight.

DSCN5233

I tucked in all the little tails and the thread ends.  Let me just tell you that the entire stack of 6 blocks took only a half hour to stitch together.  One.  Half.  Hour.  That’s it, just a half hour.  It took that long for me to join the first two sections of the center.  And did I mention that the entire second round of my rosette #1 was stitched by machine?  Could you tell that when I posted the pictures the other day?

DSCN5195

Part two of this tutorial will include another example of utilizing a sewing sequence.  I’ll also show how the hexies are joined to the previous rounds.  Stayed tuned for that big pile of fun.

A special thanks today to Brandi.  And also a shout out to Doris, Marilyn, Maureen and Debbie.

Rollin’ rollin’ rollin,’ keep those hexies rollin’

Ding ding, that’s the end of round 2!

DSCN5193

I’m working on the Millefiore Quilt-Along, using the book the New Hexagon by Katja Marek.  I am trying desperately to make sure it doesn’t overtake my entire life.  Must.  Resist.  Feeling.  Weak.

What can I do to prevent that, you ask?  Only one solution.  Finish the last round of this rosette before the other one is released!  Which is the first of next month.  No pressure there.  It’s only 18 hexagons.  Only 126 separate pieces.  Which have to be cut, basted, stitched together, attached to the second round.

DSCN5195 DSCN5196

By the way, I just can’t help myself.  I have to show off this gem on my kitchen counter, which surprisingly coordinates very well with this project so far.

I’m in love with the fabric in the center diamonds of this round.  It looks like stripes of sequins, coincidentally in the colors I’m using in this rosette.  I chose to cut half horizontally and half vertically, using different colors of the stripes.  It really looks like two different fabrics, doesn’t it?

DSCN5197

As I plot my last round on this rosette, I think I want to incorporate that floral from the center.  Hmmmmm…I’m having fun working without a flight plan.

Now go out there and feed your crafty obsession.  Daylight’s burning.

Ring around the rosette

Hot diggity dog, I made some progress!

DSCN5133

This is part of the Millefiore Quilt-Along using the book The New Hexagon.  Bless her heart, Katja Marek is starting a revolution with this project.  Based on absolutely no science, I’ll bet that more people have started English paper piecing (EPP) since this project hit the web.  And I’ll also bet her book is flying out of stores and warehouses all over!  Go get your Google on or look on Facebook and see what’s happening!

I fussy cut the bee fabric for the diamonds, but the batik and the blue were so easy since they didn’t require fussy cutting.  Which is good, because I am discovering I am not speedy at hand sewing.  But I’m making progress, amazing since I ripped out my middle.  My rosette, not my midsection.  I kept seeing my crappy little stitches.  Even though I’ve thoroughly embraced the mantra that finished is better than perfect.  What the heck was I thinking when I used a whip stitch the first time?

DSCN5150

This second time I used the ladder stitch.  The funny thing is, I know that’s what I should have done the first time.  The ladder stitch is what I ALWAYS used when stitching together knitted garments.  It’s my go-to stitch when I want to make sure my stitches don’t show.  I guess I just had a brain fart, didn’t translate my knowledge back to fabric.  My bad.  I’m also thinking that whenever I am full of myself, thinking I am too clever for my shirt, I will post close-ups of some of my wonky work.

DSCN5145

DSCN5138

Might not be much progress on this for a few days.  I’m off to Honolulu for the weekend, hanging with some young-uns.  There will be rum and a pirate ship involved.  And perhaps some photographic evidence.

Crafting can be dangerous.  Be prepared.  Arrrgggghhhh!