

You can’t help but drool over all the eye candy that is happening in the New Hexagon Millefiore Quilt-Along. The Facebook group has more than 1600 people! Holy cows! And if you’ve been under a rock, head over to Katja Marek’s website, then meet the rest of us right back here. We’ll wait. http://www.katjasquiltshoppe.com

Ooh, here’s an idea…how to make this project happen without spending every waking moment hand stitching. Because, frankly, I’ve spent a good part of my life trying to avoid hand sewing. I know I’m not the only one out here that wants to do this project, but NOT by hand!

First, get all your pieces prepped. Just follow Katja’s directions in the book. She’s got this part on lock and load. Count how many you need of each shape, each fabric. Make them into little piles.

Now lay out the hexagons. This is block 12 from the book. Just stack up all the sets you need, in this case, 6 of block 12, laid out just like they need to be joined.

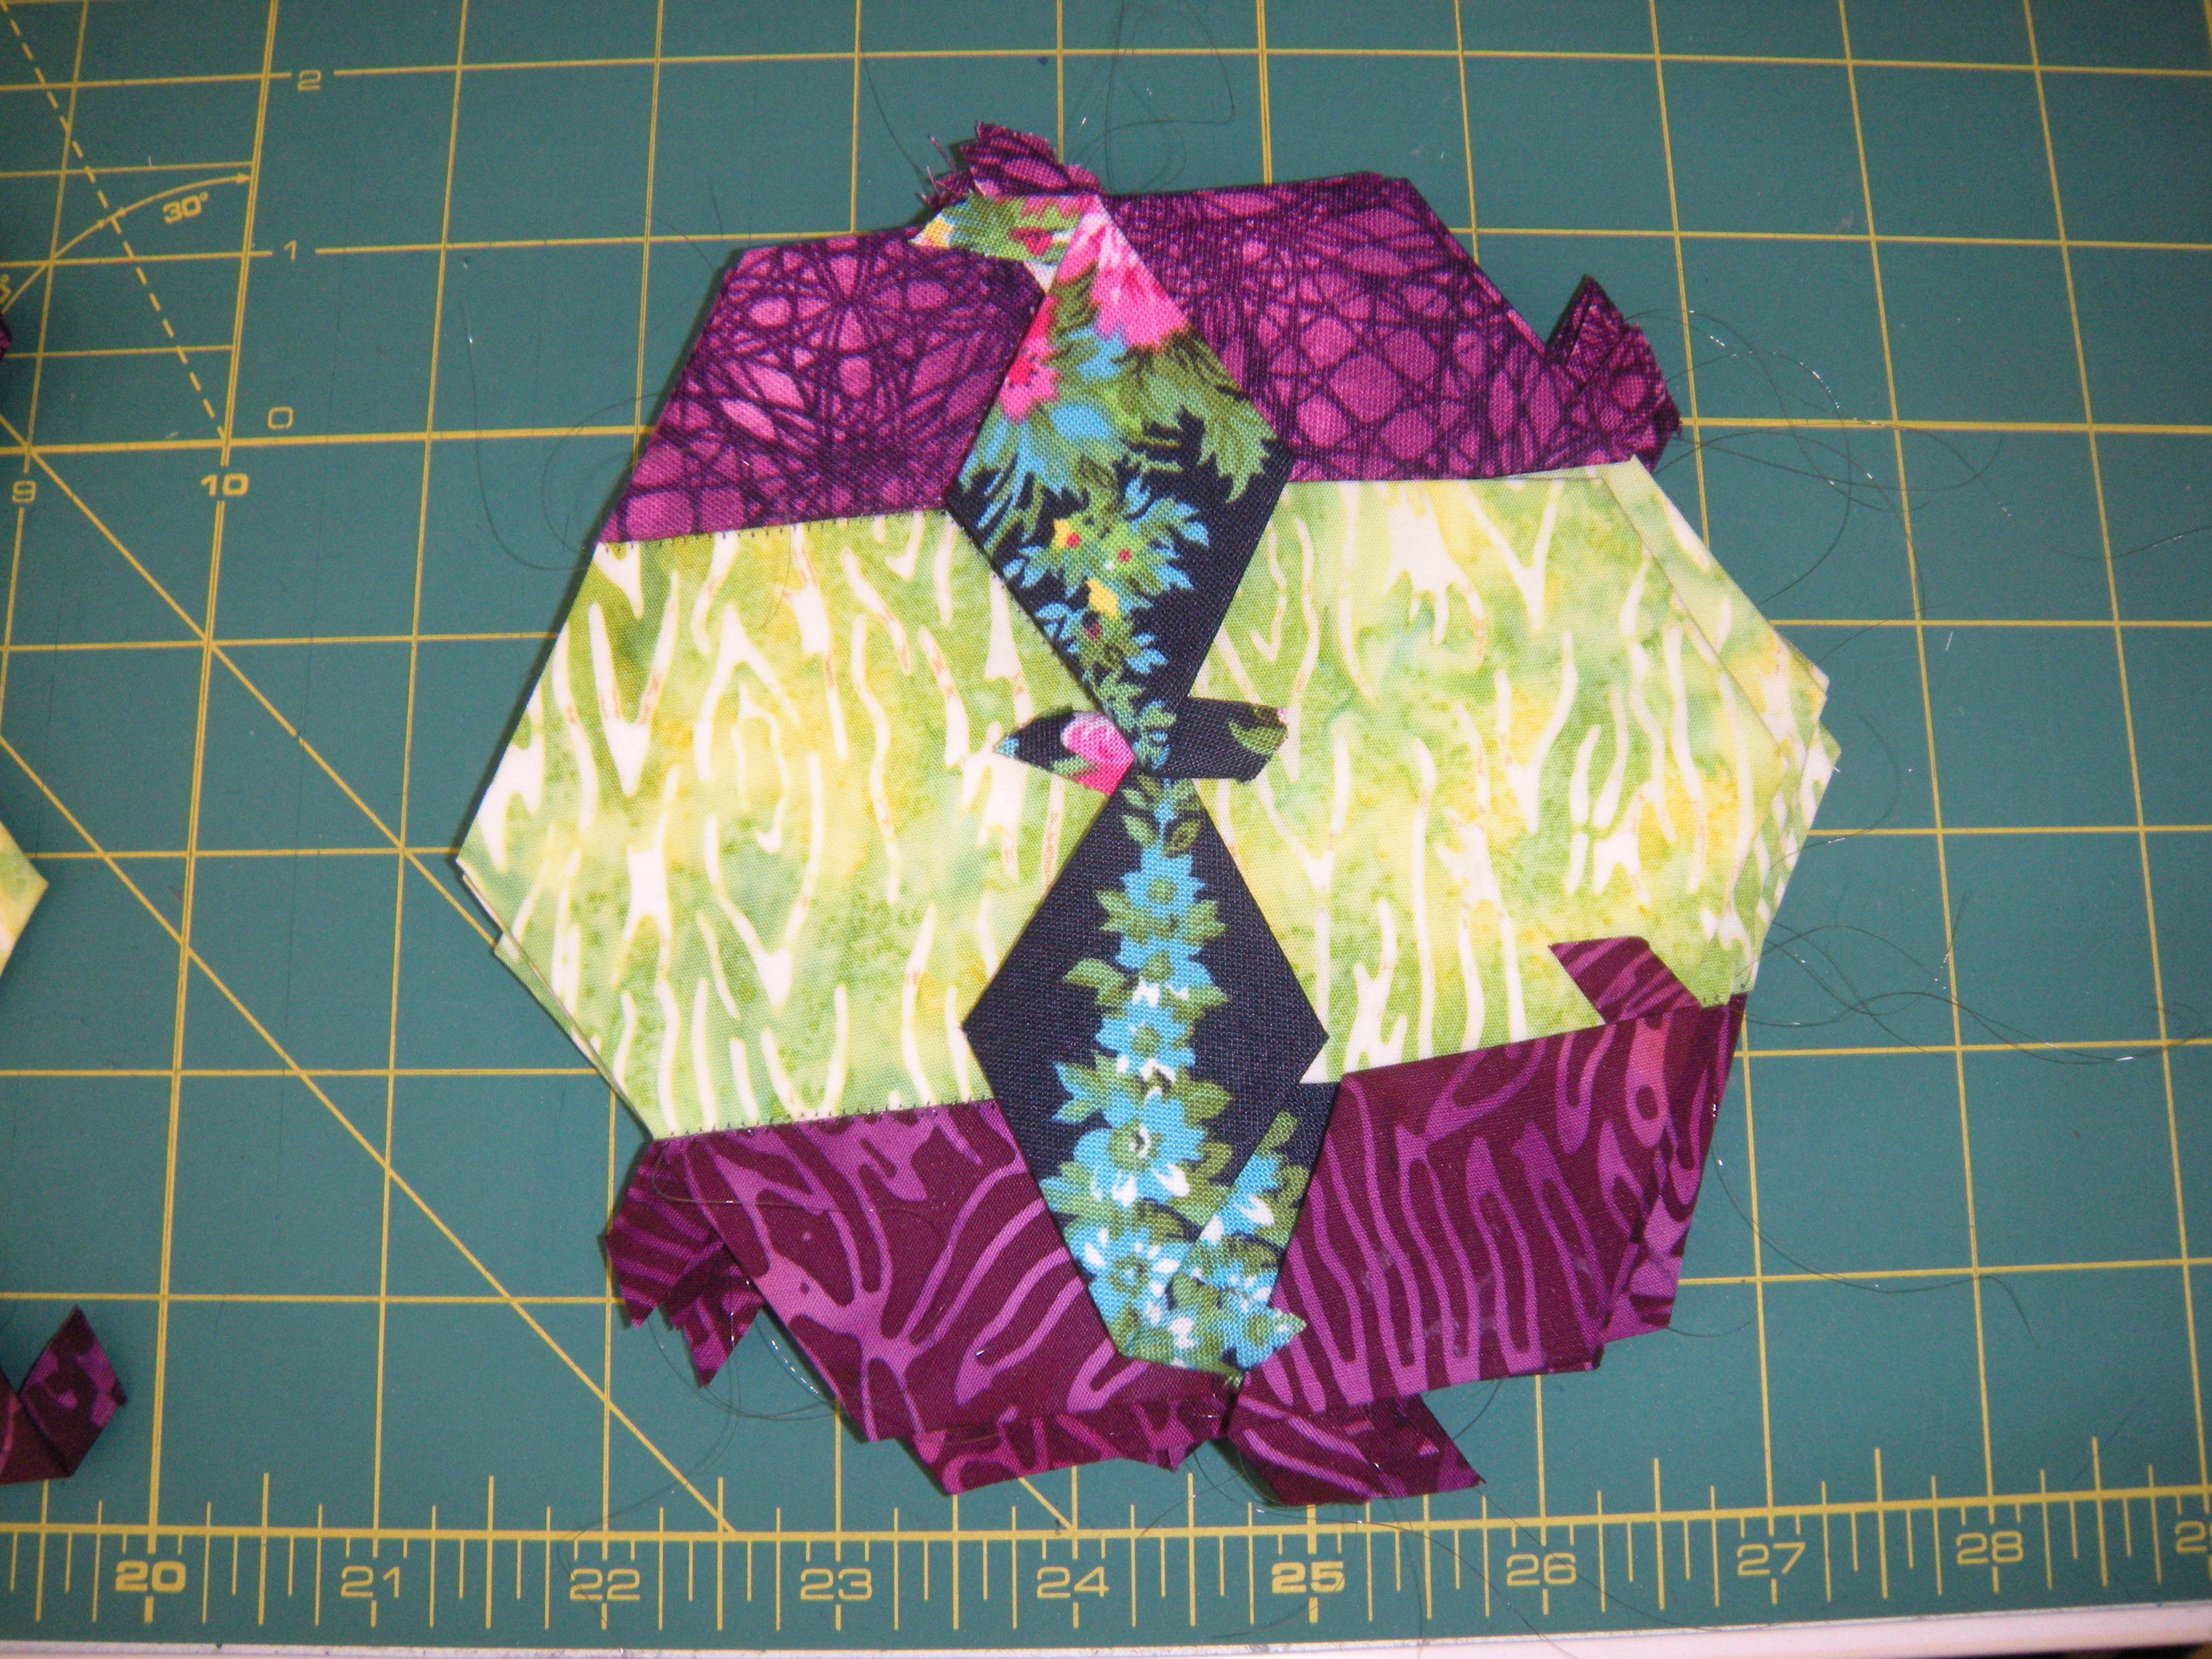
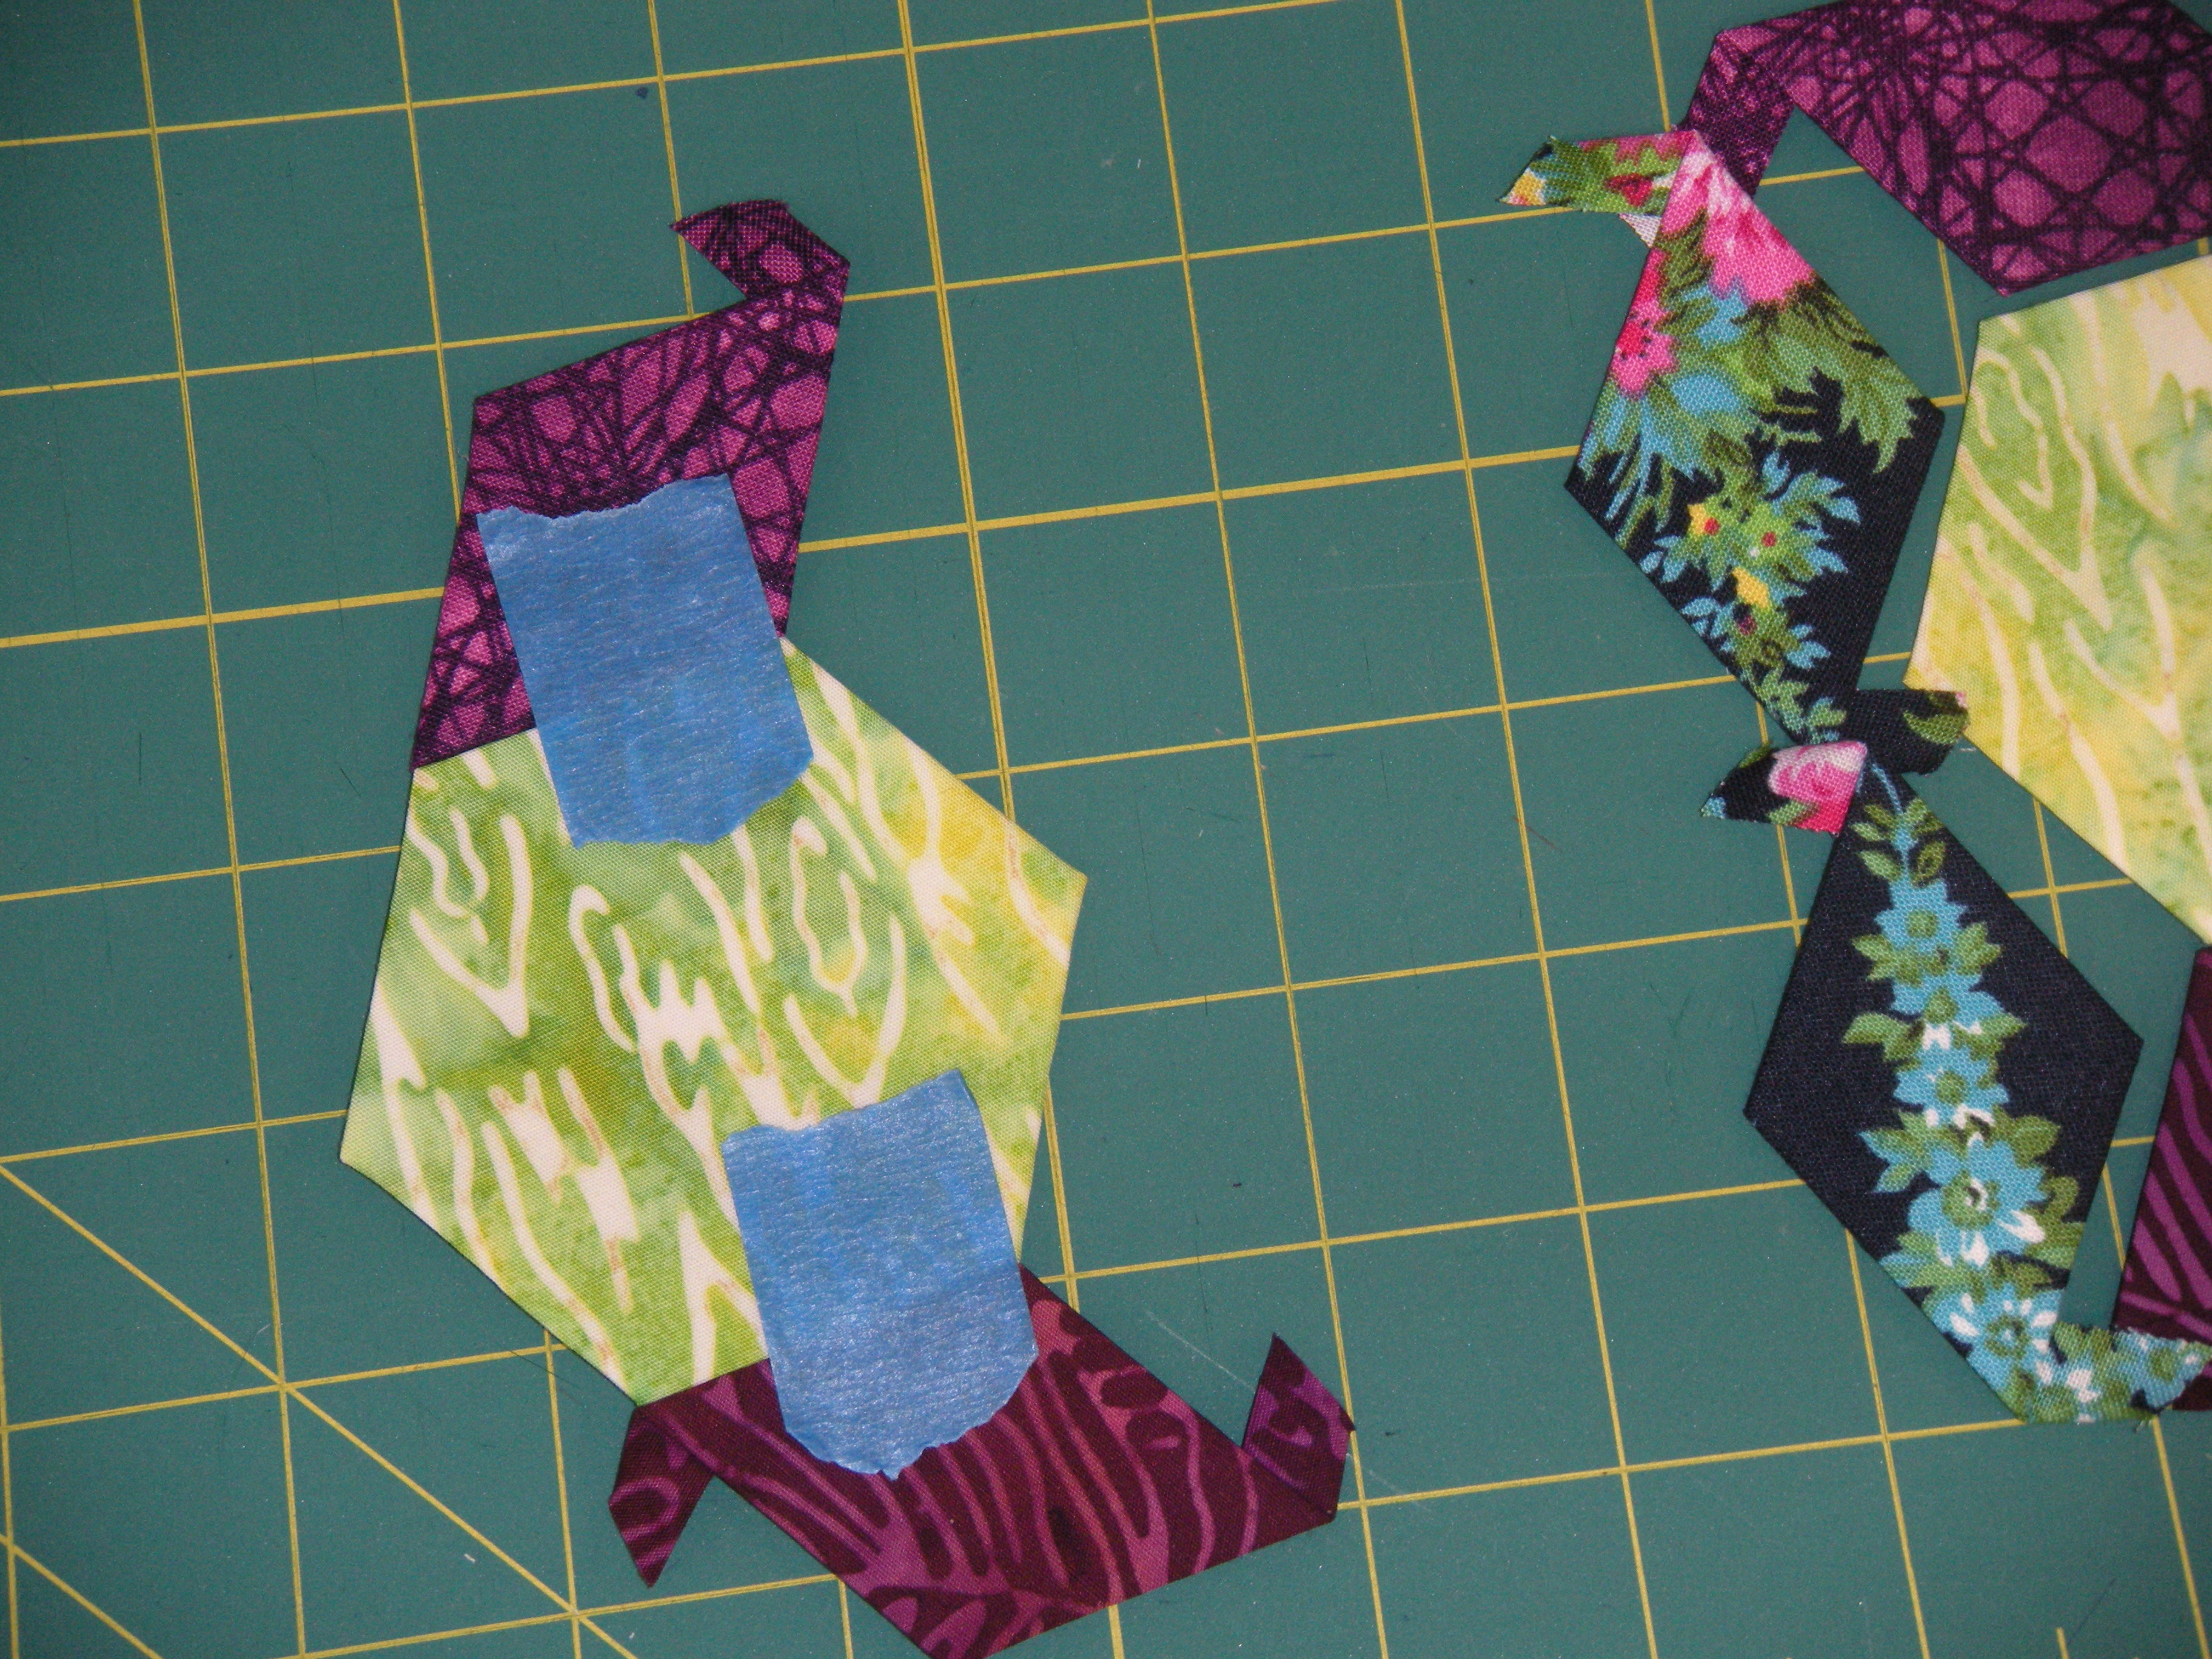
The next step is to determine your logical sewing sequence, which seams to join first to minimize the number of starts and stops. In this case, joining each green hexagon to the purple diamonds above and below it. Use blue painter’s tape to hold together the pieces to be joined. Comes off without a gooey mess.
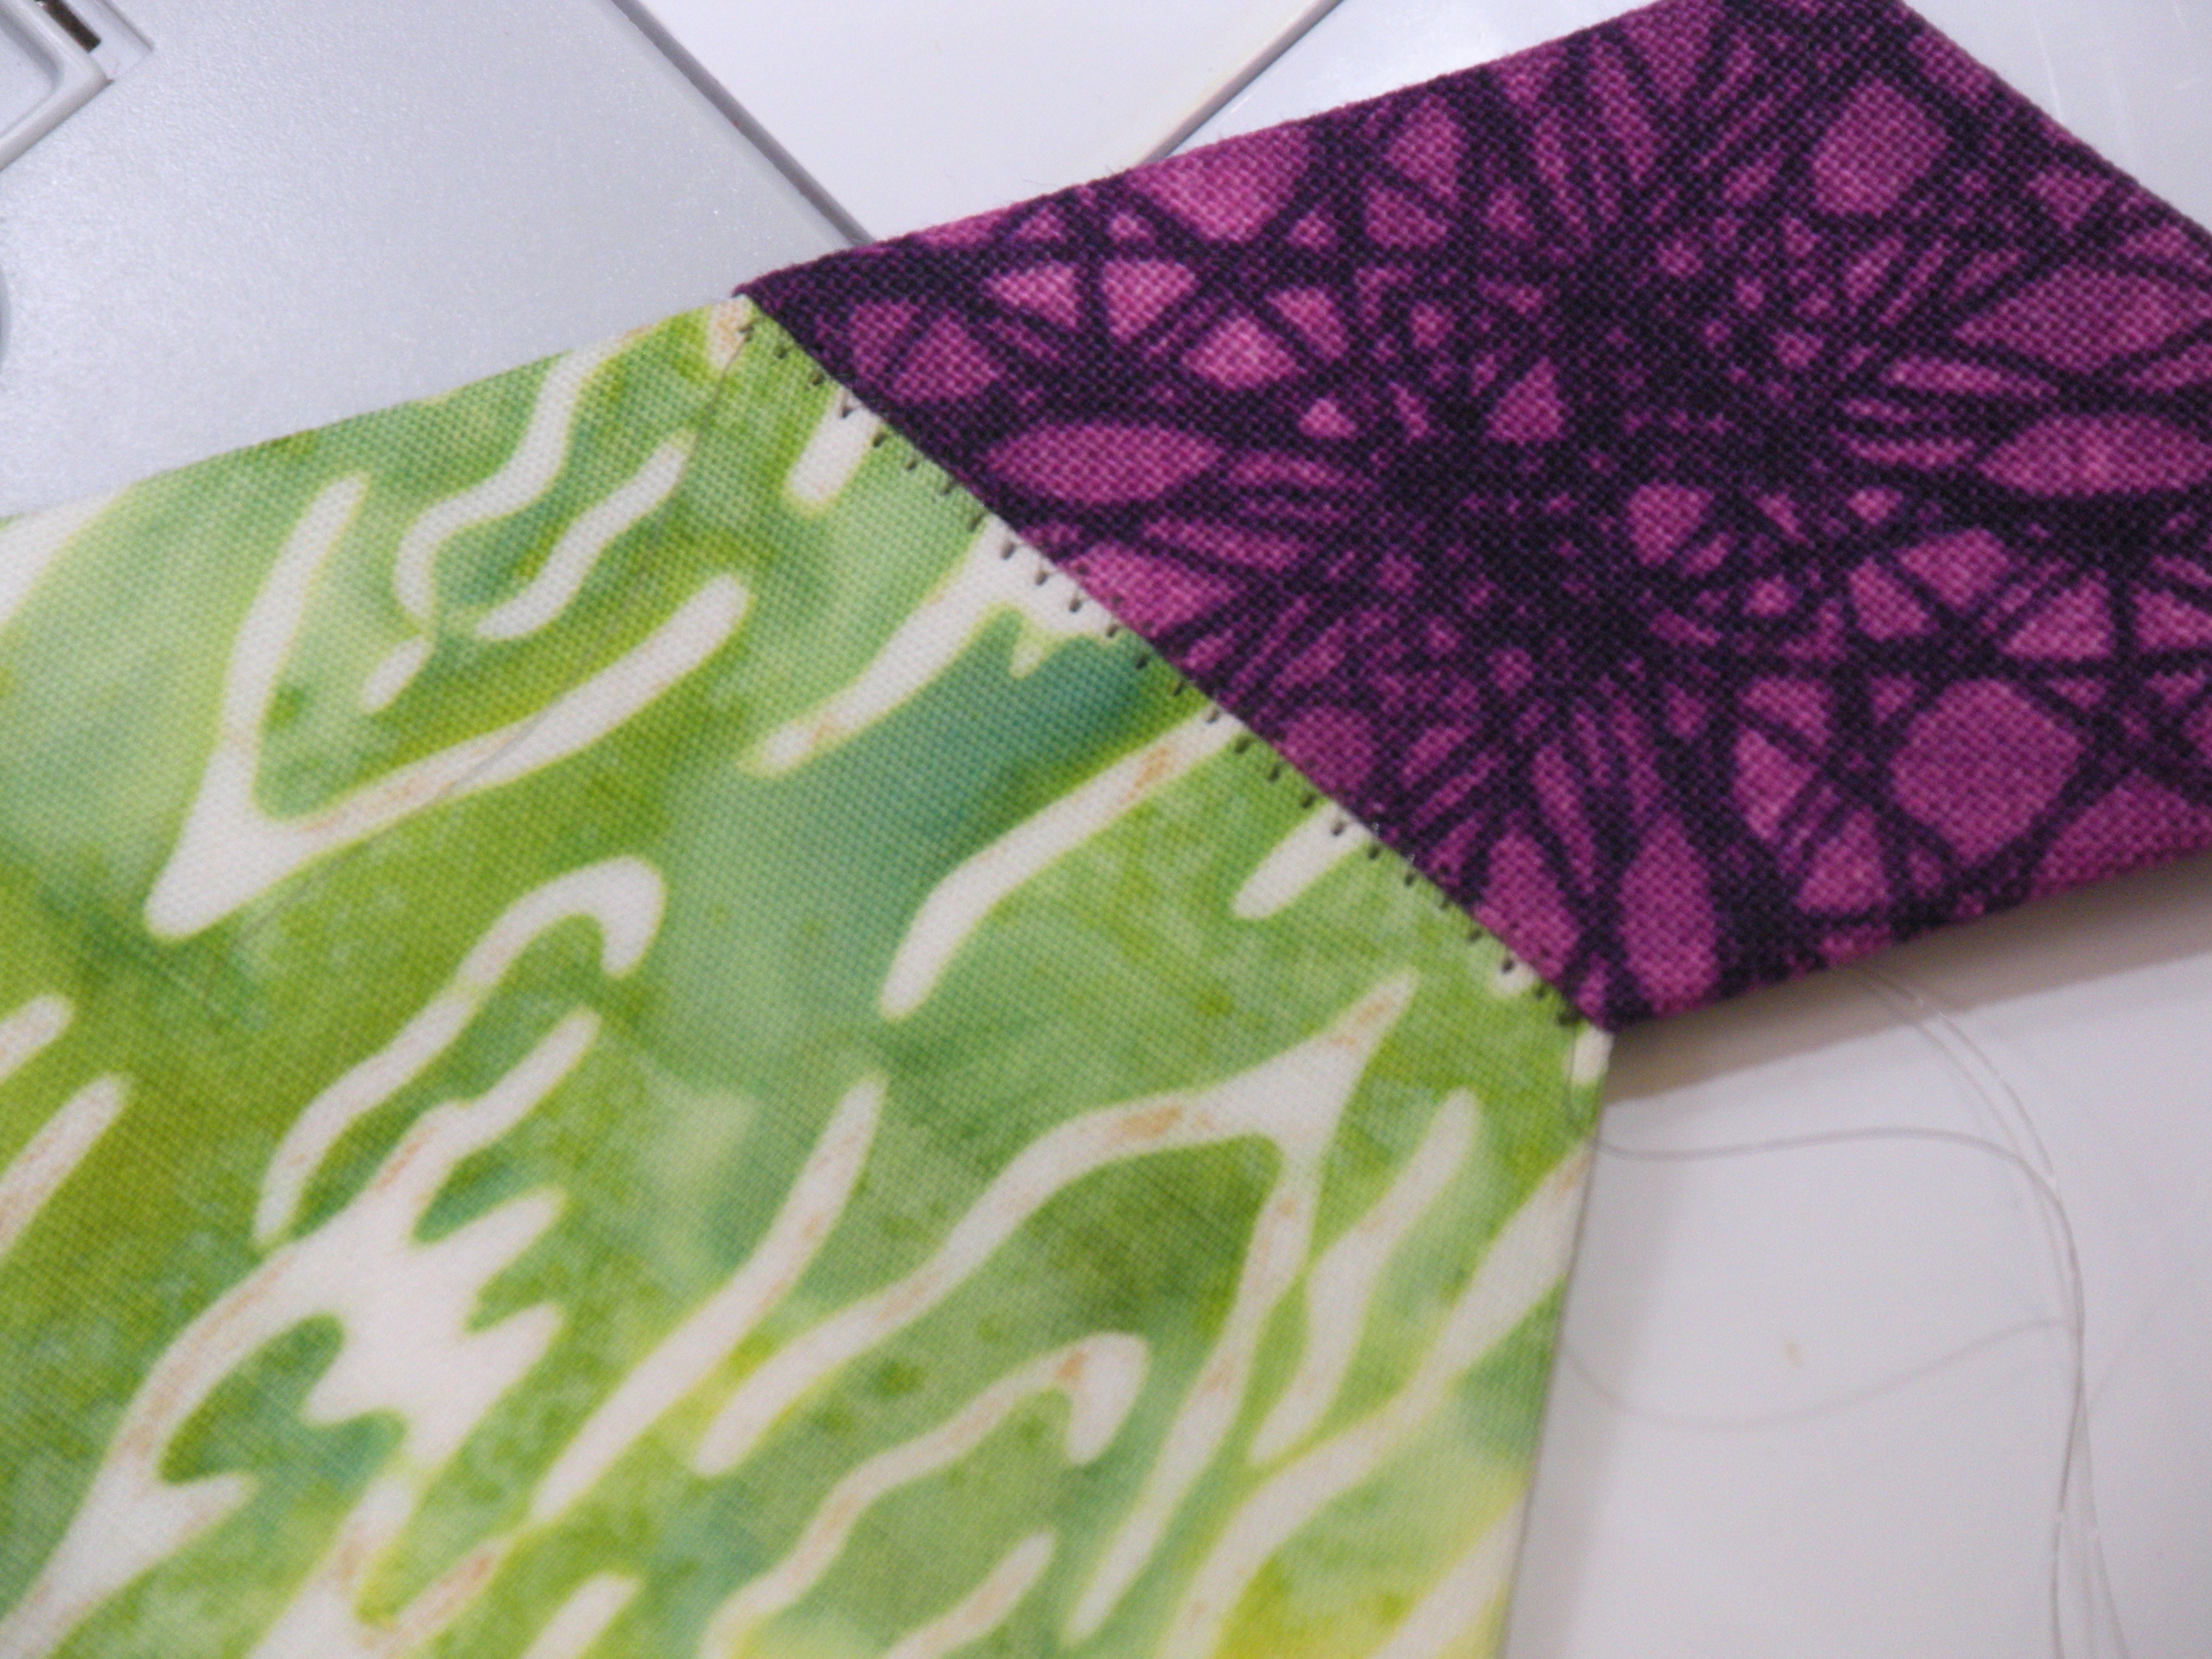
The thread I am using is a smoke colored invisible thread, top and bobbin. I set the machine on zig-zag, 1.5mm width, .8mm length. Use a thin, sharp needle. I’m using a size 10 Microtex needle.

Use a foot that allows good visibility to the needle. Anchor the thread with a lockstitch at each end, catching each side with the zig-zag stitch.
Don’t trim the thread ends. Think about the thread like little whiskers…if you cut them short they feel all pokey. Leave them long and tuck them to the inside as you join more pieces together.

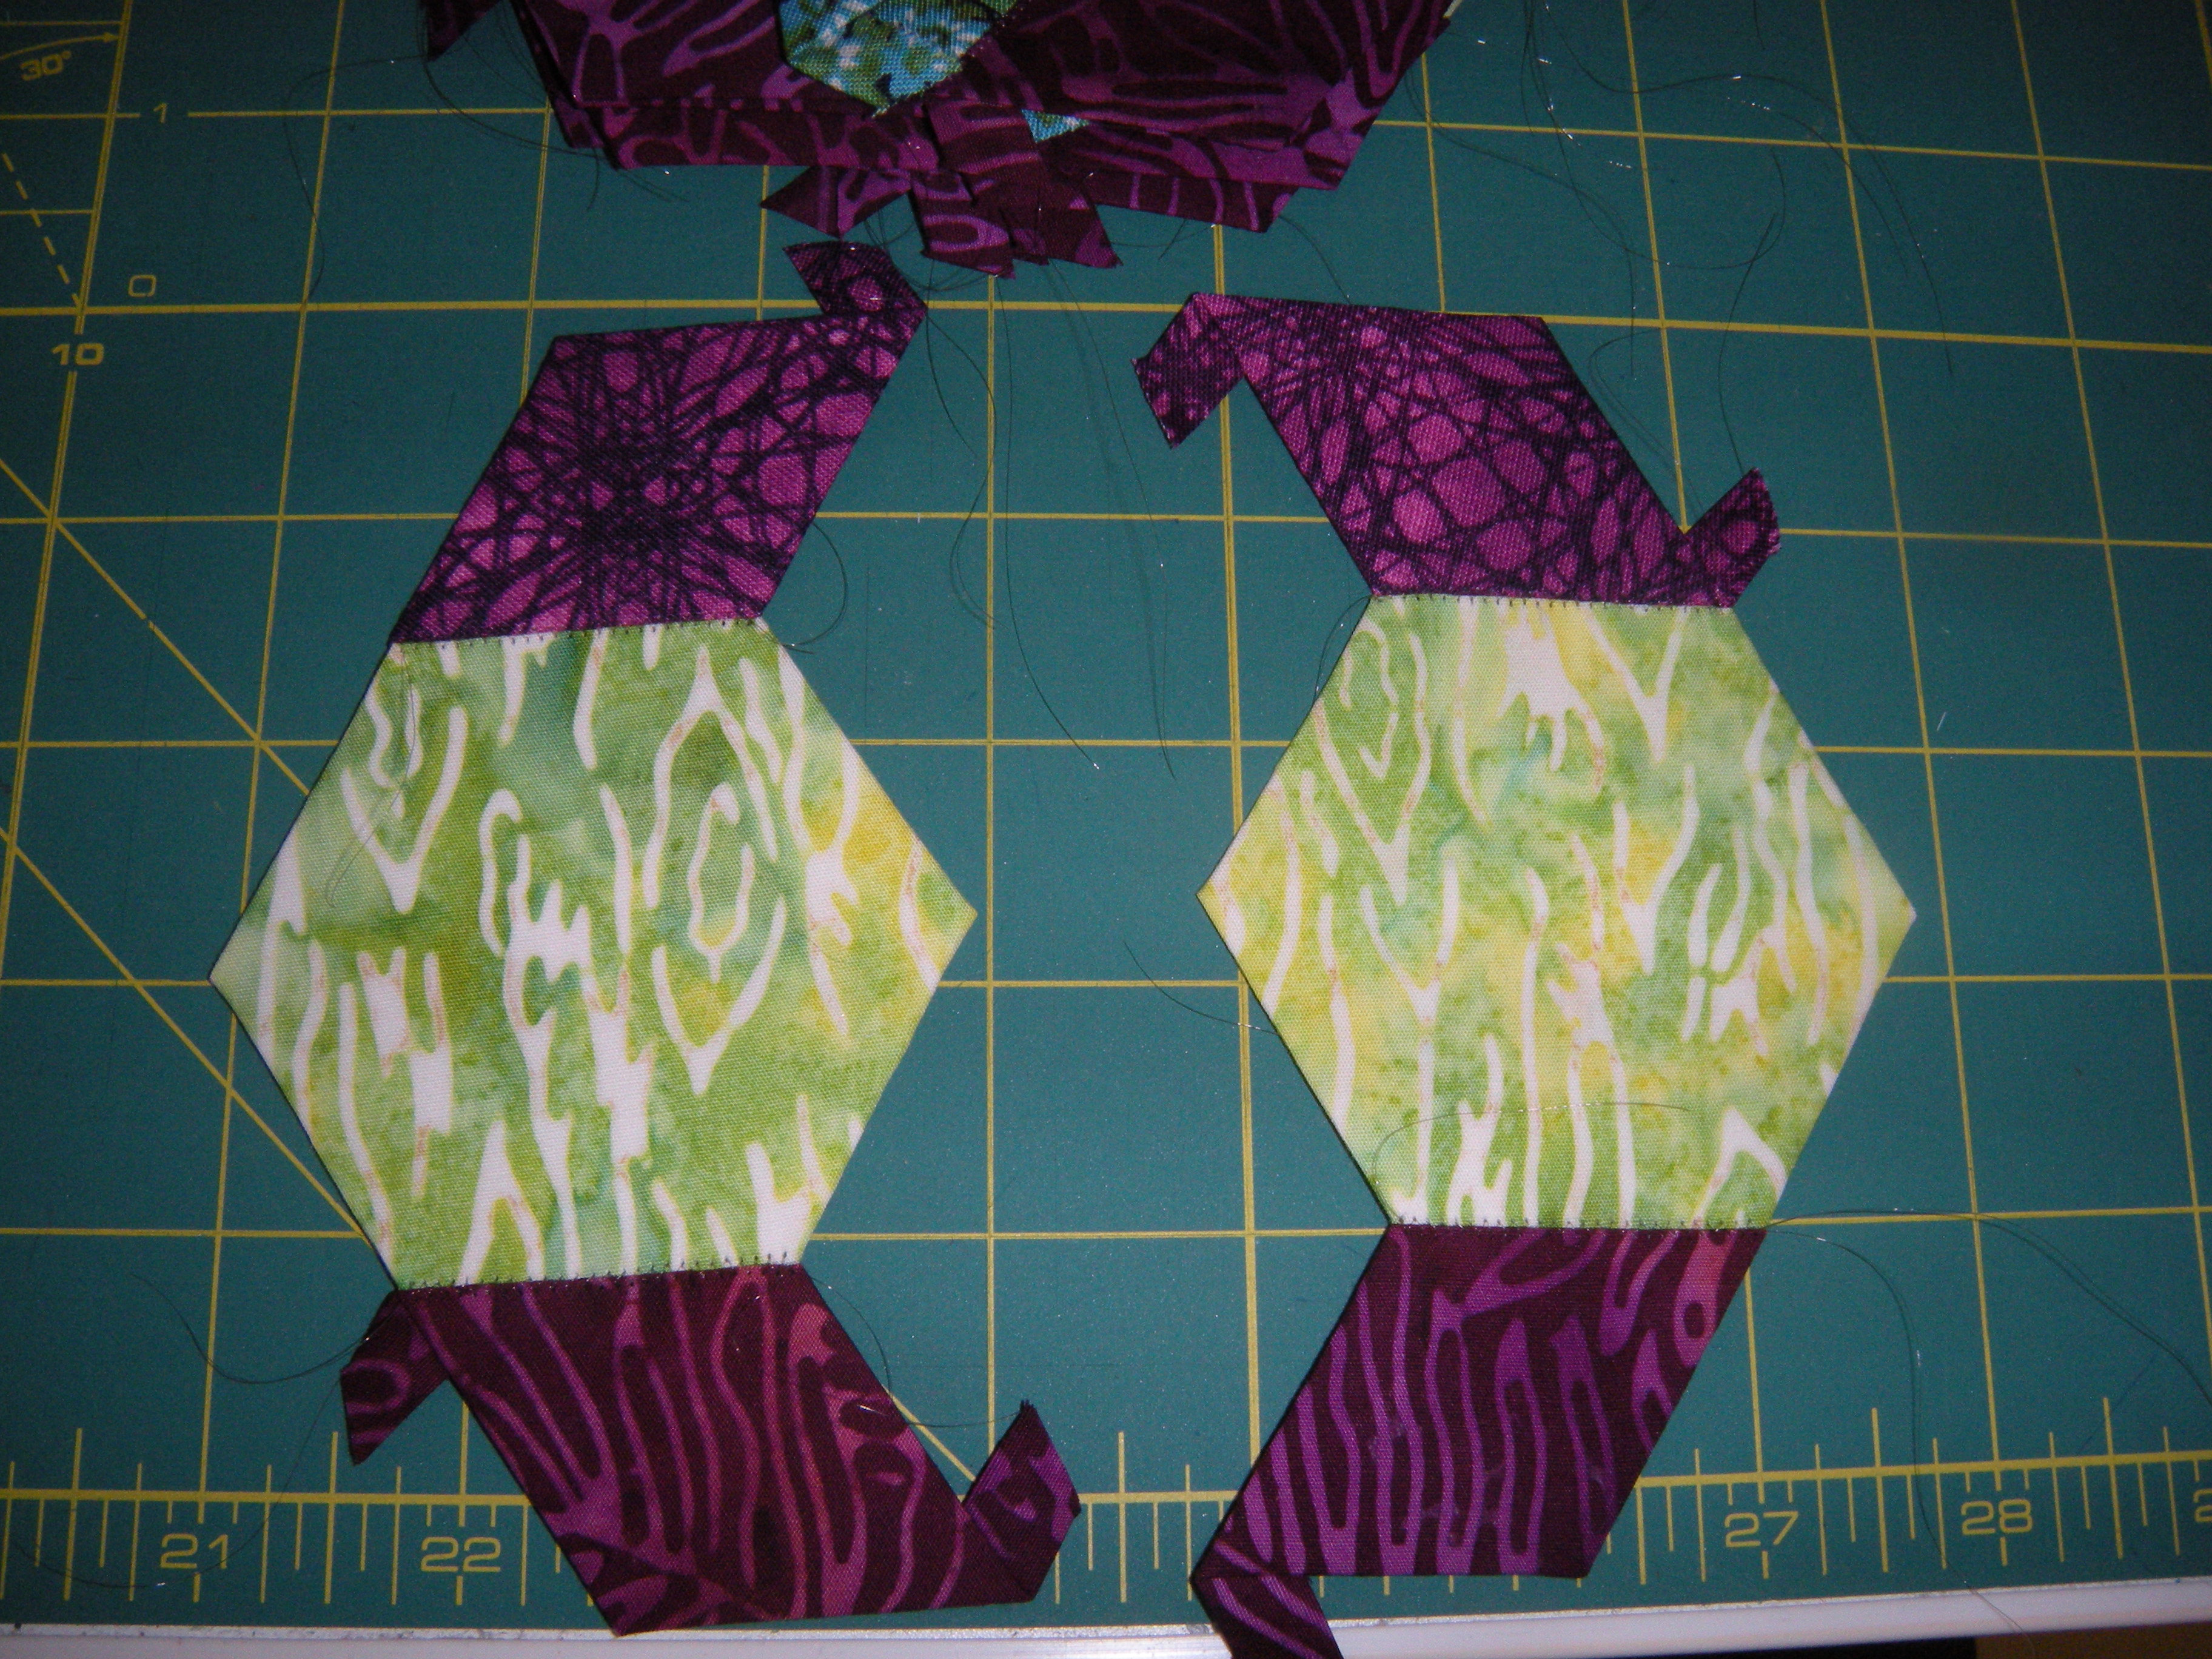
Two sides, ready for the middle. Tape both of the center diamonds in place, double-checking your directional prints. This part will be sewn in one big figure-8 shaped seam, pivoting at corners and ends. Pivot with the needle down in the fabric as shown in the second photo below. In this case, I am pivoting towards the navy fabric, so the needle is down in the navy fabric when I pivot.


The third photo shows the stitching continuing down to the second diamond, and then pivoting at the little pink point, the bottom of the figure-8, to return up the other side to finish. Make sure you lock the stitching at the beginning and end of the eight.
I tucked in all the little tails and the thread ends. Let me just tell you that the entire stack of 6 blocks took only a half hour to stitch together. One. Half. Hour. That’s it, just a half hour. It took that long for me to join the first two sections of the center. And did I mention that the entire second round of my rosette #1 was stitched by machine? Could you tell that when I posted the pictures the other day?

Part two of this tutorial will include another example of utilizing a sewing sequence. I’ll also show how the hexies are joined to the previous rounds. Stayed tuned for that big pile of fun.
A special thanks today to Brandi. And also a shout out to Doris, Marilyn, Maureen and Debbie.

I was so excited to find your site. I am joining a group in Feb that is just starting this quilt. I hand applique and wanted to do the hexagons by machine. Thank you so much for taking the time to give us step by step instructions.
Dianna
LikeLike
You are so welcome! I am taking a hiatus from my blog while focusing on family medical issues. I Hope to be back soon, and hope you will find more to like on my blog!
LikeLike
H, I know I’m way past the start of this project but I just found out about it! I’m really happy you have posted these, I too sew by hand really slow but I like the quilt so much I thought I would try! I had asked someone about machine stitching these but didn’t really know how, so your blog helps so much! Some will still be hand sewn while waiting at appointments. And then when I can I will sew by machine!
LikeLiked by 1 person
It’s never too late to join in! I went into this thinking I would get over my dislike of hand sewing. I loved the quilt sooo much. My machine stitching tutorials came about because I had to face the reality, after a couple of rounds, that I would never finish it if I did it by hand. Your approach sounds spot on to me!
LikeLike
Thanks for this! I am hand piecing mine as I don’t always like to be tied to the sewing machine. I take my hand stitching with me where ever I go. I will try this method when I’m in a hurry to get’er done. Thanks
LikeLike
If you have to tear out the paper pieces, are they reusable? I have never sewn with invisible thread and have heard you have to mess with all your tensions, can you use regular thread like a light grey or ecru?
LikeLike
You are just full of great questions! Once you tear out the papers, they aren’t really reusable again. They end up with little raggedy edges because you kinda have to rip them out a little. But it’s not hard to do – it just messes up the edges a little.
Regarding the invisible thread, give it a try! I don’t have to adjust anything on my machine to get it to work. I wind a bobbin in the regular way, pop it in and thread the machine, then go to town! Practice on some scraps to see how wide you need it on your machine. Here’s my warning…use high quality invisible thread, the quilt shop type and not the craft store type. The craft store invisible thread is stretchier and harder to work with, which is why you may have heard horror stories from some people about it. I bought a cone of smoke colored invisible thread at the quilt store and it rocks! It lasts forever. It disappears on virtually every fabric EXCEPT a white or ecru fabric.
Let me know how it goes!
LikeLike
I found that the hardest thing about the rosettes is sewing all the components together. For me, it’s like wrestling an elephant. After reading your comments
…I think that I will sew the rosettes together by machine. Feeling very good about this. I do enjoy a little hand sewing, but this way I will have the best of both worlds.Thank you.
LikeLiked by 1 person
Tomorrow I am going to do a scrap rosette to practice on before working on my block. I am a late starter just picked up my Rosette paper kits for #1,2,3 and 4 on Friday from Katja Quilt shop in Kamloops. Maybe this will help me get caught up for the May Rosette reveal. I live in Bezason, Canada. Happy Easter to everyone.
LikeLiked by 1 person
Oh my gosh, I used to live in Minnesota, doncha know!
LikeLike
I’m going to have to try this. Looks like I will be making this twice. Thank you for the tutorial Carole.
LikeLike
Have you tried to remove any papers? Am wondering about how they will come out when sewn into the papers.
I too am struggling with the hand sewing with this quilt. I am actually thinking about piecing the hexagons on the machine. None of the pieces are too tiny to deal with. I don’t really mind set in seams, so I think that would be another route. For those not started, the pieces in the hexagons are MUCH bigger than they appear in the photos!
LikeLike
Yep, I have taken out some of the papers. They are fairly easy to remove; it’s a little bit like punch out paper dolls from my youth! The stitching perforates the paper right near the edges. I just use my pointer finger to hold down the seam so it doesn’t distort, then pull away the paper with my other hand. All the paper comes out, and it’s actually kinda fun!
LikeLike
Thank you you’ve given me a new look at this project. I wasn’t sure I could do this I have trouble
With hand sewing wanted to but didn’t think it would happen. Now I will start i’am late but better late than never. Thank you again will post a picture if and when I get # 1 done.
LikeLiked by 1 person
Yahoo! I fell in love with this project, and realized right away that I would never make it if I tried to hand stitch it all. I am really happy with how it is turning out. I hope you give it a try, and definitely let me know how it goes!
LikeLike
I have wanted to create this quilt so badly but wasn’t able to because I can’t hand sew. Thank you soooo much. All other projects are being put on hold. I have to go get the book now. Thanks!!
LikeLiked by 1 person
Yahoo, Joyce! I know what you mean…I started this project with my conscience taunting me. I knew full well that hand sewing is not my bag. Now I am so happy with my progress that I have signed up for auto-ship on the paper pieces! http://www.paperpieces.com
LikeLike
No pressure, but February is coming soon…
The good news, rosette number one is the biggest, I hear.
LikeLike
Great tutorial Carole, for those who have hand issues or turtle issues 😉
Your rosette is looking lovely. Katja
LikeLiked by 1 person
Thanks Katja! Today my goal is to get part two up and running. I’m also going to answer the questions that have been asked about this method!
LikeLike
Check out Jane’s comment below! She’s been sucked into the vortex!
LikeLike
Wow.who would have thought? Looks fantastic
LikeLiked by 1 person
A great tune many thanks! I must try this technique too 🙂
LikeLiked by 1 person
Well, you have pushed me over the edge. Been admiring these hexagon quilts and checked out the Quilt-a-long. Have so many projects to work on now it’s crazy but this really speaks to me. Particularly since I see how nice it can look machine stitched like this. Book is on its way to me now. You are an enabler!😊😊
LikeLiked by 1 person
What a wonderful testimonial! Better get over to http://www.paperpieces.com and get your papers ordered! Once the book arrives, you won’t want to wait. You’ll be all whiney and impatient, digging through your fabric collection…
LikeLike
Can I make the templates from the book which I just ordered. On a limited budget and they are pricey for me?
LikeLiked by 1 person
Of course you can! You can make your own “papers,” the shapes to which you baste your fabrics, from cardstock. You can also make cutting templates from template plastic.
LikeLike
Will be doing part of mine this way. Love the handwork but will run out of time.
LikeLiked by 1 person
Exactly! Past the middle of January, I was daunted by the idea that February was approaching and I had only finished the center and the first round! Now it’s flying, and I will be finished before February arrives!
LikeLike
This is great! Will thr paper come out easily?
LikeLiked by 1 person
Yep! Part two will include this!
LikeLike